
Articles

Why Does My Fringe Look Different From The Model?
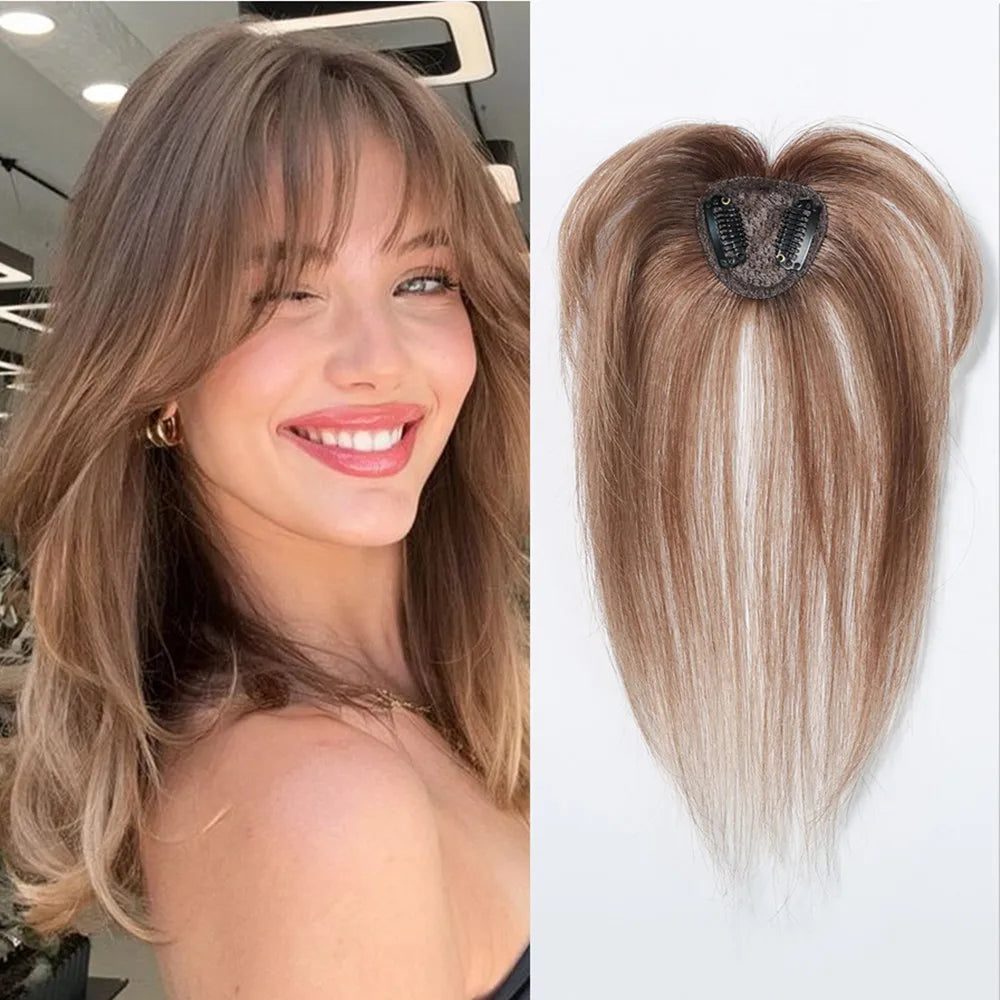
If your clip-in fringe looks odd at first, that’s normal. In most cases, the issue is not the fringe itself. It usually comes down to placement, length, texture match, density, and styling. Here’s the short answer: model photos show a fringe after cutting, heat styling, and blending. Yours may need the same work before it sits the way you want. Even a shift of 1–2 cm can change how short, thick, or natural it looks. What I’d check first: Placement: too close to the hairline can look heavy; too far back can look thin Face shape: this affects how the fringe frames your features Hair density: fine hair may show the base; thick hair can make the fringe look too light Root direction: cowlicks and growth patterns can push it apart or make it puff up Texture match: straight fringe + wavy hair often looks off unless styled together Trimming: many fringes come long so they can be cut to suit you A few facts make this easier to understand: Many clip-in fringes are sold slightly longer than needed so they can be trimmed Moving the base about 5 cm / 2 in back can make the fringe look longer and softer Placing it about 1–2 cm behind the front hairline often helps hide the seam Check What can go wrong What I’d do Placement Too bulky, too short, uneven Move the clips back or re-centre them Density Base shows or fringe looks separate Backcomb roots lightly or pick a lighter fringe style Texture Fringe looks like a separate piece Style your hair and fringe together Root direction Split middle, lifting, puffing Blow-dry side to side and change the base section Length Sits too long or too blunt Trim only after clipping and styling Bottom line: the model photo is the finished result, not the first fit. Once I place it well, match the texture, and tidy the length, the fringe usually looks much closer to the photo. How To Apply & Blend Clip In Fringe/Bangs - Cliphair Extensions sbb-itb-08feb2fWhy your fringe looks different on the model A fringe looks different on every person because styling, face shape, and lighting all change the way it sits. Model photos show a styled result, not a first attempt Product photos show a fringe after professional shaping, smoothing, and blending, not straight from the pack[2]. In plain terms, the image shows the finished look. Your first fit usually shows the starting point, before anything has been trimmed or worked into your hair. Most clip-in fringes are made a bit longer so they can be cut to suit the wearer[6][1]. That’s normal. Once the fringe has been styled, your own features and natural hair pattern play a big part in how it falls. Face shape, texture, and hairline change how the fringe falls Fringes can look very different depending on face shape. Blunt styles tend to suit longer faces, while side-swept or curtain styles can soften round and square faces[6][3]. Hairline and density also affect how full the fringe appears[4][3]. A straight fringe clipped over wavy or textured hair can look like an obvious add-on if the two aren’t styled to match[3]. It’s a bit like adding a puzzle piece from another box: even if it’s close, the mismatch stands out. A hairdresser can help match the fringe to your hairline and density. Even then, photos can make the result look softer or harsher than it does in person. Lighting and camera angle affect how the fringe appears Studio lighting and camera angles can make a fringe look shinier, fuller, or more even than it does at home[4][3]. That polished model shot isn’t just about the fringe itself. Light, angle, and camera setup all shape what you see. From here, the next factor is where the fringe is placed on the head. How face shape and fringe placement affect the result Clip-In Fringe Placement Guide: Higher vs Lower vs Centred Face shape matters, but placement is what changes how that shape looks. A small shift can make a fringe sit softer, fuller, longer, or more obvious. So if the first fit looks a bit off, placement is often the fastest thing to adjust. The best spot depends on your face shape and how much coverage you want. Placement Effect on Length Effect on Fullness Overall Result Higher (towards the crown) Appears longer Lighter, softer finish Blended and natural; suits shorter foreheads Lower (near the hairline) Appears shorter Maximum density and coverage Bold and full; can look bulky if not blended Centred Even and symmetrical Balanced volume Uniform; helps prevent crookedness or gaps Higher placement gives a lighter, longer look Clipping the fringe about 5 cm (2 in) back from your hairline lets it sit longer on the face [8][3]. That often works well for shorter foreheads, where a heavy fringe can sit too close to the features and feel a bit crowded. Lower placement creates more coverage and density Placing the fringe closer to your natural hairline makes it look fuller [8]. On long or oblong faces, that extra coverage can help balance facial length [8][3]. But there’s a catch: if the piece sits too far forward, it can look bulky or start to separate from your own hair [8][1]. Centred placement helps keep it even Setting the fringe in line with the centre of your forehead helps spread the weight evenly and keeps the piece looking symmetrical [2][6]. The base should sit about 1–2 cm behind your front hairline - not on it [6]. If the placement looks right but the fringe still stands out, the next things to check are density and root direction. Hair density and blending problems If the placement is right but the fringe still looks a bit off, hair density and root direction are often the issue. The aim is to match weight, not just shape. Fine hair can make the fringe base more visible Fine hair often doesn't have enough natural lift to hide the clips or the seam where the piece starts. A simple fix is to build a bit of grip at the root before clipping the fringe in. Gently backcomb the roots at the attachment point, just enough to give the clips something to grab onto, then add a light spritz of texturising spray [3][5]. That small step helps hide the clip edges and gives the piece better hold. If the fringe still feels too heavy against the rest of your hair, go for a wispy or airy style. It usually blends more smoothly with fine hair than a blunt, dense cut. Thick hair can make the fringe look detached or too light Thick hair brings the opposite problem. The fringe can end up looking too thin or disconnected next to the fullness of your natural hair. The easiest fix is to curl or wave your front sections and the fringe together after clipping it in. When you style both as one piece, not two separate parts, the blend tends to look much closer to the finish you see in model photos [1]. Root direction and section size affect how the fringe sits If your fringe puffs up, splits in the middle, or sits unevenly, root direction is usually behind it. A cowlick or strong growth pattern under the piece can push it out of place, even when you've positioned it with care. If that keeps happening, the base underneath often needs adjusting. Section a triangular panel from your hairline back about 5 cm (2 in), then clip the fringe into the front of that section [3]. This gives the piece a flatter, more stable base. Then you can let your natural hair fall over the top to help cover the seam. How to style your fringe to match the model Once placement and density are sorted, styling is what helps the fringe melt into the rest of your hair. Prep your hair before fitting the fringe Style your own hair first. Set your part, smooth flyaways with a small amount of serum or gel, then blow-dry or straighten the front sections so the texture already matches. If you change your part after clipping the fringe in, it can throw the whole thing out of line. Clip the fringe in only once the front section is smooth. Match the fringe texture to the rest of your hair After prep, get the texture lined up before you tidy the ends. Match the fringe texture to your front sections, then style both together with the same tool so they blend like one piece. Adjust the ends and side pieces after clipping in If the fringe feels heavy or too blunt at the corners and ends, use a light touch of texturising paste or spray to add movement and soften the finish [3][1]. Then blow-dry the side pieces away from the face to soften the line and keep the fringe from sitting too stiffly. Quick fixes to make your fringe look natural at home If your fringe still looks a bit off after styling, a few small tweaks can help it sit better and hide the base. Start by moving the clips 1–2 cm behind your hairline. That lets your own hair fall forward, which helps cover the base and makes the fringe blend in better [9][1]. Still getting that annoying split down the middle? Blow-dry the fringe from side to side instead of letting it fall into place on its own. This helps stop uneven partings and keeps the hair from settling into its usual split [7]. If the base is still showing, lightly lift the roots and pull a few strands over the seam. Then use a small amount of texturising spray to fill any gaps and soften the finish [8][9]. Save trimming for last. If the fringe still feels too long once everything is clipped and styled, book a face-framing trim with the fringe in place [8][1]. FAQs Can I wear a clip-in fringe with a cowlick? Yes, you can. Start by lightly dampening the hair around your cowlick. Then blow-dry it in the direction you want with a round brush. Once your hair is smooth, apply your clip-in fringe as usual. If you need a cleaner blend, run a straightener over your natural hair on a low heat setting so it sits neatly with the fringe and looks natural and polished. Should I trim the fringe myself or see a hairdresser? Because our clip-in bangs are made from high-quality 100% Remy human hair, you can trim them to suit your face shape and personal style. If you only need a small tweak, you can do it yourself. But for the best result, it’s worth seeing a professional hairdresser. They can adjust the length and layering to match your features and hair density, so the bangs blend in more naturally with your own hair. How do I make a clip-in fringe blend with curly hair? Choose a 100% human hair fringe so you can style it with heat and match your own curl pattern. Start by sectioning a triangle at the front hairline, then clip the fringe just behind that section. Once it’s in place, use a curling iron to softly wave the fringe so it blends with the rest of your hair. Finish with a small amount of texturising paste to soften the join and give everything an easy, natural look. Related Blog Posts How to Trim Hair Extensions at Home Clip-In Hair Extensions: Instant Transformation You Can Do at Home Human Hair Topper with Bang Fringe Hair Extensions: Try Bangs Without the Chop
Learn more
The Ultimate Guide to Choosing a Hair Topper for a Seamless Hairline
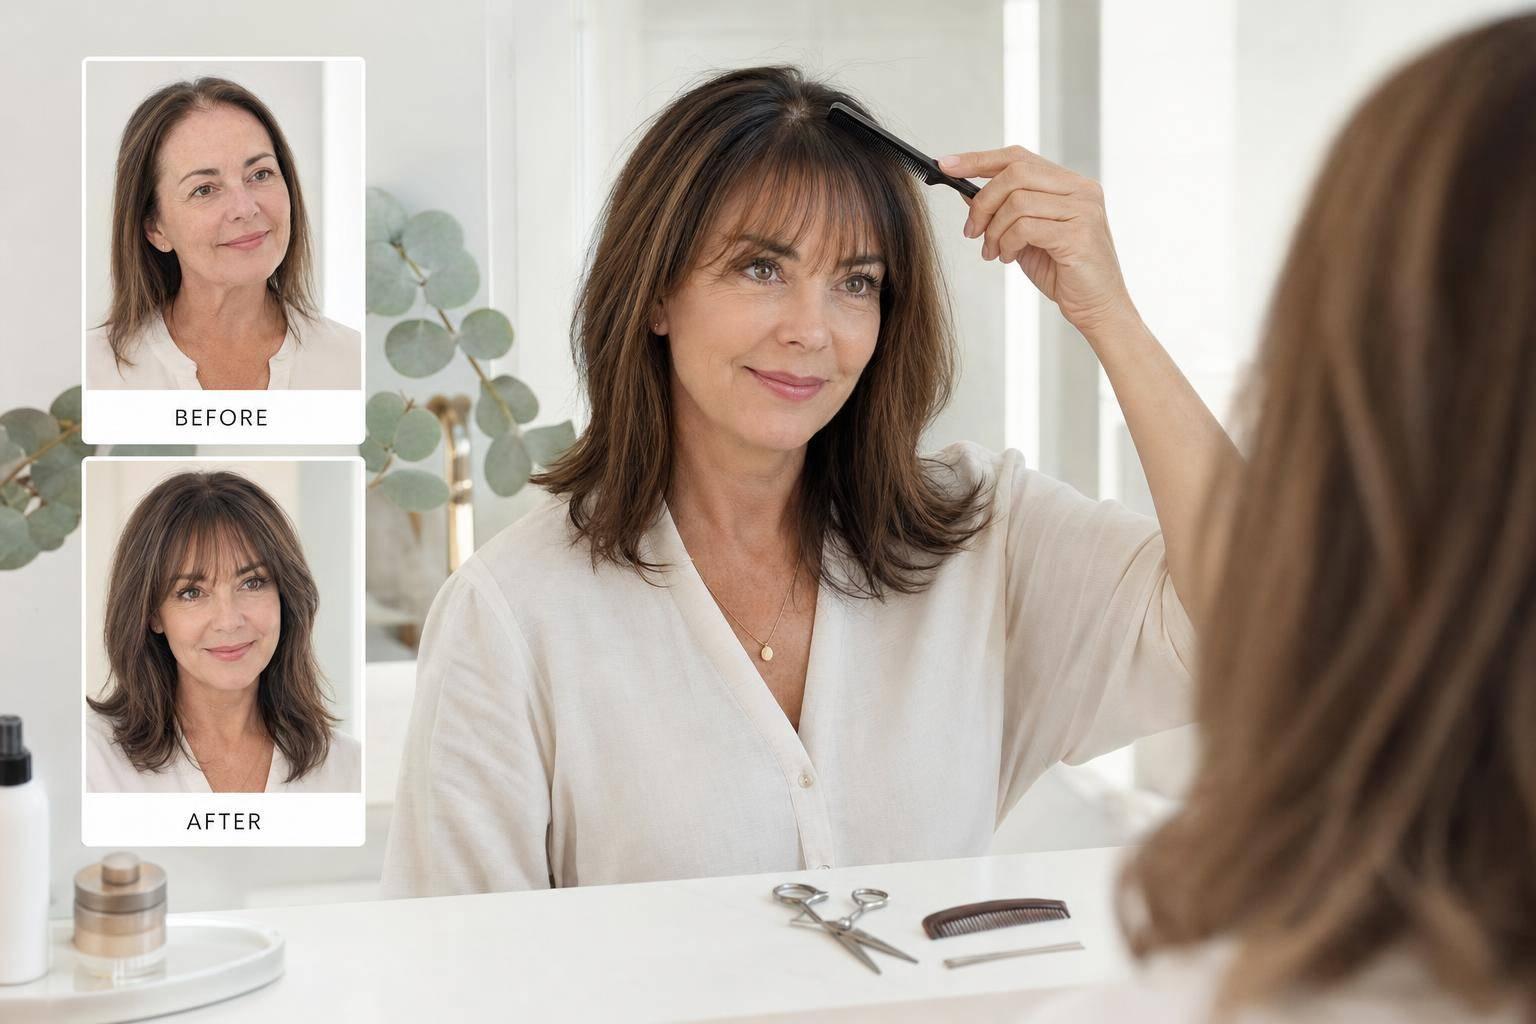
When dealing with thinning hair, choosing the right hair topper can make a big difference. A topper is a partial hairpiece that blends with your natural hair to provide volume and coverage in specific areas like the crown or hairline. It doesn’t stop hair loss but offers a quick, non-surgical way to boost confidence. Here's what you need to know: Base Types: Lace bases are lightweight and great for frontal thinning, silk bases mimic a natural scalp, and monofilament bases allow flexible parting. Hair Types: Human hair toppers, like Remy hair, offer a natural look and styling options but cost more. Synthetic options are cheaper but less versatile. Attachment Methods: Most toppers use clips, while some rely on tape or adhesives. Proper placement and scalp care are essential to prevent damage. Blending and Styling: Match the topper to your hair's colour, texture, and density. Use root sprays, powders, or teasing techniques to hide the transition line. Care and Maintenance: Wash every 10–14 days with sulphate-free products, avoid conditioning the base, and store in a cool, dry place to extend its lifespan. Prices range from $469.00 AUD for synthetic toppers to around $999.00 AUD for premium human hair options. Careful selection and maintenance ensure a natural look and long-lasting wear. How to Get an Undetectable Hairline with a Lace Front Topper | Step-by-Step Guide! | UniWigs sbb-itb-08feb2fChoosing the Right Base for Your Hairline Hair Topper Base Types: Which One Is Right for You? The base of your hair topper plays a key role in how natural it looks. It affects how seamlessly the front edge blends with your skin and existing hair. Picking the right base can make all the difference between a flawless look and one that reveals the topper's presence. Here's how to choose the best option based on your thinning pattern. Why Lace-Front Toppers Are Ideal for Frontal Thinning For those dealing with a receding hairline or very sparse hair at the front, lace-front toppers are a standout choice. The sheer lace panel lies flat against the skin, creating the illusion that the hair is growing directly from your scalp. This makes it perfect for hairstyles that pull the hair away from the face, without the risk of exposing a visible edge. "A topper clipped behind a very thin or missing hairline will always reveal that something has been added. No amount of styling can completely disguise that transition." - Karen Dowsey, Founder and Hair Loss Specialist, Frankie Hair Toppers [4] Unlike non-lace-front toppers, which rely on your natural hair to conceal the seam, lace-front toppers eliminate the need for blending at the front. This makes them a better option for those with minimal or no hairline coverage. However, if your natural hairline is still intact, you might want to explore other base types. When Silk or Monofilament Bases Make Sense If your hairline is still in good shape but you're experiencing thinning along the part line or crown, silk or monofilament bases could work better for you. Silk bases: These hide the hair knots beneath a layer of silk, giving the part line a realistic, scalp-like appearance that’s hard to detect, even up close [3]. Monofilament bases: These feature a fine mesh where each strand of hair is individually tied, offering flexibility to change your parting direction. They're also lightweight and breathable, which is especially useful in Australia's warmer weather. To achieve the most natural look, position these bases 1–2 cm behind your natural hairline so your bio hair can cover the edge. Matching the Base Type to Your Thinning Pattern The table below simplifies the process of choosing a base type based on your specific thinning area: Thinning Pattern Recommended Base Why It Works Receding or sparse frontal hairline Lace-front Creates a seamless front edge; ideal for off-the-face styles [3][4] Widening part line Silk base Mimics a natural scalp at the part line by concealing knots [3][2] Crown or diffuse top thinning Monofilament Lightweight and allows for flexible, multi-directional parting [2] Advanced thinning across the top Ergonomic or larger base Offers broader coverage and added volume [6] Assess whether your natural hairline has enough density to blend with a topper. If it does, a silk or monofilament base might be your best bet. Otherwise, a lace-front topper will provide the most natural-looking result. How to Measure, Position, and Secure Your Topper Once you've chosen the right base, the next step is ensuring your topper fits perfectly and stays securely in place. Accurate measurements and proper positioning are key to achieving a natural, seamless look. How to Measure and Position the Topper Style Your Hair First: Start by styling your hair as you normally would. This will help you clearly identify any thinning areas that need coverage. Measure Carefully: Use a soft tape measure to determine the length and width of the thinning area. Add Extra Space: To ensure a secure fit, add 1–2 cm to your measurements. This allows the clips to attach to healthy hair. Position Correctly: Place the front edge of the topper about 2.5–5 cm behind your natural hairline. This positioning helps your natural hair blend with the topper, masking any visible seams. "Always add about 1–2 cm to ensure the topper clips onto healthy hair for a secure hold." - Waks Wigs [2] Secure the Clips: Start by fastening the front clip, then attach the remaining clips gently to avoid tugging. Clip Placement and Scalp Protection Proper clip placement not only keeps the topper in place but also safeguards your natural hair. Repeated use of clips in the same spot can lead to traction alopecia, a condition caused by excessive tension on hair strands. To minimise this risk: Shift Clip Positions: Adjust the placement of the clips every few months. As Transitions Hair suggests: "Rotate their [clips] position every few months to avoid stress on any one area." [1] Tease for Grip: Lightly teasing the hair near the clip areas can help secure the topper and prevent it from sliding. Remove at Night: Take off your topper before bed to relieve your scalp of overnight tension [1][2]. Fit and Comfort Checklist Before stepping out, run through this quick checklist to ensure your topper looks and feels just right: Flat Base: The topper base should sit smoothly against your scalp without any gaps or bulges. Comfortable Tension: Clips should feel secure but not tight enough to cause discomfort. Natural Blending: Your natural hair should cover the topper’s edge for a flawless finish. Secure Hold: The topper should stay firmly in place, even when you move or touch your hair. Lightweight Feel: The topper should feel breathable and comfortable for extended wear. If anything feels off - like pulling or discomfort - take a moment to readjust. Following these steps ensures your topper not only enhances your look but also feels comfortable and secure throughout the day. Matching and Blending Your Topper with Your Natural Hair How to Match Colour and Texture Getting the right colour and texture match is key to achieving a seamless look with your hair topper. Instead of comparing the topper to your roots, match it to your mid-lengths and ends, as these are the visible parts of your hair. Always check the colour under natural light, ensuring the topper’s undertones (warm or cool) align with your own hair. Texture is equally important. If your natural hair is wavy, pairing it with a straight topper will look unnatural, no matter how well the colours match. Opt for a topper that reflects your usual hair texture or the style you wear most often. With human hair toppers, you can use heat tools to adjust the texture to match your hair. Density is another factor to keep in mind. Too much density can look bulky, especially on fine hair. Hair specialist Lisa Liesmann explains, "The lighter the density, the more natural a hair topper will look." For women with thinning hair, a density range of 110% to 130% typically provides a balanced, realistic appearance. [6] Step-by-Step Blending Routine Once your topper is clipped in place (start with the front clip), follow these steps to create a flawless blend between your natural hair and the topper: Detangle both: Before styling, comb through your natural hair and the topper to eliminate any knots or tangles where the two meet. Pull your natural hair forward: Gently bring your bio hair over the edge of the topper’s base to help conceal the seam. Tease at the hairline: Lightly tease the area where your hair meets the topper to soften the transition. Style together: Use a straightener or curling iron on both your natural hair and the topper at the same time to merge the textures. Always apply a heat protectant to human hair toppers before using heat tools. Trim for perfection: Schedule a professional trim while wearing the topper to ensure the layers blend smoothly. [2][7] Once the textures are blended, focus on refining the join to make it completely undetectable. How to Hide the Transition Line Even with a perfect colour match, the line where your topper meets your scalp can sometimes catch the light. A few finishing touches can help make this line disappear. Root touch-up sprays in a matching shade provide a quick fix - just mist lightly along the edge to blur the contrast between the topper’s base and your scalp. Hair fibres, such as Toppik, can also work wonders by bonding to fine hairs and filling in any gaps. For a more polished finish, use a fine brush to apply a matching powder along the transition line. This technique mimics the natural appearance of a scalp and works especially well in bright lighting. Lastly, make sure your topper’s part perfectly lines up with your natural parting. Even a slight misalignment can draw unwanted attention, but when everything matches, your hairline will look effortlessly natural. How to Care for Your Hair Topper Daily and Weekly Care Routine With the right care, a hair topper can last up to two years. Karen Dowsey, Founder of Frankie Hair Toppers, explains: "A high-quality human hair topper can last up to two years when properly cared for, and in some cases even longer." [3] Stick to washing your topper every 10–14 days, or more often if you exercise regularly or use a lot of styling products. Before washing, gently detangle the hair using a wide-tooth comb - this simple step helps prevent shedding and matting. Use a sulphate-free shampoo and conditioner designed for human hairpieces. When conditioning, avoid the base of the topper, as applying conditioner there can loosen the hand-tied knots over time. [1][2] After washing, gently blot the topper with a microfibre towel and allow it to air dry by laying it flat or placing it on a wig stand. [2] Caring for the topper's delicate base and front edge is just as important for maintaining its lifespan and natural appearance. Looking After the Base and Front Edge The base of your topper is its most fragile part, and the lace front edge is especially delicate. When putting on or removing your topper, make sure all clips are fully open to avoid damaging the lace. [5] If you use tape or adhesive along the front edge, clean off any residue after each use. Adhesive buildup can weaken the lace and make it more noticeable against your skin. [1] To keep the hair hydrated, apply conditioner or oil sprays only to the mid-lengths and ends, steering clear of the base. This will help preserve the integrity of the topper and prevent unnecessary wear. [5] Storage and Travel Tips for the Australian Climate The hot and humid Australian summer can be tough on hair toppers. Keep your topper out of direct sunlight and away from high humidity when you're not wearing it, as both can cause the colour to fade and the texture to change. [2] At home, store your topper on a wig stand to retain its shape, or in a silk bag to protect it from dust and friction. [2] When travelling - whether interstate or overseas - a silk bag is ideal for packing your topper. It prevents tangling and protects the hair from varying climates. [2] Finally, always remove your topper before bed. This not only gives your scalp a break but also reduces unnecessary wear and tear on the piece. [1] Conclusion: Getting a Natural Hairline with the Right Topper Creating an undetectable hairline starts with thoughtful choices before you even put on the topper. The base type, precise sizing, and careful placement all play a role in achieving a natural look. As Frankie Hair Toppers explains: "The hairline is the most visible part of any hair solution... A topper clipped behind a very thin or missing hairline will always reveal that something has been added." [4] To ensure a seamless blend between your natural hair and the topper, focus on the basics: measure accurately, add 1–2 cm for secure clipping, and position the topper just behind your natural hairline. This placement allows your natural hair to disguise the transition effortlessly. Opting for lighter density is another key tip. As Lisa Liesmann from the Australian Wig Company highlights, "The lighter the density the more natural a hair topper will look." [6] Small finishing touches, such as teasing the hairline gently and rotating clip positions regularly, help maintain a fresh and natural appearance. With proper care, a high-quality 100% Remy human hair topper can last up to two years, making it a smart investment for everyday confidence. [3] Stick to these techniques and care routines to keep your look natural and polished for the long term. FAQs Do I need a lace-front topper for a receding hairline? Yes, a lace-front topper works well for those with a receding or thinning hairline, particularly if blending your natural hair is challenging or if you experience alopecia at the front. The lace front is designed to replicate the appearance of hair growing directly from the scalp, offering a smooth and natural-looking transition. However, if your front hairline still has enough density, a standard topper can also be a good option. You can place it slightly behind your natural hairline and blend it with your existing hair for a cohesive look. How do I know what topper size to buy? To determine the correct topper size, use a soft tape measure to check the length and width of the thinning area - whether it's along your part line, crown, or front hairline. Add an extra 1–2 cm to these measurements. This extra space ensures the clips can securely attach to strong, healthy hair. For optimal results, consider consulting a professional who can help you choose a base size and shape that works best for your needs. Will a hair topper damage my natural hair? When applied properly, a hair topper shouldn’t harm your natural hair. Make sure it matches the shape of your scalp, feels lightweight, and clips securely without being overly tight. To minimise strain on specific areas, adjust or rotate the clip positions every few months. Taking care and positioning it correctly is essential for keeping your hair healthy. Related Blog Posts Human Hair Toppers Human Hair Topper with Bang Hair Toppers: The Secret to Natural-Looking Coverage & Volume Fringe vs Bang Topper: Which One Is Right For You?
Learn more
The Benefits of Silk for Hair Extensions
Silk can help protect your hair extensions by reducing friction, preventing tangles, and retaining moisture. Unlike cotton, silk provides a smooth surface that’s gentle on extensions, helping them last longer and look better. Here’s why silk is a smart choice: Reduces Friction: Silk’s smooth texture prevents snags and breakage, especially during sleep. Prevents Tangles: Cotton fibres can cause knots, while silk keeps extensions smooth and manageable. Locks in Moisture: Silk doesn’t absorb oils or treatments, keeping extensions hydrated and soft. Protects Bonds: Reduces stress on attachment points like tapes and wefts. Switching to silk pillowcases, bonnets, or scrunchies can significantly improve the lifespan and appearance of your extensions. Choose high-quality mulberry silk with a momme weight of 19–22 for the best results. How Silk Reduces Friction and Prevents Breakage The Science Behind Friction Reduction Silk's fibroin protein gives it a naturally smooth surface, unlike the textured finish of cotton, which tends to grip and catch hair. Cotton's uneven surface can tug at hair strands during sleep, while Mulberry silk allows hair to glide effortlessly, avoiding snags. Hair cuticles are made up of overlapping scales, and rough fabrics can lift these scales, leading to tangles and breakage. Silk, on the other hand, helps keep the cuticles flat and aligned. This is particularly crucial for hair extensions, which lack the natural oils from the scalp that help repair and protect natural hair. Friction creates drag, which can weaken the bonds holding extensions in place. Over time, this can loosen attachments and cause premature shedding. Studies show that the average person moves 40 to 50 times during sleep [5]. Each movement creates tiny friction events, which can add up to significant damage to both your hair and the bonds securing extensions [5]. Using silk nightly can greatly reduce this friction, helping to preserve the health of your extensions and protect your investment. Protecting Extensions While You Sleep A silk pillowcase is a great start for reducing friction, but a silk bonnet offers even better protection by fully enclosing the hair. This prevents extensions from rubbing against shoulders, bedding, or other surfaces that could cause damage during the night. For the best results, choose 22-momme silk. Lower momme weights (such as 12–16) may lose their smooth texture after washing, but 22-momme silk retains its glide, ensuring long-term protection for your extensions [3][5]. Before going to bed, gently brush your extensions and secure them loosely with a silk scrunchie. Also, avoid sleeping on wet hair to minimise the risk of friction damage further. sbb-itb-08feb2fHow Silk Prevents Tangling and Matting Why Extensions Tangle Without Silk Cotton pillowcases might feel soft, but their coarse fibres can wreak havoc on your hair extensions. As you move during sleep, these fibres grab onto the hair shaft, creating knots and putting unnecessary stress on the bonds or tapes that keep your extensions secure [1]. On top of that, cotton is highly absorbent, which means it pulls moisture and natural oils away from your hair. This leaves extensions dry, brittle, and far more likely to tangle. Unlike your natural hair, extensions don’t benefit from the oils produced by your scalp [3]. Without that natural hydration, they’re more prone to dryness, which makes tangling even worse. Those tangles can quickly escalate into stubborn mats, especially near the roots where the extensions are attached. "Cotton fibres grip the hair shaft as you move during sleep, which can lead to tangles and stress on the bonds or tapes of your extensions." - MYRN Silk [1] Switching to silk can be a game-changer, as it reduces friction and helps retain moisture. Keeping Extensions Smooth with Silk Silk provides a smooth, low-friction surface that lets your extensions glide effortlessly as you sleep [1]. This reduces tugging and snagging, keeping tangles at bay and cutting down on the time you spend detangling in the morning. For all-day protection, silk scarves and bonnets are excellent options. A silk bonnet, in particular, offers full coverage, shielding your extensions from rubbing against your shoulders, clothes, or other surfaces [4]. This is especially handy when travelling or relaxing at home. For the best results, choose silk products with a momme weight between 19 and 22, as this strikes the perfect balance between smoothness and durability [3]. "Since I started wearing a silk bonnet to bed, my tape-in extensions last so much longer. I used to get terrible tangles every morning and now my hair looks smooth and stays in place." - Bella C., Verified Customer [4] Moisture Retention for Hydrated Extensions Why Extensions Need Moisture Unlike natural hair, extensions don’t benefit from the scalp’s natural oils. These oils, known as sebum, are what keep our hair soft and manageable. Extensions, however, are cut off from this natural source of hydration, leaving them entirely dependent on external moisture[3]. Without proper care, they can dry out, becoming brittle, frizzy, and tangled. This dryness weakens the hair strands, making them more prone to breakage and split ends. Silk, however, offers a solution by helping to maintain moisture, ensuring your extensions stay smooth and flexible. How Silk Preserves Natural Oils While cotton pillowcases might feel soft, they can actually strip your hair of moisture overnight. Any leave-in conditioners or serums you’ve applied can end up absorbed by the fabric, leaving your extensions dry and lifeless by morning. "Cotton is naturally absorbent, and pulls essential moisture away from your scalp whilst you sleep. It also contains tiny fibres that can tug at your hair and extensions, causing frizz and breakage." Mulberry Park Silks[2] Silk works in a completely different way. Its smooth, non-absorbent surface helps lock in moisture by keeping oils and conditioning treatments on your hair instead of soaking into the pillowcase. Plus, silk is made from fibroin - a natural protein that’s also found in professional salon treatments. This protein helps maintain hydration, keeping hair moisturised naturally. Switching to 100% mulberry silk pillowcases or bonnets creates the perfect environment for your extensions, helping them retain moisture and stay soft, shiny, and healthy overnight[3]. Benefits of Using Silk For Healthy Hair & Skin Plus Prevent Wrinkles ft. Lilysilk-Beautyklove Silk vs Satin: What's the Difference? Silk vs Satin for Hair Extensions: Material Comparison Chart Silk and satin may look and feel similar, but they are fundamentally different - and understanding these differences is key to maintaining your extensions. Silk is a natural protein fibre derived from silkworm cocoons and contains amino acids that benefit hair. Satin, on the other hand, refers to a type of weave, typically made from synthetic materials like polyester or nylon. Why does this matter? Pure mulberry silk not only provides a smooth surface but also nourishes extensions thanks to its natural proteins. Satin, while smooth, lacks these conditioning properties. As Kendra Cosenza, Brand Manager at Mulberry Park Silks, explains: "The key to understanding why certain fabrics are better for hair than others lies in the science of friction and moisture retention. When we sleep, our hair is in its most vulnerable state." [6] This insight highlights why silk is often the fabric of choice for protecting extensions. Silk offers other benefits as well. It naturally regulates temperature, keeping your scalp cool and comfortable while you sleep. In contrast, synthetic satin can trap heat, leading to sweating that may weaken extension bonds. Silk is also hypoallergenic and resistant to dust mites and mould, which helps maintain the integrity of your extensions over time. When shopping for silk products, look for 100% mulberry silk, not "silky satin" or "silk-feel" fabrics, which are typically made from polyester. For optimal results, choose a momme weight between 19 and 22, with Grade 6A silk being the highest quality. Expect to pay between $67 and $105 for premium 22 momme silk pillowcases, while satin alternatives are usually under $20. Comparison Table: Silk vs Satin Feature Pure Mulberry Silk Synthetic Satin Material Origin Natural protein fibre (silkworm cocoons) Synthetic petroleum-based (polyester/nylon) Friction Reduction Excellent; reduces friction by up to 43% Moderate; smooth but may cause static Moisture Retention High; preserves natural oils and treatments Fair; lacks moisture-absorbing properties Breathability High; regulates temperature naturally Low; traps heat and may cause sweating Hair Health Conditions hair with natural amino acids Provides only a smooth surface Hypoallergenic Naturally hypoallergenic and antimicrobial Not inherently hypoallergenic Care Requirements Delicate; hand washing preferred Machine washable; low maintenance Choosing silk over satin can make a noticeable difference in maintaining the health and longevity of your extensions. How to Use Silk Products with Hair Extensions Building on silk's benefits, here's how to seamlessly incorporate these products into your daily routine. Choosing the Right Silk Products Silk can do wonders for protecting and maintaining your hair extensions, but picking the right products is key. Start with silk pillowcases. These reduce friction by 43% compared to cotton, offering passive protection while you sleep [7]. Look for pillowcases made from 100% mulberry silk with a momme weight between 19 and 22 - this strikes the perfect balance between durability and smoothness [3]. For active sleepers or those with long, thick extensions, silk bonnets are a great option. High-quality 100% mulberry silk bonnets, which typically cost around $55.95, outperform synthetic satin versions by providing superior protection [4]. Silk scrunchies are another must-have. Unlike traditional elastic bands that can snag and damage extension bonds, silk scrunchies hold your hair securely without causing dents or breakage [8]. Similarly, silk headscarves are perfect for wrapping extensions overnight. They help preserve specific styles and prevent frizz while minimising friction and split ends [2]. Daily and Night-Time Care Routines Incorporating silk into your daily and night-time hair care routine can make a big difference in maintaining your extensions. Start your night-time routine by detangling your extensions. Use a soft-bristle or loop brush, working from the ends upward, to gently remove knots and buildup. Once detangled, secure your hair in a protective style. For tape-in extensions, a low, loose bubble ponytail with silk scrunchies minimises stress on adhesive bonds. For weft extensions, divide the hair into two sections and braid loosely to distribute weight evenly. If you wear clip-in extensions, always remove them before bed to avoid unnecessary tugging on your natural hair. To keep your extensions hydrated, apply a small amount of leave-in conditioner to the mid-lengths and ends, as extensions don’t benefit from natural scalp oils. Avoid going to bed with wet extensions, as moisture can cause severe matting and weaken bonds. After drying and detangling, protect your hair by wearing a silk bonnet or wrapping it in a silk scarf. This ensures full coverage and reduces friction during sleep. When travelling, pack a portable silk pillowcase to maintain low-friction sleep no matter where you are. Store silk accessories in breathable bags to prevent humidity buildup, and wash them by hand in cool water using a gentle, enzyme-free detergent. Let them air dry away from direct sunlight to keep the fibres intact. Using Silk Protection with Silkara Hair Extensions Why Silkara Hair Extensions Work Well with Silk Silkara Hair extensions are made from high-quality human hair, which naturally lacks the oils produced by the scalp. This makes silk products an excellent choice for keeping your extensions in top condition and extending their lifespan. Silk contains fibroin, a protein often found in salon treatments, which makes it a great match for premium human hair. Thanks to its non-absorbent nature, silk helps retain moisture and enhances the effects of leave-in treatments. Hair extension expert Shantella Rios highlights the benefits: Your hair is a natural fibre and using 100% silk headscarf is going to protect the hair... There's no friction that's going to cause split ends.[2] Silk’s ultra-smooth texture also reduces tension on attachment points - whether tapes, clips, or wefts - helping extensions stay securely in place and minimising the risk of early shedding. To complement these advantages, Silkara Hair provides accessories designed specifically to protect your extensions. Silkara Hair Accessories for Silk Care Silkara Hair offers a range of accessories to enhance your silk care routine and keep your extensions looking flawless. Detangling brushes: Perfect for gently removing knots before bed, ensuring your extensions are ready for silk protection. Silk scrunchies: These secure your hairstyles without creating unnecessary tension or damage. Silk storage bags: Ideal for keeping clip-ins and fringe pieces smooth and protected when not in use. These accessories work hand-in-hand with silk products to maintain the quality and appearance of your hair extensions. Conclusion Silk products are a great way to protect your hair extensions and help them last longer. The smooth texture of silk reduces friction, which helps protect attachment points and minimises breakage. It also prevents tangling and matting, saving you time and effort detangling in the morning while reducing stress on your extensions. Beyond reducing friction, silk helps retain essential moisture. Since hair extensions don't get natural oils from your scalp, they can easily dry out. Silk's non-absorbent, protein-based fibres help preserve hydration from leave-in treatments, keeping your extensions soft, shiny, and healthy-looking for longer. For the best results, pair quality Silkara Hair extensions with silk pillowcases, bonnets, or scrunchies. This combination of premium human hair and silk care creates the perfect conditions to maintain your extensions between salon visits. In fact, your stylist might notice the difference at your next appointment, as extensions protected with silk often show less wear on bonds and tapes. Incorporating silk into your routine is simple. Start with just one silk product - whether it’s a pillowcase, halo hair extension, or scrunchie - and you’ll quickly notice smoother, more manageable extensions. Using silk not only protects your extensions but also simplifies your daily care routine, keeping your extensions sleek and durable with minimal effort. FAQs Do I need a silk bonnet if I already use a silk pillowcase? Using a silk pillowcase can work well for many people, as it helps reduce friction and keeps frizz under control. However, a silk bonnet offers added protection by completely covering your hair. This limits movement and cuts down friction even more, which is particularly beneficial for curly, textured, or delicate hair types. If you have fine or straight hair, a silk pillowcase alone might do the job. What’s the best momme weight for silk with hair extensions? When it comes to caring for hair extensions, the ideal silk momme weight usually falls between 22 and 25 momme. A 22 momme silk is prized for its softness, which helps minimise friction and tangling. On the other hand, 25 momme silk offers extra durability along with a luxurious texture. Both choices work wonderfully to maintain and protect hair extensions, keeping them in top condition. How do I wash silk pillowcases and bonnets without ruining them? To keep your silk pillowcases and bonnets in top condition, it's best to hand wash them. Use cold to lukewarm water (below 30°C) and a pH-neutral detergent specifically made for silk or delicate fabrics. If you prefer machine washing, select a delicate or silk cycle and stick to cold water. Steer clear of regular detergents, bleach, or fabric softeners, as these can harm the fabric. After washing, gently press out excess water without wringing and let the items air dry. Lay them flat or hang them in a shaded spot to preserve their quality. Related Blog Posts Hair Extension FAQ: Top Questions Answered How to Detangle Hair Extensions Without Damage Fringe Hair Extensions: Try Bangs Without the Chop Weft hair extensions, use case, types and benefits
Learn more
Weft hair extensions, use case, types and benefits
Weft hair extensions are long strips of hair sewn or bonded together horizontally, designed to blend naturally with your hair. They add length, volume, and distribute weight evenly to minimise damage. Depending on your hair type, you can choose from Machine, Hand-Tied, or Genius wefts: Machine wefts: Thick and durable, great for dense or coarse hair. Hand-tied wefts: Thin and lightweight, ideal for fine or fragile hair. Genius wefts: A middle ground offering flexibility and comfort. Each type suits different hair densities and textures, with proper care extending their lifespan up to 12 months. Maintenance every 6–8 weeks ensures they stay secure and natural-looking. Whether you want subtle volume or dramatic length, weft extensions offer a practical way to enhance your style. Types of Weft Hair Extensions Weft Hair Extensions Comparison Guide: Machine vs Hand-Tied vs Genius Choosing the right weft hair extensions depends on factors like your hair density, scalp sensitivity, and styling preferences. Each type offers its own benefits, from the durability of machine wefts to the lightweight feel of hand-tied options. Machine weft extensions are created using industrial machines that sew hair onto a reinforced fabric strip. These wefts are about 3–5mm thick, making them the most durable option. They can hold a high hair density, delivering maximum volume. Their adjustable width allows them to fit various head shapes, making them ideal for thick or coarse hair with strong roots. However, they can feel heavy on finer hair and may be noticeable through thinner sections. Hand-tied weft extensions are meticulously crafted by hand, with individual hair strands tied onto a thin thread. This results in an extremely thin profile of just 1–2mm. Creating a single hand-tied weft can take 2–4 hours of manual work, which increases their cost by 40–80% compared to machine wefts. These wefts lay flat against the scalp, offering a discreet look and reduced tension on delicate roots. However, they cannot be cut, as cutting them will cause the knots to unravel, and they require gentle care to prevent shedding. Genius weft extensions combine the best features of machine and hand-tied wefts. They are machine-made but on an ultra-thin base, mimicking the flat, comfortable fit of hand-tied wefts. At 2–3mm thick, they strike a balance between durability and a lightweight feel. Unlike traditional hand-tied wefts, genius wefts can usually be cut to size without fraying, and they avoid the short, return hairs that can irritate the scalp. To choose the right weft for your hair density, use the ponytail rule: If your natural ponytail circumference is under 5cm, go for hand-tied wefts. If it’s over 8cm, machine wefts are more suitable. For medium density (5–8cm), genius or hand-tied wefts are usually the best options. The next section will explore how to use each type for the best results. sbb-itb-08feb2fWhen to Use Weft Hair Extensions Picking the right weft extensions depends on your hair's density, texture, and strength. These factors influence both the type of extension that will blend seamlessly and how much weight your roots can comfortably handle. For Fine Hair If your hair is fine or thin, hand-tied or Genius wefts are your best bet. These wefts are ultra-thin (just 1–2mm), making them discreet and gentle on fragile roots. For first-time installations, keep the total weight under 70g to avoid stressing your hair. While machine wefts are sturdy, they can feel too bulky and heavy for fine hair. Maintenance is key - schedule touch-ups every 6–10 weeks to move the wefts up as your hair grows. This keeps them secure and invisible. For Thick or Voluminous Hair If your hair is naturally thick or coarse, machine wefts are the way to go. These wefts are heavier and provide the density needed to blend with full, voluminous hair. They add noticeable fullness without being overwhelmed by your natural texture. You can choose from various weights, ranging from 50g for a subtle boost to over 120g for a bold, dramatic look. Thick hair can handle the extra weight, allowing for more transformative results. For Textured or Curly Hair For curly or wavy hair, it’s all about matching the texture. Opt for pre-textured wefts made from 100% human Remy hair. These extensions mimic natural movement and can be styled with heat to align perfectly with your curl pattern. To ensure a flawless blend, compare the wefts to your natural hair in daylight for a precise colour and texture match. This prevents the extensions from looking out of place or hanging awkwardly. In Australia, weft extensions are especially loved for enhancing relaxed, beachy waves and adding volume to effortlessly chic styles. Next, explore how each type of weft can elevate your styling game. Benefits of Weft Hair Extensions Weft hair extensions are more than just a way to elevate your look - they add practicality, versatility, and durability to your hair routine. Whether you have fine or thick hair, these extensions cater to a wide range of needs. Volume and Length Weft extensions provide instant volume and length, saving you from the long wait for natural hair growth. Applied in rows, they blend seamlessly with your natural hair, adding fullness and vibrancy right away [1]. You can choose the volume you want by selecting different weights. For example, machine wefts are packed with the highest hair density, making them ideal for anyone seeking a dramatic transformation [5]. Plus, high-quality wefts are designed to sit close to the scalp, staying discreet even in sleek ponytails or intricate updos [6][5]. Styling Options Made from 100% human Remy hair, weft extensions let you curl, straighten, and wash them just like your own hair [2][3]. This opens up a world of styling possibilities, from sleek ponytails and textured curls to loose waves and elegant updos [4][2]. You can even colour them to add highlights or lowlights without risking damage to your natural hair [3]. These extensions move naturally and remain undetectable, no matter how you style them [1][3]. Stylists can also layer different lengths to create depth and dimension, making them perfect for popular Australian styles like relaxed beachy waves or chic, effortless looks. Durability and Lifespan When properly installed and cared for, high-quality wefts can last 9–12 months [7]. Regular maintenance, including professional move-ups every 6–8 weeks, keeps them looking their best as your natural hair grows [1][7]. The extensions are reusable for multiple applications, provided you follow a few care tips. Machine and Genius wefts, for instance, can be cut to any width without unravelling, ensuring a secure and custom fit [7]. To maximise their lifespan, use sulphate-free products, brush them 2–3 times a day with a loop brush, and avoid sleeping on wet hair [1][2]. Limit heat styling to 180°C and always apply a heat protectant to maintain the integrity of the fibres [1][2]. With the right care, these extensions will stay looking flawless for months. Conclusion Weft hair extensions are a quick way to add volume, length, and styling flexibility to your look. Whether you're drawn to the sturdiness of machine wefts, the lightweight comfort of hand-tied options, or the balanced features of genius wefts, there's something for every hair type and lifestyle. For those with fine or delicate hair, lighter options like hand-tied or genius wefts minimise scalp tension and blend seamlessly. If you have thicker hair and want more density, machine wefts are a great choice. Keep in mind, hand-tied wefts can’t be trimmed, so for a tailored fit, machine, genius, flat, or PU wefts are better suited. Choosing the right type ensures your extensions work perfectly for your hair and styling goals. FAQs How are weft extensions installed? Weft hair extensions are added by securing them to your natural hair. One popular method is sewing-in, where the extensions are stitched into thicker sections of hair, offering a long-lasting result. Another option is the beaded method, which uses silicone-lined beads to attach the extensions without the need for glue or heat - making it a great choice for medium to thick hair. For those with finer to medium hair, tape-in extensions are a common choice. These use adhesive strips to 'sandwich' sections of natural hair, creating a seamless and lightweight finish. Each method caters to different hair types, ensuring a tailored look. Will weft extensions damage my natural hair? When done properly, weft extensions are typically gentle on your natural hair and shouldn't cause damage. That said, issues like breakage can arise if they're not installed or removed correctly. To avoid these problems, always have a professional handle the installation and removal process, and stick to recommended care practices. How do I wash and sleep with weft extensions? To keep weft extensions looking their best, opt for sulfate-free, lightweight products when washing. Steer clear of heavy oils and parabens, as these can weigh the extensions down. Use lukewarm water when rinsing, and always handle them with care to avoid unnecessary stress on the hair. For bedtime, switch to a silk or satin pillowcase to reduce friction, which can lead to tangling. Additionally, secure your extensions in loose braids or buns before sleeping. These simple habits go a long way in preserving their natural appearance and extending their lifespan. Related Blog Posts 7 Best Hair Extension Types for Fine Hair: A Complete Guide Hair Extension FAQ: Top Questions Answered Clip-In Hair Extensions: Instant Transformation You Can Do at Home 5 Benefits of U-Part Extensions for Natural Hair
Learn more
Tap Hair Extensions, virgin remy and injection virgin remy
Choosing the right hair extensions can be tricky, but understanding the differences between tape hair extensions, virgin remy hair, and injection virgin remy hair can make it easier. Here’s a quick breakdown: Tape Hair Extensions: Pre-taped wefts that "sandwich" your natural hair, offering a semi-permanent hold for 6–8 weeks. They’re quick to apply, cost-effective, and work well for fine hair. Virgin Remy Hair: Made from 100% untreated human hair, it’s durable (lasting 12–18 months) and offers a natural shine. It’s ideal for those who frequently style or colour their hair. Injection Virgin Remy Hair: A premium option where hair is embedded into a thin tape strip, creating an undetectable "skin weft" effect. Perfect for fine hair and provides a natural look. Key Points: Tape-ins are budget-friendly and quick to apply. Virgin remy hair is a high-quality, long-term investment. Injection virgin remy offers the most discreet finish but comes at a higher cost. Quick Comparison: Feature Tape Hair Extensions Virgin Remy Hair Injection Virgin Remy Hair Durability 6–12 months 12–18 months 12+ months Cost (AUD) $200–$600 $500–$1,200+ $158.99+ per 50g Maintenance Frequency Every 6–8 weeks High care needed Every 6–8 weeks Best For Fine hair, budget Styling, durability Fine hair, natural look Silkara Hair, based in Sydney, offers ethically sourced, high-quality options with free shipping on orders over $100. Choose the type that suits your hair type, budget, and styling goals. Hair Extensions Comparison: Tape-In vs Virgin Remy vs Injection Virgin Remy The Right Hair Extensions For YOU! Type + Method + Color sbb-itb-08feb2f1. Tape Hair Extensions Tape hair extensions are a popular choice for those seeking a natural, long-lasting, and cost-efficient way to enhance their hair. They are known for their versatility and ease of maintenance. Hair Quality Tape extensions are made from 100% Remy human hair, which gives them a natural shine and feel. For those wanting thicker, more consistent hair, premium options like Double Drawn hair are available. These extensions are sourced from reputable regions, ensuring quality you can trust [3]. You can style, wash, and treat them like your own hair, but it’s important to keep heat styling tools below 180°C to protect the hair [3]. Application Method The "sandwich method" is used to apply tape extensions. This involves placing a thin section of your natural hair between two adhesive wefts, creating a secure and flat bond [3]. Each weft is about 4cm wide and is placed 1cm away from the roots to ensure natural movement [3]. For a full head, you’ll need 60 to 80+ pieces, and the process can be completed in under an hour. To ensure the adhesive bonds properly, wash your hair beforehand with a clarifying shampoo and avoid using conditioner or oils. Invisibility One major benefit of tape-in extensions is how discreet they are. The flat design of the wefts allows them to sit close to the scalp, making them nearly invisible when styled. The even weight distribution reduces any bulkiness, and newer designs like injection tapes are especially effective for fine hair, offering an almost undetectable finish [3]. Durability When cared for properly, high-quality Remy tape extensions can be reused multiple times. Premium options can last 6 months to over a year, with 2 to 6 reapplications, while lower-grade extensions typically last 3–4 months with 1–2 reapplications [3]. Extensions made from premium Russian hair can handle 3–6 reapplications over 6–12 months. Regular repositioning every 6–8 weeks is essential to accommodate hair growth and prevent tangling. The medical-grade adhesive used is strong yet gentle, ensuring a secure hold without damaging your natural hair [3]. Maintenance To extend the life of your tape-ins, proper care is key. Wash your hair 2–3 times a week using sulfate- and oil-free shampoos, and apply conditioner only to the mid-lengths and ends, avoiding the tape bonds [3]. Never sleep with wet extensions; instead, tie your hair in a loose braid or low ponytail and use a silk or satin pillowcase to minimise friction. Detangle gently with an extension-safe loop brush 2–3 times daily, starting at the ends and working your way up. After installation, wait 48–72 hours before washing to allow the adhesive to fully set [3]. Price Range In Australia, the cost of tape-ins varies based on quality and length. Standard quality extensions range from A$200 to A$600, while premium Remy hair extensions can cost between A$500 and A$1,200+ [3]. Professional installation fees are generally A$100 to A$300 per session. Maintenance services, including removal, cleaning, and re-taping every 6–8 weeks, typically cost A$200 to A$365. While the upfront cost is higher compared to clip-ins, the ability to reuse premium tape-ins over time makes them a more economical choice in the long run [3]. Next, we’ll explore the unique characteristics of virgin Remy hair. 2. Virgin Remy Hair Virgin Remy hair is considered the gold standard for hair extensions. It stands out because it has never undergone chemical treatments like dyeing, bleaching, straightening, or perming [4]. This ensures the hair retains its natural colour and texture, making it an excellent choice for those prioritising quality. Hair Quality What sets virgin Remy hair apart is its untouched condition. As LDL International describes: "Virgin hair uses human hair that has never been treated. It's free of chemicals and dyes, so the colour and shape of the hair are all-natural." [4] The hair is collected with the cuticles aligned, reducing tangling and friction [4]. Its natural purity makes it versatile for customisation, and it is available in shades ranging from dark brown to black. When cared for properly, this type of hair can last much longer than chemically treated alternatives [4]. Application Method There are two main ways to apply virgin Remy hair: tape-ins and sew-ins. Tape-ins use adhesive bonds to secure the extensions, while sew-ins involve stitching wefts of hair onto cornrows [2][6][7]. Buyers can choose between machine-wefted extensions, which are thicker and more durable, or hand-tied extensions, which offer a flatter and more flexible fit [7]. Maintenance To maintain the hair's natural quality, gentle care is essential. Use sulfate-free and oil-free shampoos, especially for tape-ins, as oils can weaken the adhesive [6]. Air drying is recommended to protect the strands and extend the hair's lifespan [2][5]. When brushing, start with a wide-tooth comb at the ends and work upwards, holding the roots to avoid stressing the bonds [2][6]. For sew-in extensions, it's crucial to ensure the braided base is thoroughly dried after washing to prevent bacteria growth [6]. Price Range In Australia, virgin Remy hair is priced at a premium due to its exceptional quality. Tape-in extensions typically start at around A$270 for a pack of 20 pieces (50g), while standard Remy hair options are priced between A$130 and A$160 [1][2]. Installation costs range from A$200–A$400 for tape-ins and A$300–A$600 for sew-ins. The initial cost for the hair itself can range from A$200–A$500 for tape-ins and A$300–A$700 for sew-ins [6]. While the upfront expense is higher, virgin hair's durability - lasting over a year or even up to three years with proper care - offers great long-term value [4][6]. Next, the article explores injection virgin Remy hair, a choice for those seeking an even more seamless blend. 3. Injection Virgin Remy Hair Injection virgin Remy hair represents a high-end development in tape extension technology. Unlike traditional tape-ins, these extensions use a specialised technique where the hair is embedded into a polyurethane tape strip. This creates a "skin weft" effect, making the extensions look like natural hair growing directly from the scalp [8]. Hair Quality These extensions are crafted from untreated, virgin Remy hair. The innovative design embeds the hair directly into the tape, giving it a seamless and natural appearance. As Vivien Beauty puts it: "The hair seems to grow from your own scalp as skin weft, making the extensions less visible, giving the appearance of natural hair growth from the root." [8] The tape strips are thinner than traditional tape-ins and free of visible knots, making them nearly invisible, even in finer hair. Each strip measures 4cm wide by 0.8cm high and weighs about 2.5g [8]. Application Method These extensions are applied using a sandwich technique, where a small section of your natural hair is placed between two adhesive strips. The ultra-thin design ensures they lie flat against the head. For best results, position the strips about 0.6cm from the scalp and press firmly for 5–10 seconds to activate the medical-grade adhesive [8]. This design creates a natural, skin-like finish. Invisibility Thanks to their construction, these extensions blend seamlessly with your natural hair, remaining virtually undetectable [2]. Durability Injection Remy hair extensions can last between 6 and 12 months with proper care. They are reusable, requiring reapplication every 6 to 10 weeks [8]. Maintenance To maintain these extensions, avoid washing your hair for 48 hours after installation. Once this period has passed, limit washing to no more than three times a week. Always use sulphate-free and alcohol-free products to preserve the adhesive bond. When styling with heat, keep the temperature between 71°C and 85°C to prevent damage, though air drying is the preferred method to extend their lifespan [8]. Price Range In Australia, a 50g pack (20 pieces) of injection virgin Remy hair typically costs around A$158.99 [2]. By comparison, standard Remy tape-ins are priced at approximately A$127.99 for the same weight [8]. The higher price reflects the advanced design and extended reuse potential of injection tape-ins. Next, we’ll explore the advantages and drawbacks of each extension type to help you decide which option suits your needs best. Advantages and Disadvantages Each type of hair extension comes with its own set of features, maintenance requirements, and costs. Here's a breakdown to help you weigh your options. These differences influence how the extensions look, how often they need care, and how much you’ll spend. Tape Hair Extensions Tape-in extensions are known for their quick application time - typically taking just 1–2 hours, compared to the 3–5+ hours needed for sew-in methods[6]. Their lightweight design makes them a great choice for fine hair, offering a natural and seamless look. The adhesive "sandwich" method doesn’t require any tools or chemicals, making it a gentle option. However, you’ll need to steer clear of oil-based products near the adhesive bonds and schedule maintenance appointments every 6–8 weeks[3]. On the plus side, tape-ins are a cost-effective option with relatively low initial and upkeep expenses. Virgin Remy Hair Virgin Remy hair is considered the gold standard when it comes to raw hair quality. It remains completely unprocessed, with all cuticles intact and aligned in the same direction. As Bombay Hair explains: "Unlike Remy hair, Virgin hair is unprocessed, meaning that it hasn't been dyed, permed, or chemically treated"[9]. This purity makes Virgin Remy hair highly durable, lasting over 12 months with proper care. It can also be reused 3–6 times, making it a long-term investment. However, this premium quality comes with a higher price tag, reflecting its unmatched durability and natural look. Injection Virgin Remy Hair This type of extension merges the high quality of Virgin Remy hair with an advanced tape-in design. The hair is injected into a thin polyurethane strip, creating what Jadore Hair Supplies describes as: "an ultra-thin, transparent seam that's virtually undetectable even upon close inspection"[3]. Like Virgin Remy hair, these extensions last 12+ months and can be reused multiple times. They also require regular reapplication appointments. While they offer the most natural appearance and premium quality, they come with the highest upfront cost. Here’s a side-by-side comparison to help you evaluate these options: Criteria Tape Hair Extensions Virgin Remy Hair Injection Virgin Remy Hair Hair Quality 100% Remy (processed for consistency) 100% unprocessed (highest purity) Premium Virgin Remy (highest grade) Application Time 1–2 hours Varies by method 1–2 hours Invisibility High (lies flat) Depends on application method Superior (mimics natural scalp) Durability 6–12 months 12+ months 12+ months Maintenance Frequency Move-up every 6–8 weeks Requires high-moisture care Move-up every 6–8 weeks Price Range A$200–A$600 per full head A$500–A$1,200+ Premium (highest initial cost) This comparison highlights the key features of each extension type, helping you decide which option best suits your needs and budget. How to Choose the Right Extension Type Choosing the right hair extensions starts with knowing your natural hair type and what you want to achieve. For instance, if your hair is fine or thin, tape-in extensions are a great option. They're lightweight and sit flat against your scalp, avoiding any added bulk. On the other hand, if you have thick or curly hair, injection virgin Remy extensions are a better fit. They offer a stronger grip and the volume needed to blend seamlessly with denser hair textures. Think about how these options fit into your daily hair care and styling routine. Your budget is another important factor. Hair extension costs can range from A$200 to over A$1,000, depending on the type and upkeep. Tape-in extensions are more affordable, while virgin Remy hair offers high-quality, reusable options. Injection virgin Remy extensions are the priciest upfront but provide exceptional longevity and a natural look. Don’t forget to include maintenance costs, which typically run between A$50 and A$100 per month for conditioning products and proper care. Consider your styling goals too. If you’re looking to add length without too much volume, tape-ins or virgin Remy extensions can extend up to 60 centimetres. For a fuller, more voluminous look, injection virgin Remy extensions have thicker wefts that create density. Tape-in extensions are also a time-saver, as they can be installed in under 45 minutes, making them a low-maintenance choice. Product details can also help you decide. For Australian customers, Silkara Hair offers tape-in extensions that are damage-free and easy to apply. These extensions use hypoallergenic, medical-grade adhesive and feature 100% human hair in a variety of shades. With proper care, they can last 6–12 weeks. Silkara’s virgin hair products are unprocessed, with cuticle-aligned strands that resist frizz, even in Australia’s humid climate. Pairing them with sulphate-free shampoos and weekly argan oil treatments ensures they stay in great condition. To find the best match, focus on your styling goals - whether that’s adding volume, length, or achieving a natural look. Align these goals with your hair type and budget. By considering texture, maintenance needs, and even your local climate, you can make a choice that avoids common issues like poor blending or unexpected upkeep costs. Conclusion When deciding between tape-in, Virgin Remy, or injection Virgin Remy hair extensions, consider your personal style, maintenance preferences, and budget. Tape-in extensions are a lightweight option that sit flat against the scalp, making them ideal for those with fine hair. Virgin Remy hair, being completely unprocessed, is perfect if you regularly bleach, dye, or use high-heat styling tools, as it offers durability and versatility. Injection Virgin Remy extensions, on the other hand, provide an undetectable finish by mimicking the natural growth of hair. Each of these options caters to different needs. Tape-in and injection extensions work well for fine hair, offering a discreet, damage-free appearance. Virgin Remy hair is a go-to for those who love experimenting with colours or styles, thanks to its ability to withstand frequent treatments. While Virgin Remy extensions may have a higher initial cost, their durability and ability to be reused make them a smart long-term investment. Silkara Hair offers high-quality extensions that deliver a natural blend and lasting value. Their premium Remy tape-in extensions, priced at around $158.99 AUD for a pack of 20 pieces, are highly rated by Australian customers with an impressive 4.8/5 stars. Customers often highlight the excellent colour matching and the thin, seamless design. As one satisfied customer, Claude Yost, shared: "Great quality silky straight real human hair... the stripes are nice and thin so it’s not obvious when applied." [2] FAQs How many packs (grams) do I need for a full head? For a complete set of hair extensions, you'll generally need around 3–4 packs (roughly 150–200 grams). The exact amount can vary depending on your hair's length, thickness, and the level of volume you're aiming for. Can I colour or tone virgin Remy and injection virgin Remy hair? Yes, both virgin Remy and injection virgin Remy hair can be coloured or toned. To maintain the hair's quality, it's important to choose high-quality dyes and follow proper colouring techniques. Always start by testing a small section to check the results, and if you're unsure, consult a professional stylist to ensure the best outcome. What products should I avoid so tape bonds don’t slip? Avoid applying products with oils, silicones, or heavy conditioners close to the bonds. These ingredients can break down the adhesive, leading to tape bonds slipping. It's also important to avoid low-quality extensions, as they may fail to stick properly or lose their hold too quickly. Related Blog Posts 7 Best Hair Extension Types for Fine Hair: A Complete Guide Clip-Ins vs. Tape-Ins: Mistakes to Avoid Tape-In Hair Extensions: Salon-Quality Length That Lasts Clip-In vs Tape-In Extensions
Learn more
Ultimate Guide to Dyeing Hair Extensions
Dyeing hair extensions at home can help you achieve a perfect colour match with your natural hair, but it requires the right materials, techniques, and care to avoid damage. Here’s what you need to know: Best Extensions for Dyeing: Use Virgin Remy human hair extensions for even colour absorption and durability. Avoid synthetic extensions - they can’t be dyed with regular products. Preparation: Gather professional dye, a matching developer (10 or 20 volume), and tools like a tint bowl, brush, gloves, and foil. Start with clean, detangled extensions and perform a strand test to check dye compatibility. Application Tips: Apply dye evenly in small sections, working from root to tip. Protect clips, tapes, or bonds with tape or plastic wrap. Monitor the process every 5–10 minutes. Post-Dye Care: Rinse thoroughly with lukewarm water, use sulphate-free products, and air-dry extensions to maintain quality and colour. For bold colours, consider the watercolour method, and for dimension, try balayage or ombre techniques. Proper aftercare - like avoiding high heat and using UV-protectant sprays - will keep your extensions looking great longer. Stick to darker shades for safer results, and always prioritise high-quality materials for the best outcome. Selecting Hair Extensions That Can Be Dyed Virgin Remy Human Hair Extensions When it comes to dyeing hair extensions, Virgin Remy human hair extensions are the top choice. These extensions are sourced from a single donor and have never undergone chemical processing. Because their cuticles remain intact and aligned, they allow dye to penetrate evenly, reducing the risk of patchy results. Plus, the natural oils in the hair help keep it hydrated during the dyeing process, minimising breakage and preserving its strength[1][2]. In comparison, non-Remy or processed hair often has mixed cuticle directions, which can lead to tangling and uneven colour absorption. Virgin Remy extensions, on the other hand, provide consistent texture and predictable dye results. They not only lift colour evenly but also hold pigment for longer. To ensure the best outcome, it’s always a good idea to perform a strand test on a small section of the hair to check porosity and dye uptake before proceeding[1][2]. Choosing Virgin Remy extensions sets the stage for a flawless colour match, making it easier to achieve the desired look without compromising quality. Synthetic vs Human Hair Extensions Synthetic extensions are a different story. They can't be dyed with regular hair dyes. Since they're made from plastic fibres, they don’t absorb dye like human hair does. Attempting to dye synthetic extensions with standard products can result in melting, clumping, or no visible colour change. While specialised dyes for synthetic hair exist, the results are often short-lived and less vibrant compared to human hair[2][3]. For those looking for dyeable options, Silkara Hair offers both synthetic and 100% human hair extensions. Their premium human hair extensions - available in styles like clip-ins, halo, and U-part - are crafted for salon-quality dyeing at home. With an impressive 4.8/5 star rating from over 6,000 reviews, customers frequently highlight how well these extensions blend with natural hair and maintain their quality through washing and styling[4]. For custom colouring projects, their 100% Remy human hair range is the way to go. Understanding the limitations of synthetic hair ensures you focus on the best techniques for dyeing high-quality human hair extensions. Silkara Hair Colour Match Guarantee If you're unsure about dyeing or selecting the right shade, Silkara Hair's Colour Match Guarantee is a fantastic alternative. Their team of experts offers free colour recommendations within 12–24 hours based on photos of your natural hair taken in daylight. Simply submit two clear photos (front and back) showing your hair worn down from root to tip, and they’ll match you to the perfect shade[5]. If the shade doesn’t suit you, they’ll help you find a replacement colour, eliminating the risks of over-processing or uneven dye results. This service is especially useful for Australians looking for quick, professional-looking results without the hassle of chemical treatments. Starting with a professionally matched base shade also makes it easier to customise the colour later if needed. sbb-itb-08feb2fColoring Hair Extensions - DO'S & DONT'S TO AVOID SPOTTY HAIR COLOR ON EXTENSIONS #hairextensions Tools and Preparation Before Dyeing Hair Extension Developer Volume Guide: Effects and Best Uses Required Supplies To get started, you'll need a few essentials: professional hair dye (permanent, semi-permanent, or demi-permanent), a matching developer, a tint bowl, an application brush, gloves, foil sheets, clarifying shampoo, a moisture repair conditioner, and a hydrating mask. The clarifying shampoo is key - it removes product buildup from the extensions, ensuring the dye absorbs evenly[7][8]. After dyeing, the conditioner and mask help restore the extensions' softness and strength[6][8]. If you're in Australia, sourcing these items is simple. Stores like Hair Supply Direct in Melbourne (locations in South Yarra and Ferntree Gully) and glamaCo in Queensland offer professional-quality products to both professionals and the public[8][9]. Prices are quite reasonable: tint bowls start at $3.95, professional dyes such as Cristalli Hair Colour Creme range from $6.00 to $11.00 for a 100ml tube, and a 1,000ml bottle of L'Oreal INOA Oxydant developer costs about $24.00[7][8]. For the best results, always pair your dye with the same brand of developer[8]. Once you've gathered your supplies, it’s time to set up your workspace. Preparing Your Work Area Choose a flat, spacious surface where you can spread out your human hair clip-in extensions without overlapping. Cover the area with tin foil to protect your furniture and keep the hair separated during the dye application. Proper lighting is essential for monitoring the process, and maintaining a warm room temperature will help the chemicals work effectively. Before laying out the extensions, detangle them gently using a wide-tooth comb. Always perform a strand test on a small, hidden section of the hair to check how it reacts to the dye. When applying the dye, cover the extensions with plastic wrap to keep the formula from drying out during the processing time (usually 20–40 minutes). Check the colour every 5–10 minutes by wiping a small section with a paper towel, then reapply dye if needed. With your workspace and extensions prepped, the next step is choosing the right developer for your desired result. Developer Volumes and Their Effects Developers, made from hydrogen peroxide, open the hair cuticle and activate the dye, allowing it to penetrate the hair shaft[11][12]. The "volume" of the developer indicates its strength - higher volumes lift more pigment but can cause more damage. Since extensions are often pre-processed, selecting the correct volume is crucial to preserving their quality. Developer Volume Peroxide % Primary Effect Best Use for Extensions 10 Volume 3% Deposits colour with little to no lift Toning, darkening, or refreshing colour 20 Volume 6% Lifts 1–2 levels; permanent deposit Grey coverage or moderate colour changes 30 Volume 9% Lifts 2–3 levels; faster oxidation Lightening darker extensions (use cautiously) 40 Volume 12% Lifts 4–8 levels; maximum lightening Avoid - too damaging for extensions "Higher volume doesn't just mean more power. It means faster oxidation and less control. And fast isn't always better" [13]. For extensions, 10 Volume is the safest option to deposit colour without risking damage. Use 20 Volume only when absolutely necessary. Avoid 30 and 40 Volume developers entirely, as they can compromise the integrity of the extensions. Always mix the dye and developer in plastic bowls and with plastic whisks, as metal tools can react with the chemicals and alter the colour unexpectedly[11]. Stick to the manufacturer's recommended mixing ratio (typically 1:1), and keep in mind that the mixture remains active for only 60 minutes[10][12]. How to Dye Hair Extensions Step-by-Step Step 1: Choosing the Right Shade Start by comparing the current colour of your extensions to your natural hair under natural daylight. Keep in mind that extensions often appear a bit lighter once they dry. Picking the right shade at this stage is crucial to achieving the look you want. Step 2: Preparing the Dye Mixture After selecting your shade, mix the dye right before application to ensure it stays consistent. Use a plastic bowl and a non-metallic tool to combine the dye and developer, sticking to the 1:1 ratio recommended by the manufacturer. For bold, fashion-forward colours, you can try the watercolour method. This involves mixing the dye with a small amount of conditioner, which helps deposit colour without altering the hair's natural shade - perfect for pre-lightened extensions. Step 3: Applying the Dye Before applying the dye, detangle the extensions and wash them with a sulphate-free shampoo. Divide the hair into smaller sections to ensure even coverage. Using a tint brush, apply the dye from the roots to the tips, following the direction of the hair to avoid frizz. Massage the dye into the strands with gloved fingers for complete saturation. If you're working with tape-ins or clip-ins, protect the adhesive strips or metal clips by covering them with blue painter's tape or plastic wrap. Wrap the dyed extensions in tin foil or plastic wrap to retain moisture during the processing time, which typically ranges from 20 to 40 minutes. Check the colour every 5–10 minutes by blotting a small section with a paper towel. If needed, reapply the dye to even out the shade. Step 4: Rinsing and Drying Rinse the extensions under lukewarm water using low pressure for 15–20 minutes, or until the water runs clear. Follow up with a protein-rich conditioner or a hydrating mask, leaving it on for 5–10 minutes. Rinse again with cool water to seal the cuticles. Gently press out excess water with a towel, avoiding any twisting or wringing that could damage the hair. Lay the extensions flat on a clean towel to air-dry, spreading them out to prevent tangling. Hold off on heat styling until the extensions are fully dry. Advanced Colouring Techniques Watercolour Method for Bright Colours The watercolour method, also known as a colour bath, is a creative way to achieve bold, vibrant colours on hair extensions without relying on harsh chemicals. This technique involves immersing extensions in hot water mixed with semi-permanent dye, ensuring even absorption. It's particularly effective on high-quality human hair extensions that can lift to a Level 10 or 613 shade, creating the ideal base for bold, fashion-forward hues [15][17]. "Colouring hair extensions, with this water colouring technique, is so much easier than any other method you ever tried." - DanYel Williams [16] To get started, remove any rubber bands, plastic ties, or labels from the extensions, as these can block the dye from adhering evenly. Use a large, non-metallic bowl filled with hot tap water (not boiling) and mix in semi-permanent dye with a plastic whisk, ensuring there are no clumps that could lead to uneven colouring. For intense shades, you might need two bottles of dye. Submerge the extensions completely, leaving them in the solution until the water turns clear - this signals the dye has been fully absorbed. The process is budget-friendly, costing as little as $6, and is a fantastic way to experiment with bold colours. To finish, apply a deep conditioner and allow the extensions to air-dry to maintain their quality [15][16]. From here, you can explore how balayage and ombre techniques can bring unique, eye-catching shades to your extensions. Balayage vs Ombre on Extensions Balayage and ombre are two popular techniques for adding dimension to hair extensions, each offering a distinct effect. Balayage involves freehand painting with sweeping motions, creating a soft, sun-kissed look without harsh lines. Ombre, on the other hand, features a more defined gradient, transitioning from darker roots to lighter ends for a striking contrast. "Balayage is a freehand painting technique (the word literally means 'to sweep'). Colour is hand-painted onto the hair, creating a diffused, natural blend with no harsh lines." - Monique McMahon, Que Colour [18] Feature Balayage Extensions Ombre Extensions Application Freehand painting in sweeping motions Structured, horizontal gradient Transition Soft, diffused, and blended Defined shift from dark to light Appearance Natural, sun-kissed dimension Bold, dramatic, two-toned contrast Regrowth Subtle with no harsh lines Noticeable where gradient begins Maintenance Minimal upkeep Low to moderate upkeep Both techniques work beautifully with premium human hair extensions, offering versatile options to suit different styles. Balayage is perfect for a subtle, natural look with lighter pieces framing the face, while ombre makes a bold, modern statement with its clear colour contrast. Extensions like Silkara wavy halo extensions, made from high-quality human hair, are ideal for these techniques, as they can handle the colouring process with ease. Dyeing Different Extension Styles Each type of hair extension requires specific care to achieve consistent and flawless colour. For clip-in extensions, dye each weft individually to ensure the colour penetrates evenly, including the hair near the lace or clips. With halo extensions, protect the transparent wire or band by wrapping it in plastic - if you're using the watercolour method, only submerge the hair portion. Ponytail extensions need extra attention around the wrap-around base to make sure the colour matches the main hair piece. For fringe and U-part extensions, carefully section the hair to ensure the top portion (the part closest to your face or parting) matches perfectly. Always use clips to section the hair before applying dye to avoid patchy results. Once dyed, allow all extension styles to air-dry to maintain vibrancy and prevent heat damage [15]. Common Mistakes and Maintenance Ensuring your extensions look their best means avoiding common missteps and committing to proper upkeep. Here's how to sidestep potential issues and maintain your extensions for lasting results. Preventing Damage from Over-Processing Even with careful preparation, certain mistakes can compromise your extensions. Steer clear of box dyes and high-volume developers (30–40), as they strip moisture and weaken hair. Stick with a 10-volume developer to minimise the risk of over-processing. Protect attachment points - like tape adhesives, clips, or keratin bonds - from dye. These can dissolve, oxidise, or slip if exposed. Wrapping these areas in tin foil or blue painter's tape can prevent any accidents. Avoid bleaching or lightening extensions that have already been coloured. This often leads to significant damage. If you're after a lighter shade, opt for virgin hair or choose a darker tone instead. Always perform a strand test beforehand, and apply dye from roots to tips to ensure even coverage and avoid frizz or patchiness [14]. Fixing Uneven Colour or Fading Uneven colouring often stems from inconsistent application or differences in hair porosity. Here are some ways to address and prevent such issues: Avoid spot-treating uneven areas, as this can make the contrast worse. Instead, use waves or curls to disguise uneven tones. If the extensions appear too dark, a sulphate-free clarifying shampoo can help lift excess pigment with one or two washes. For brassiness, purple or blue toning shampoos can neutralise unwanted tones. Use sparingly, as overuse can dull the extensions or even give them a greenish tint. When colour fades, professional toners or colour-depositing conditioners can revive vibrancy without the damage of permanent dyes. If extensions fade differently from your natural hair, root concealers or colour sprays can help blend the transition. Allow 7–10 days for the colour to settle before attempting any corrective measures [14]. These steps not only correct issues but also set the stage for effective post-dye care. Caring for Dyed Extensions Proper care after dyeing is crucial to maintaining both colour and quality. Rinse dyed extensions thoroughly with lukewarm water for 15–20 minutes to remove any residue. Use a sulphate-free, colour-safe shampoo and avoid rubbing the hair together to prevent tangling. Apply a sulphate-free leave-in conditioner from the mid-lengths to the ends. Once air-dried completely, store extensions in a cool, dark, and dry place to avoid heat damage and fading. When styling, use lower temperatures on your tools to slow colour loss. A UV-protectant hair mist can also help reduce fading caused by sun exposure [14]. Silkara Hair provides premium tools designed to care for extensions gently, helping you preserve their vibrancy and quality. If your extensions feel gummy or show signs of breakage after dyeing, stop any at-home treatments and consult a professional for advice. Conclusion This guide covers everything you need to know to achieve a seamless colour match for your hair extensions. The key to success lies in three main factors: selecting the right type of hair, applying the dye correctly, and taking care of your extensions afterward. Always opt for 100% virgin Remy human hair extensions - they're the only type that will reliably hold colour. Synthetic hair, no matter the effort, won’t absorb dye. When it comes to the dyeing process, precision is critical. Work through small sections of hair, applying the dye evenly from root to tip to avoid uneven patches or frizz. Use a professional-grade dye paired with a 10- or 20-volume developer, and allow the colour to process for 20–40 minutes. Once done, rinse thoroughly for 15–20 minutes until the water runs clear [14]. It's also safer to dye your extensions darker rather than lighter. If you're aiming for a lighter shade, starting with virgin hair is your best bet. Following these steps will help you achieve consistent, polished results. After dyeing, proper aftercare is essential. Use sulphate-free, colour-safe products, limit heat styling, and store your extensions in a cool, dark place to maintain their vibrancy. By following these tips, you'll enjoy stunning, salon-quality extensions right from the comfort of your home. FAQs Can I dye hair extensions lighter without bleach? If you're looking to lighten hair extensions without using bleach, natural methods can be a gentle option. One popular choice is lemon juice, which, when combined with sunlight, can subtly brighten the colour over time. These approaches are ideal for gradual lightening or creating soft highlights, but they typically result in only small changes. For those seeking more precise or noticeable results without risking damage, it’s worth consulting a professional stylist. They can use advanced colour-matching techniques to ensure your extensions blend seamlessly while maintaining a natural appearance. How do I match my extensions to my natural hair in daylight? To find extensions that blend perfectly with your natural hair, daylight is your best friend. Use natural, indirect light to get a true sense of your hair's colour and undertones. Snap a few clear photos of your hair from different angles in daylight - this will help you compare your shade accurately with colour charts. Start by identifying your base colour, like blonde or brunette, and figure out your undertones - are they warm, cool, or neutral? Opting for multi-tonal shades that mimic natural highlights and lowlights can make the extensions blend effortlessly for a seamless finish. Will dye ruin tape, clip, or bond attachments? Dyeing hair extensions can affect the strength of tape, clip, or bond attachments. While it’s technically possible to dye extensions while they’re attached, doing so can weaken their hold if not handled correctly. To reduce the risk of damage, use appropriate techniques and ensure the dyeing method suits the type of extensions you have. Be gentle with the attachments throughout the process and afterwards to help preserve their durability. Related Blog Posts Common Hair Extension Problems and Solutions 6 Ways to Match Hair Extensions to Natural Hair Color Factors Affecting Human Hair Extensions Durability How to Choose the Perfect Hair Extension Colour for Seamless Blending
Learn more
Ultimate Guide to Heat Styling Synthetic Extensions
Heat styling synthetic extensions can be tricky but manageable with the right approach. Synthetic fibres are sensitive to heat and can melt if not handled properly. Here's a quick summary of what you need to know: Check heat-safe labels: Only heat-resistant extensions can handle temperatures up to 180°C. Always test a small section first. Prep before styling: Clean, detangle, and use a heat protectant spray designed for synthetic hair. Use the right tools: Opt for styling tools with adjustable temperature settings and ceramic plates for even heat distribution. Cool and set: Synthetic fibres need to cool fully to hold their shape after styling. Post-styling care: Let extensions cool completely, apply a lightweight serum, and store them properly to maintain their shape. For curling, keep temperatures between 120°C and 180°C, and for straightening, stick to 120°C–150°C. Avoid titanium plates or high-heat blow dryers. If you're unsure, tools like heatless curlers are a safer alternative. Silkara Hair offers heat-resistant synthetic extensions and tools like the Hollow Detangling Brush (AUD $35.00) and Heatless Curler Set (AUD $39.00–$49.00), making styling easier while protecting your extensions. Always follow these steps to keep your synthetic extensions looking polished and lasting longer. Step-by-Step Guide to Heat Styling Synthetic Hair - Sage by Estetica sbb-itb-08feb2fPreparing Synthetic Extensions for Heat Styling Getting synthetic extensions ready for heat styling is essential to avoid damage and achieve great results. Before grabbing your styling tools, make sure your extensions can handle the heat, are clean and tangle-free, and are treated with the right protective products. Check for Heat-Safe Labels Not all synthetic extensions are designed to handle heat. Regular synthetic fibres can melt when exposed to styling tools, so it’s crucial to check for labels like "heat-resistant" or "heat-safe" from the manufacturer [1]. Look for clear statements on the packaging or product description, and steer clear of vague claims. Even with heat-friendly extensions, there are limits. Many are only safe up to 180°C, so it’s important to follow the manufacturer’s guidelines [1]. If you’re unsure, do a strand test on a small, hidden section of the extensions. Start with the lowest heat setting and check for melting, frizz, or any unusual changes in texture [3]. Clean and Detangle Extensions A clean foundation is key for successful heat styling. As Rakis on Collins suggests: "Always style extensions that are clean and free from styling product buildup" [1]. Leftover hairspray, oils, or serums can bake into synthetic fibres when heated, causing permanent damage and an undesirable finish. Make sure your extensions are completely dry before applying heat. Tara Hair warns: "Styling wet or damp extensions can lead to severe damage, as the heat can cause the moisture to turn into steam, which can weaken the hair strands" [3]. Detangling is another must. Use a wide-tooth comb or a brush specifically made for clip in hair extensions to gently remove knots and prevent breakage. Tara Hair explains: "This step is crucial to prevent breakage and ensure even heat distribution" [3]. Be gentle to avoid damaging the fibres or pulling on the tracks. Use Heat Protectant Products Even heat-safe extensions need extra care. Heat protectants act as a shield between the fibres and your styling tool, which is essential since synthetic hair is prone to melting and becoming brittle [3]. These products also help maintain smoothness, reduce frizz, and keep your extensions looking polished after styling. Opt for a heat protectant spray or serum designed for synthetic hair. Avoid products with harsh ingredients like alcohol or sulphates, as these can dry out the fibres and cause buildup. Apply an even layer of protectant across all sections of your extensions and let it dry completely before styling. As always, test your product on a small section to ensure compatibility. Once your extensions are prepped and protected, you’re ready to choose your heat styling tool. Best Tools for Heat Styling Synthetic Extensions Heat Styling Tools Comparison for Synthetic Extensions Once your synthetic extensions are prepped, the next step is picking the right heat styling tools. The key? Opt for tools with adjustable temperature settings. This is essential because synthetic fibres are sensitive to heat. Standard synthetic fibres can handle temperatures between 71°C and 85°C, while heat-friendly versions can go up to 160°C safely[4][6]. Curling Tools When it comes to curling synthetic extensions, tools with precise temperature control and ceramic barrels are your best bet. Ceramic barrels distribute heat evenly, reducing the risk of hot spots that could damage the fibres[7]. Look for curling irons or wands with digital displays to set the exact temperature you need[1]. If you're after natural-looking waves, clamp-free curling wands are a great choice. They minimise mechanical stress on the fibres while creating soft, flowing curls[8]. For a gentler option, consider heated rollers. These use indirect heat to create volume and soft curls, though they do take more time to set[7]. Straightening Tools Flat irons for synthetic extensions should feature ceramic plates and digital temperature controls. These ensure even heat distribution, giving you a smooth, straight look without causing frizz or melting the fibres[7]. Avoid tools with titanium plates - they heat up too quickly and can reach temperatures that are unsafe for synthetic hair[7]. Blow dryers require extra caution. High-heat settings can easily damage synthetic fibres. Instead, stick to the cool shot setting. Blow dryers with ionic technology are a good choice, as they reduce frizz by breaking down water molecules, allowing for effective drying at lower temperatures[7]. If possible, air-drying on a wig stand is the safest option for non-heat-resistant extensions[6]. Heat Styling Tools Comparison Table Tool Max Safe Temp Features Pros Cons Recommended Use Curling Iron/Wand 160°C (320°F) Adjustable digital display, ceramic barrel Fast results; defined curls Risk of melting if too hot Heat-resistant fibres only Flat Iron 160°C (320°F) Ceramic plates; even heat distribution Sleek, smooth finish May cause frizz if used improperly Straightening heat-safe hair Heated Rollers Moderate Gentle, indirect heat Long-lasting volume; less direct heat Bulky; takes time to set Creating soft waves Blow Dryer Cool setting Cool shot button, ionic technology Safe for drying after washing High heat causes immediate frizz Drying only (no heat) Heatless Curler Set N/A Satin/silk material Zero damage; works overnight Requires hours to set All synthetic types Step-by-Step Heat Styling Techniques Styling synthetic extensions requires a slightly different approach compared to human hair. The most important rule? The "cool and set" technique. Synthetic fibres need to cool completely in the desired shape to hold the style. If you let a curl drop while it’s still warm, it simply won’t stay. How to Curl Synthetic Extensions Start by testing a hidden strand to ensure your chosen temperature won’t damage or melt the fibres. Once you’re confident, clip your halo hair extensions onto a hair hanger at eye level - this makes the process much more manageable. Work with small sections, about 1 inch wide, to ensure even heat distribution. Set your curling iron to a temperature between 120°C and 180°C, depending on the type of synthetic fibre. Wrap one section around the curling iron barrel and hold it for 5 to 10 seconds - time this carefully. When removing the curl, gently slide it off the barrel into your palm, keeping its shape intact. Avoid letting the curl hang loose. Immediately secure the curl with a pin clip to lock in the shape. Let the curls cool completely for at least 10 minutes. Once cooled, remove the clips and use a wide-tooth comb to style. For soft waves, comb through 4 to 5 times; for tighter curls, brush very lightly to maintain their bounce. How to Straighten Synthetic Extensions Before straightening, make sure your extensions are completely dry and tangle-free. Use a wide-tooth comb or a loop brush, starting from the ends and working your way up. Apply a heat protectant spray made specifically for synthetic hair to minimise heat damage. Divide the extensions into small, manageable sections using clips. Set your flat iron to a temperature between 120°C and 150°C, and glide it smoothly along each section without pausing to avoid overheating. As Noelle Salon explains: Straightening will likely permanently remove the original curl or wave pattern from the extensions. So, be certain this is the look you want before you begin. Once straightened, place the extensions on a wig stand or hanger and allow them to cool completely before brushing or touching them. After cooling, apply a lightweight, synthetic-safe serum to the mid-lengths and ends to add shine and reduce frizz. Your straightened extensions are now ready for styling or storage. Maintaining Heat-Styled Synthetic Extensions Post-Styling Care Tips Taking care of your synthetic extensions after heat styling is key to keeping them looking their best. Start by letting them cool down completely before you brush, style, or store them. This step is non-negotiable - it helps lock in the style. For curls, leave them pinned, or for straightened sections, drape them over a hanger and wait until they're cold to the touch. Skipping this cooling phase can compromise the shape and longevity of your style. Once cooled, apply a lightweight serum or oil to the mid-lengths and ends to add shine and protect the fibres. Be selective with your products - steer clear of anything containing alcohol, sulphates, or harsh chemicals, as these can dry out the extensions and lead to tangling. When it’s time to store your extensions, use a hanger or a silk bag to help maintain their shape and avoid tangles. Before putting them away, make sure they’re clean, free of product buildup, and thoroughly detangled using a loop brush. How to Refresh Heat-Styled Extensions Reviving your heat-styled extensions doesn’t always require more heat. For curls, try foam rollers or braid damp sections overnight to bring them back to life. For straight extensions, a gentle pass with a wide-tooth comb and a touch of serum can do the trick. To protect your extensions, limit heat styling to just once or twice a week. When you do need to restyle, always conduct a patch test on a hidden section first. Keep your tools at or below 180°C [1] to minimise damage. Between styling sessions, proper storage and gentle detangling - from the ends upward - will go a long way in maintaining their quality and ensuring they last for months [3]. Silkara Hair Synthetic Extensions and Tools Why Choose Silkara Hair for Synthetic Extensions? Silkara Hair's synthetic extensions are made from advanced Japanese fibre that closely resembles the soft, natural feel of real hair. This fibre ensures smooth heat styling, offering a predictable response and blending effortlessly with your own hair for a polished appearance. The collection features a variety of options, including halo extensions (available in straight and wavy styles, ranging from 14 to 22 inches), clip-in sets (offered in 4-, 5-, and 7-piece configurations), versatile clip-in ponytails, and messy buns secured with elastic scrunchies. Many items, particularly wigs, are designed to be heat-resistant, making them suitable for daily styling. With a stellar 4.8/5-star rating from over 6,081 reviews and more than 1,000 Australian customers [9], Silkara Hair has a proven reputation for quality. Pricing begins at around AUD $46.00 for synthetic halo extensions, AUD $36.00 for clip-in ponytails, and AUD $43.00 for messy buns [10]. Silkara Hair also offers a Colour Match Guarantee and free shipping [9], making it easier to find your perfect match without added stress. In addition to their high-quality extensions, Silkara Hair provides specialised tools to ensure your styling experience is seamless and gentle. Styling Tools from Silkara Hair To complement their extensions, Silkara Hair offers a range of tools designed specifically for effective and gentle styling. The Hollow Detangling Brush (AUD $35.00) is crafted to detangle fibres without causing damage or pulling [5]. For those looking to avoid heat, the Heatless Curler Set (AUD $39.00–$49.00) is a fantastic option. It creates voluminous curls overnight without exposing your extensions to thermal stress, which helps maintain their longevity. With an impressive 4.87/5-star rating from 719 reviews [4], this set works best on slightly damp or dry synthetic extensions, delivering salon-level results from the comfort of your home. These tools not only make styling easier but also align with the recommended practices for maintaining synthetic extensions, ensuring they stay in top condition for longer. Conclusion Styling synthetic extensions with heat can be simple if you prepare properly. Start by confirming your extensions are heat-safe, ensure they’re clean and tangle-free, and always use a heat protectant before styling. Synthetic fibres are sensitive to high temperatures, so keep your tools below 180°C to avoid melting or causing irreversible damage [2]. Investing in high-quality styling tools is key. Look for equipment with adjustable temperature settings and ceramic or tourmaline plates, which provide even heat distribution and minimise the risk of damage [3][11]. After styling, let your extensions cool completely in their new shape - this cooling step is critical for locking in the style and ensuring it lasts. To maintain your styled look, focus on proper care after styling. Work in small sections, stick to low heat settings, and refresh your extensions between sessions to keep the synthetic fibres in good condition while achieving a polished, professional result. If you're looking for reliable products, Silkara Hair offers a range of heat-resistant synthetic extensions and styling essentials. Their Hollow Detangling Brush and Heatless Curler Set are designed for easy at-home use. With clip-in ponytails starting at AUD $36.00, free shipping, and a Colour Match Guarantee, they provide everything you need for a seamless, stylish transformation. FAQs How can I tell if my extensions are truly heat-safe? To determine if your extensions can handle heat, check for labels that mention they are heat-resistant or heat-friendly. Many good-quality synthetic extensions can tolerate temperatures up to 180°C, but it’s always smart to double-check the product information. Before styling, test on a hidden strand to ensure there’s no damage. If the extensions aren’t clearly marked as heat-resistant, steer clear of heat tools to avoid permanently damaging the fibres. What should I do if my synthetic extensions get frizzy after heat styling? If your synthetic extensions are looking frizzy, the first thing to do is check whether they’re heat-resistant. Extensions that aren’t heat-resistant can get damaged by heat, so it’s best to skip any heat styling and use a wide-tooth comb to gently detangle them. You can also try anti-frizz products specifically made for synthetic hair to smooth things out. If your extensions are heat-resistant, stick to a low heat setting when styling. Don’t forget to apply a heat protectant first - this can help reduce frizz and protect the fibres from further damage. How do I restyle curls without using heat again? To refresh curls without using heat, opt for gentle, heat-free techniques like foam rollers, bendy rollers, or perm rods. You can also use pin curl clips to shape your curls overnight or over a few hours. If you're working with heat-resistant synthetic extensions, low-temperature steam is a safe way to revive curls. Just make sure to confirm that your extensions can handle these methods to avoid any damage. Related Blog Posts Heatless Waves vs. Heat Curls: Pros and Cons Synthetic vs. Human Hair Extensions in Summer How to Style Heat-Resistant Synthetic Hair Safely 5 Everyday Hairstyles You Can Do in Minutes with Halo Extensions
Learn more
Clip-In vs Tape-In Extensions
When choosing between clip-in and tape-in hair extensions, it boils down to how often you wear them, your hair type, and your budget. Here's the quick breakdown: Clip-in extensions are temporary, easy to apply at home, and cost-effective, ranging from A$200–A$600. They're ideal for occasional use but need daily removal. Tape-in extensions are semi-permanent, professionally applied, and last 6–8 weeks. They cost more upfront (A$600–A$1,500) and require regular maintenance, making them better for everyday wear. Quick Comparison Factor Clip-In Extensions Tape-In Extensions Attachment Clips Adhesive strips Application DIY (5–30 mins) Professional (60–90 mins) Wear Duration Temporary (daily removal) Semi-permanent (6–8 weeks) Cost A$200–A$600+ A$600–A$1,500 (includes install) Maintenance Minimal, at home Salon visits every 6–8 weeks Hair Type Best for thicker hair Works well with fine hair Choose clip-ins for flexibility and affordability. Opt for tape-ins if you want a long-term, low-effort solution. Your lifestyle and budget are key in making the right choice. Clip-In vs Tape-In Hair Extensions Comparison Chart Clip-in VS Tape-in Extensions / Q&A sbb-itb-08feb2fHow Clip-In Extensions Work Clip-in extensions are made of hair wefts attached to small metal pressure clips that snap open and shut. These clips allow you to secure the extensions to your natural hair without needing adhesives, heat, or chemicals [4][6]. Their simple design makes them perfect for an at-home application - no salon visit required. Application Process Applying clip-ins is simple and usually takes just 5 to 10 minutes once you get the hang of it [4]. You'll need a few tools: a mirror, a pintail comb for sectioning, a detangling brush, and some sectioning clips to hold your hair in place [6]. Start with clean, dry hair. If your hair is fine, a bit of dry shampoo or texturising spray can help the clips stay in place [6]. Use the pintail comb to create a horizontal part about an inch above the nape of your neck. Then, gently tease the roots at that section to create a secure base for the clips [4][6]. Snap the clips open, press them into the teased roots, and close them firmly. Work your way upward, starting at the nape and moving toward the crown. Use the wider wefts for the middle sections of your head and smaller wefts for areas near the temples [6]. Once all the wefts are secured, brush through your hair and style it - curling or waving can help blend the extensions seamlessly [6]. "Clip-ins are essentially do it yourself extensions. Apply them in minutes from home – perfect for busy schedules or last-minute events." - Heather Collier, Cliphair [6] After application, it's important to remove them properly at the end of the day to keep your hair healthy. Wear Time and Removal Clip-in extensions are meant for temporary use, typically worn for 12 to 16 hours at a time [4]. They should always be removed before sleeping, showering, or swimming to prevent tangling and damage [4][5]. To take them out, unclip each weft starting from the bottom and work your way up. Once removed, store the wefts flat or gently coiled in a clean, dry place [6]. This daily removal routine makes clip-ins one of the gentlest extension options available, as it allows your scalp to rest from any tension [5]. With proper care, a high-quality set made from 100% Remy human hair can last anywhere from 1 to 3 years [4]. How Tape-In Extensions Work Tape-in extensions are applied using thin wefts pre-coated with a medical-grade adhesive. Unlike temporary options like clip-ins, these extensions are semi-permanent, designed to stay in place for several weeks at a time. Professional Application Required Tape-in extensions must be installed by a professional stylist. The process involves the "sandwich method", where a small section of your natural hair is placed between two adhesive-coated wefts. Each weft is about 4 cm wide and weighs 2 grams, evenly distributing the weight to minimise strain on your hair follicles. The stylist positions the wefts approximately 0.6 cm away from the scalp. This spacing allows for natural movement while reducing tension on the hair roots. Once the hair is sandwiched between the adhesive strips, firm pressure is applied for 5–10 seconds to secure the bond. Some stylists also use a flat iron on low heat to reinforce the adhesive. The entire application process for a full head typically takes around one hour [8][9]. "The adhesive used in professional tape extensions is specifically formulated for hair applications, utilising cyanoacrylate-based compounds similar to those approved by medical authorities for wound closure." – Jadore Hair Supplies [9] To ensure the adhesive sets properly, it's recommended to avoid washing your hair for 48 to 72 hours after installation. Duration and Maintenance Tape-in extensions are designed for daily activities, including sleeping, showering, exercising, and even swimming. They usually last 6 to 8 weeks before requiring maintenance [5]. As your natural hair grows, the extensions move further from the scalp, which can lead to tangling or matting if not maintained. Maintenance involves a professional removing the extensions using a specialised alcohol- or oil-based solution. The old adhesive is cleaned off, new tape tabs are applied, and the wefts are repositioned closer to the roots [10]. In Australia, these appointments typically cost between A$200 and A$365. The upside? High-quality Remy human hair tape-ins can be reused 2 to 6 times, lasting 6 to 12 months with proper care [9]. For at-home care, stick to sulphate-free and oil-free products around the adhesive bonds. Oils and harsh chemicals can weaken the tape, causing the extensions to slip or fall out [9]. Next, we’ll compare these features with the application and upkeep of clip-in extensions. Clip-In vs Tape-In: Direct Comparison Now that we've gone through how each type of extension works, let's break down the key differences. These distinctions can influence both your daily routine and your budget. Clip-ins are perfect for DIY enthusiasts. You can apply them yourself in about 5 to 30 minutes from the comfort of your home - no professional help needed [2]. On the other hand, tape-ins require a salon visit, with installation taking around 60 to 90 minutes by a professional [3]. The costs also vary significantly. Clip-ins typically cost between A$200 and A$600+ upfront, with no ongoing salon expenses [2]. Tape-ins, however, start at A$600 and can go up to A$1,500, which includes both the hair and professional installation. Keep in mind, tape-ins also require maintenance every 6 to 8 weeks, which adds to the overall cost [3]. This comparison underlines the main differences that could affect your lifestyle and financial commitment. Comparison Table Here’s a quick summary of the key differences between clip-in and tape-in extensions: Factor Clip-In Extensions Tape-In Extensions Attachment Method Pressure-sensitive clips Medical-grade adhesive strips Application Time 5–30 minutes (DIY) 60–90 minutes (Professional) Wear Duration Temporary (Daily removal) Semi-permanent (6–8 weeks) Maintenance Needs DIY cleaning & storage Professional refits & sulphate‑free care Cost (AUD) A$200 – A$600+ A$600 – A$1,500 (includes install) Damage Risk Minimal (if removed daily) Low (if professionally maintained) Reusability Up to 12 months 6–12 months (with refits) With proper daily care, clip-ins can last beyond 12 months. Ultimately, your lifestyle and how often you plan to use extensions will help you decide which option works best for you. Clip-In Extensions: Pros and Cons Clip-in extensions are a favourite for anyone who loves to switch up their hairstyle without a big commitment. They offer a lot of flexibility, but like any beauty choice, they come with their own set of advantages and challenges. Here's a closer look to help you decide if they're right for you. Benefits Clip-in extensions are all about convenience and versatility, and they come with some standout perks: Quick and easy application: You can apply them yourself in just 5–15 minutes - no salon visit needed. Plus, they’re budget-friendly, costing around A$100–A$300 upfront [4]. No long-term commitment: Want to try a new length or colour? Clip-ins let you experiment without the hassle of chemicals or permanent changes [4]. Gentle on your hair: Since they don’t rely on adhesives or heat, clip-ins are less likely to cause damage. High-quality options, like 100% Remy hair, can last 1–3 years with proper care - washing every 15–20 wears and avoiding regular salon maintenance [4]. "Clip-ins are the go-to if you want flexibility above everything else. They're perfect for someone who doesn't want extensions every day but loves having the option when they want extra volume or length." – Priyanka Swamy, Founder, Perfect Locks [4] Drawbacks Despite their flexibility, clip-in extensions also have a few downsides to consider: Daily removal: Unlike permanent extensions, clip-ins need to be taken out before sleeping, showering, or swimming [4]. Stability issues: They’re not the most secure option during intense activities. Whether you’re hitting the gym or braving a windy day, clip-ins can shift or slip. If your hair is smooth, you might need to backcomb or use a texturising product for extra grip [4]. Visibility concerns: If you have fine or thin hair, the clips might be noticeable, especially in updos or high ponytails. Plus, repeatedly clipping them in the same spot can cause tension-related thinning over time [4]. Tape-In Extensions: Pros and Cons Tape-in extensions provide a semi-permanent solution for adding length and volume to your hair, but they do come with their own set of requirements, including professional application and consistent upkeep. Benefits Tape-in extensions offer a sleek, low-maintenance option for enhancing your hair. Their flat wefts lie close to the scalp, making them blend effortlessly with natural hair for a nearly undetectable finish. Plus, they distribute weight evenly, which helps minimise strain on your scalp. The application process is relatively quick, taking about 45–60 minutes for a professional to complete. Once installed, they can last up to 6–8 weeks before needing adjustment. If you opt for high-quality Remy tape-ins and care for them properly, they can be reused for 6–12 months. "Tape-in extensions are known for looking the most natural. They lie flat against the scalp and blend seamlessly with your natural hair." – Cliphair [5] These features make tape-ins a popular choice for those looking for a natural, polished look. Drawbacks Despite their benefits, tape-in extensions come with some challenges. First, they demand regular salon visits for maintenance. Every 6–8 weeks, you'll need to have them professionally removed and reapplied, a process that involves medical-grade solvents and can be time-consuming. Additionally, there are limitations on how you can care for and style your hair. Sulphate-free shampoos are a must, and you’ll need to avoid applying oils, heavy conditioners, or serums near the tape bonds as these can weaken the adhesive. Heat styling tools also require caution - direct heat can damage the tapes. Certain hairstyles, like high ponytails or intricate updos, may reveal the flat tabs, which can detract from the seamless look. While tape-ins offer a natural appearance and convenience, their upkeep and styling restrictions might not suit everyone. Choosing Between Clip-In and Tape-In Extensions Your decision will hinge on how often you plan to use extensions, your hair type, and your budget. Let's break it down to help you figure out which option fits your needs. Lifestyle and Usage Frequency Your daily habits play a big role in choosing the right extensions. Clip-ins are perfect for occasional use - think weddings, a night out, or whenever you want a quick style upgrade. They’re easy to install on your own, but you’ll need to remove them before bed, showering, or swimming to avoid tangling or damage [2][5]. Tape-ins, on the other hand, are ideal for those seeking a more long-term solution. Once applied by a professional, they stay in place for 6–8 weeks, making them great for daily wear. They’re secure enough for active lifestyles, whether you’re hitting the gym or taking a dip in the pool [2][5]. Essentially, clip-ins are the go-to for short-term use, while tape-ins cater to those wanting a consistent, everyday look. Next, let’s see how each option works with different hair types. Hair Type Compatibility If you have fine or thin hair, tape-ins are often the better choice. Their flat design sits close to the scalp, distributing weight evenly to minimise strain, and they’re nearly invisible. Clip-ins, however, might feel bulky on finer hair and could put undue pressure on delicate roots [12][14]. For medium to thick hair, both clip-ins and tape-ins are viable. Clip-ins, in particular, blend seamlessly with thicker hair, as it easily hides the clips [11][12]. Now that you’ve matched the extensions to your hair type, it’s time to weigh up the costs. Cost Comparison Clip-ins are typically more affordable upfront and don’t require salon visits. At Silkara Hair, premium clip-in human hair extensions start at approximately $132 AUD for 10–16 inch lengths, while 18–24 inch lengths are priced from $239 AUD [7]. With proper care, these extensions can last a year or more [2]. Tape-ins, however, involve both initial and ongoing costs. Silkara Hair’s premium Remy tape-in extensions start at around $133 AUD for a 20-piece set, while 40-piece sets begin at $225 AUD [13]. You’ll also need to factor in the cost of professional application and maintenance every 6–8 weeks. While the extensions can be reused for 6–12 months with good care, the recurring salon visits add to the overall expense [1][5]. For those on a budget or needing extensions only occasionally, clip-ins are a cost-effective choice. But if you’re looking for a natural, everyday style and are okay with regular upkeep, tape-ins may offer better long-term value per day of wear [2][5]. Plus, with Silkara Hair’s extensive selection of both clip-in and tape-in extensions - rated 4.8/5 stars by over 1,000 Australian women - you’re sure to find a high-quality option that fits your lifestyle [7][13]. Conclusion When deciding between clip-in and tape-in extensions, it boils down to three key considerations: how often you plan to wear them, your hair type, and your budget. Clip-in extensions are perfect for occasional use and can be applied at home in just 5–15 minutes. With an upfront cost of $100–$300 and no ongoing salon appointments, they’re a budget-friendly option. They tend to work best with medium to thick hair and, with proper care, can last anywhere from 1 to 3 years [4]. On the other hand, tape-in extensions require professional installation, which usually takes 45–90 minutes. They need to be refitted every 6–8 weeks, making them a higher-maintenance choice. These extensions are ideal for fine or thin hair, as they lie flat against the scalp and distribute weight evenly. However, the ongoing costs can add up - expect to spend $75–$150 every 6–8 weeks, with an annual cost ranging from $800 to $1,500 [4]. Your decision ultimately depends on your lifestyle and how much upkeep you're willing to manage. If you want a polished, seamless look with minimal daily effort, tape-ins are a great option. But if you’re looking for a temporary, cost-effective solution for special occasions, clip-ins are the way to go [2]. FAQs Which option looks more natural in real life? Tape-in extensions offer a sleek and natural finish, as they sit flat against the scalp and blend effortlessly with your natural hair. This makes them a great option if you're after a realistic, long-lasting look. On the other hand, clip-ins are known for their versatility and ease of removal, but the clips can sometimes be more visible, especially if not blended properly. For daily use, tape-ins tend to be the preferred option. Can I exercise and swim with these extensions? Yes, you can absolutely exercise and swim with hair extensions, but taking care of them is key to keeping them in good shape. If you're heading into chlorinated or salt water, try to protect your extensions - wearing a swim cap can help. After swimming, rinse your hair thoroughly and follow up with a good conditioner to keep it hydrated. Also, avoid leaving your hair exposed to the sun for too long, as it can cause dryness. For clip-in or tape-in extensions, make sure they’re securely fastened before any activities. Limit their exposure to harsh chemicals or excessive sunlight to keep them looking their best. With a little extra attention, you can enjoy your favourite activities without worrying about your extensions. How do I choose the right colour and length? To pick the right colour and length for your hair extensions, start by matching the extension colour to your natural hair. If you're after a softer, more blended look, going for a slightly lighter shade can work wonders. When it comes to length, think about your current hair and the style you’re aiming for - extensions usually come in lengths between 18 and 22 inches. Many brands, such as Silkara Hair, even provide colour match guarantees to ensure you find the perfect shade. Related Blog Posts Hair Extension FAQ: Top Questions Answered Clip-Ins vs. Tape-Ins: Mistakes to Avoid Halo Hair Extensions vs. Clip-In Extensions: Which One Is Right for You? Clip-In Hair Extensions: Instant Transformation You Can Do at Home
Learn more
5 Benefits of U-Part Extensions for Natural Hair
U-Part extensions offer a simple and effective way to style your natural hair. These extensions feature a U-shaped opening, allowing you to blend a small section of your hair for a natural look. They’re easy to apply, protect your hair, and provide various styling options - all without the need for glue or tight braiding. Here’s a quick summary of their key advantages: Natural Blend: The U-shaped design lets your hair seamlessly integrate with the extensions, creating a realistic appearance. Hair Protection: Most of your hair stays tucked away, reducing heat damage and daily styling stress. Scalp Access: Unlike full wigs, they allow airflow and make scalp care simple. Styling Flexibility: Choose from different textures and styles, including straight, curly, or wavy looks. Quick Application: Easy to clip in and remove, saving time compared to other extension types. These extensions are a great option for anyone looking to enhance their hairstyle while maintaining healthy hair growth. With proper care, they can last over a year, making them a cost-effective choice for both beginners and experienced users. 5 Key Benefits of U-Part Hair Extensions Infographic THIS MY NATURAL HAIR?😱PROTECTIVE STYLING USING KINKY STRAIGHT U-PART WIG ft MERCY'S HAIR EXTENSIONS sbb-itb-08feb2f1. Blends Naturally with Your Hair U-Part extensions are designed with a U-shaped opening at the crown, allowing you to pull a small section of your natural hair through. This leave-out seamlessly conceals the edge of the extension, giving the illusion that the hair is growing directly from your scalp. As Private Label explains: "A U-Part wig leaves a portion of your scalp and hair exposed, which makes the transition between your natural hair and the wig undetectable." [4] To achieve a flawless blend, it’s important to match the extension to your hair type and texture. Extensions made from 100% human hair offer flexibility - they can be dyed, heat-styled, and treated just like your own hair. By using tools like a flat iron or curling wand on both your natural hair and the extensions, you can create consistent curls or waves for a cohesive look. Colour matching is equally critical. For example, honey-toned extensions pair beautifully with light brown hair, while darker shades enhance richer tones. As Private Label highlights: "The colour texture of your natural hair and the wig hair should be coherent to achieve that natural and beautiful look." [5] Before installing the extensions, take a moment to prepare your natural hair. Washing and conditioning it ensures it looks vibrant and healthy, avoiding any dullness or tangles that might stand out against the extensions. Braiding your hair into small, flat cornrows allows the U-part to sit snugly against your scalp. These steps not only create a polished, seamless appearance but also help protect your natural hair in the process. 2. Protects Your Natural Hair U-Part extensions are a great way to shield your natural hair from potential damage. Most of your hair stays safely braided underneath the extension, leaving only a small section exposed through the U-shaped opening. This means you're only applying heat to a small part of your hair rather than your entire head. As Private Label explains: "You only have to subject some of your natural hair to heat tools while the rest remains safe under the wig." [4] This thoughtful design not only limits heat exposure but also reduces the need for constant styling, creating a healthier environment for your natural hair. Less daily manipulation helps your hair thrive, while the absence of the tight tension found in some traditional styles reduces the risk of traction alopecia and protects your hairline. SL Raw Virgin Hair highlights the benefits: "Protective style that can promote natural hair growth by reducing daily manipulation and damage." [3] To get the most out of this protective style, make sure to use a heat protectant on the leave-out section before styling with hot tools. Keep the temperature between 71–85°C to avoid heat damage to both your natural hair and the extensions. Additionally, maintain a healthy scalp by washing and conditioning your natural hair every two to three weeks, even while wearing the extensions. This routine keeps your hair and scalp in good condition, promoting overall hair health. 3. Allows Easy Scalp Access U-Part extensions not only blend seamlessly with your natural hair, but they also make caring for your scalp incredibly convenient. With their U-shaped opening, U-Part extensions expose part of your scalp, unlike full wigs that completely cover it. This design lets you easily apply oils, massage your scalp, and even wash your hair without needing to remove the extensions. Traditional wigs can trap sweat and bacteria, often causing irritation. U-Part extensions, on the other hand, allow airflow, keeping your scalp cool and reducing the risk of buildup. As Private Label explains: "Regular wigs also lead to a buildup of sweat and bacteria on your scalp, leading to hair loss and hair damage. The U-Part wig keeps part of your scalp and hairline exposed... This thoughtful design ensures that your natural hair stays protected and healthy." [4] This exposed area also encourages better hair care habits. You can easily apply your favourite scalp oils and give your scalp a soothing massage to help improve blood circulation. For the best results, stick to sulphate-free products to maintain the health of both your natural hair and the extensions. At Silkara Hair, our high-quality U-Part extensions are crafted to support your hair's natural growth and health. 4. Offers Multiple Styling Options U-Part extensions are a quick way to switch up your look, whether you're aiming for sleek straight hair or playful curls. With these extensions, you can customise your part - choose a middle or side part - by deciding where to pull your natural hair through the U-shaped opening. They come in a variety of textures, including straight, body wave, deep wave, beach wave, kinky curly, and coily. This means you can either match your natural hair or experiment with something entirely new. As Curl Genetics highlights: "U-part wigs offer incredible styling flexibility. You can part your wig in various ways, create different hairstyles, and even use hot styling tools to curl or straighten it." [6] The flexibility doesn’t stop there. You can style your hair in high ponytails, low buns, or elegant updos. Whether you prefer heatless styles like braids or want to use tools like a flat iron or curling wand, these extensions adapt to your preferences. They make it easy to keep your look as dynamic as your schedule. U-Part extensions also simplify your daily routine. Go for a polished, straight look for work or soft waves for an evening out. The beauty of these extensions is that you’re not limited to one style - you can effortlessly switch things up from day to night without removing them. At Silkara Hair, our U-Part extensions are crafted to deliver salon-quality results while letting you express your unique style every single day. 5. Easy to Apply and Remove U-Part extensions are perfect for anyone looking to transform their hair quickly and effortlessly. Thanks to their clip-in design, you can forget about glue, tape, or pricey salon visits. All you need to do is flatten your natural hair - cornrows work wonderfully - position the U-shaped opening to match your natural part, and snap the clips into place. The whole process takes just 10 to 30 minutes at home, even if you're completely new to extensions [7][1][7][2]. The clips are designed to attach securely to your natural hair or braids, providing a firm hold without causing damage. Many U-Part extensions also come with adjustable straps in the cap, allowing you to customise the fit for your head. This ensures the extensions stay in place all day, making them a fantastic option for first-time users who want professional-looking results without the complexity of lace customisation or bonding techniques [4][2]. Taking them off is just as simple. When you're done for the day, unclip each fastener, and the entire extension comes off in seconds. There's no sticky residue, no damage, and your scalp gets a well-deserved break. As Full Shine Help Center puts it: "U-shaped half wigs are a game-changer for adding instant volume and length while maintaining a natural hairline. Perfect for both beginners and styling pros, these clip-in extensions blend seamlessly with your natural hair." [8] At Silkara Hair, we design our U-Part extensions with ease of use in mind. Whether you're in a rush or experimenting with a fresh look, you'll find the process quick, simple, and stress-free. Conclusion U-Part extensions are a fantastic option for achieving a natural look while protecting your hair. They offer a seamless blend, minimise stress on your hairline - helping to prevent traction alopecia - and are incredibly easy to style and apply. This makes them a great choice for anyone looking to maintain healthy hair growth without compromising on versatility. Thanks to their open design, U-Part extensions allow your scalp to breathe, reducing the chances of sweat and bacteria build-up. Whether you're going for a sleek updo, a high ponytail, or a casual side part, these extensions let you switch up your style effortlessly while keeping things natural. When cared for properly - such as washing them after every six wears and always applying a heat protectant - high-quality human hair U-Part extensions can last up to five years[4]. If you're ready to refresh your look while keeping your natural hair protected, check out the premium selection of U-Part extensions available at Silkara Hair. They're designed to complement your lifestyle and elevate your style with ease. FAQs What makes U-Part extensions different from other types of hair extensions? U-Part extensions strike a perfect middle ground between full wigs and clip-in extensions, offering a flexible option for those with natural hair. The U-shaped opening in these extensions allows you to seamlessly blend your own hair with the added strands, creating a natural and polished appearance. At the same time, your natural hair is tucked safely under the cap, shielding it from heat and chemical exposure. This makes U-Part extensions an excellent choice for protective styling. Unlike clip-in extensions, which are quick to apply but sit directly on top of your hair, U-Part extensions offer a more secure fit and a longer-lasting, natural finish. While halo extensions are simple to use and convenient, they don't provide the same level of custom blending that U-Part extensions do. This makes U-Part extensions a standout option for achieving a personalised and polished look. If you're after added volume, length, and styling versatility without compromising the health of your natural hair, U-Part extensions are a fantastic solution. What’s the best way to care for U-Part extensions? To keep your U-Part extensions looking their best and lasting longer, stick to a straightforward care routine. Wash them every 1–2 weeks with a gentle, sulphate-free shampoo, and follow up with a moisturising conditioner. Make sure to rinse thoroughly, then gently squeeze out any excess water - avoid twisting or wringing the hair. After washing, apply a light hair oil or a leave-in conditioner to lock in moisture. Use a wide-tooth comb to detangle, starting from the ends and working your way up to minimise breakage. Limit heat styling to protect the hair fibres, and when you're not wearing the extensions, store them in a breathable bag or on a mannequin head to prevent tangling. For daily maintenance, brush the extensions gently before and after styling. Keep your scalp clean by washing your natural hair separately, and avoid harsh chemicals or tugging excessively on the clips. A light mist of silicone-free spray can also restore shine without making the hair feel heavy. These simple steps will help your U-Part extensions blend effortlessly and maintain their premium quality, just as intended by Silkara Hair. Can I use heat styling tools on U-Part extensions? Yes, you can use heat tools to style U-Part extensions, provided they’re made from 100% human hair. To keep the extensions in good condition, always use a heat protectant before styling. Be cautious to avoid applying heat directly to bonding glue, lace, or silk bases, as this can cause damage. Stick to moderate temperature settings for the best results and to extend the life of your extensions. Related Blog Posts Hair Extension FAQ: Top Questions Answered Factors Affecting Human Hair Extensions Durability Who Should Use U-Part Extensions? Clip-In Hair Extensions: Instant Transformation You Can Do at Home
Learn more