


Mix & Match 2 → 10% Off
Mix & Match 3 → 15% Of
Mix & Match 4 → 20% Off
Skip Expensive Salon Visits Get the Same Look at Home
Achieve fuller, longer hair in minutes without spending hundreds at the salon.


Loved by Thousands of Women
Our most popular extensions for instant volume, length, and confidence.


Type: Hair Toppers
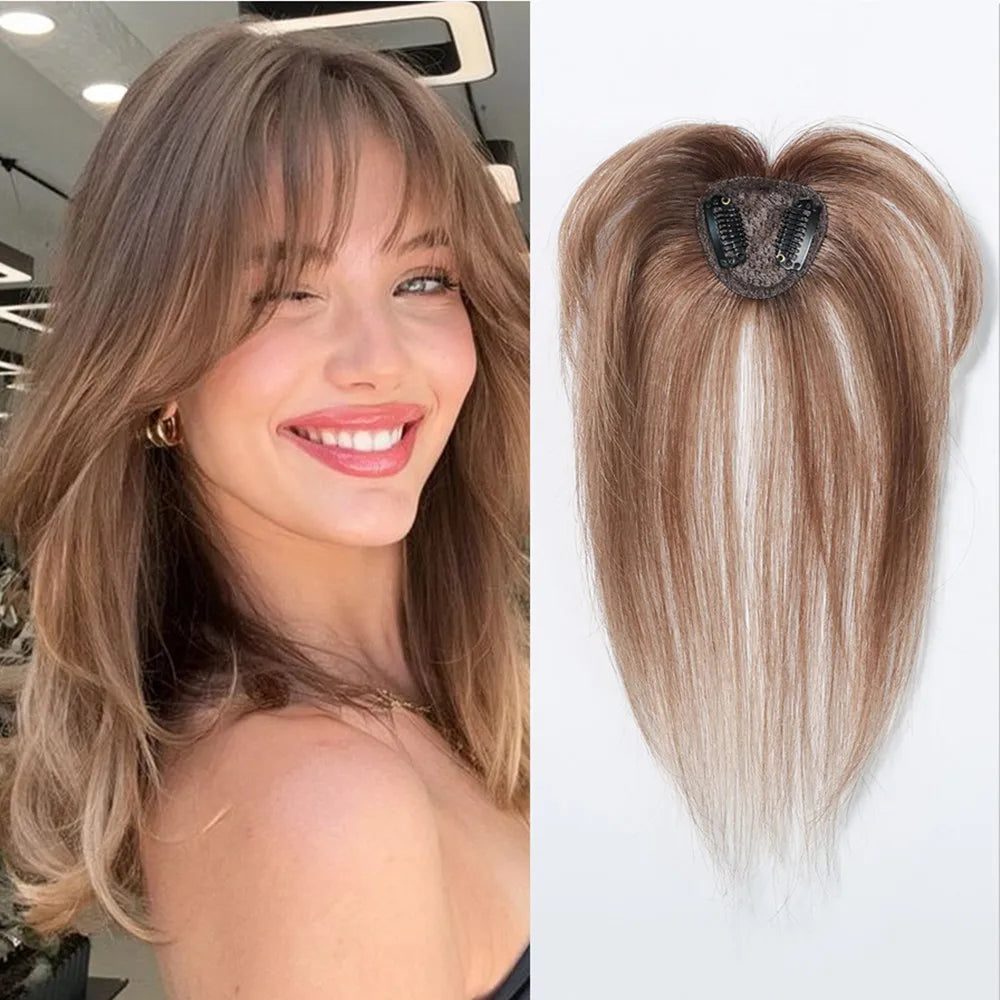
10” Human Hair Topper with Bangs – Silk Base Short Bob (6.5×6.5”)


Type: Hair Toppers
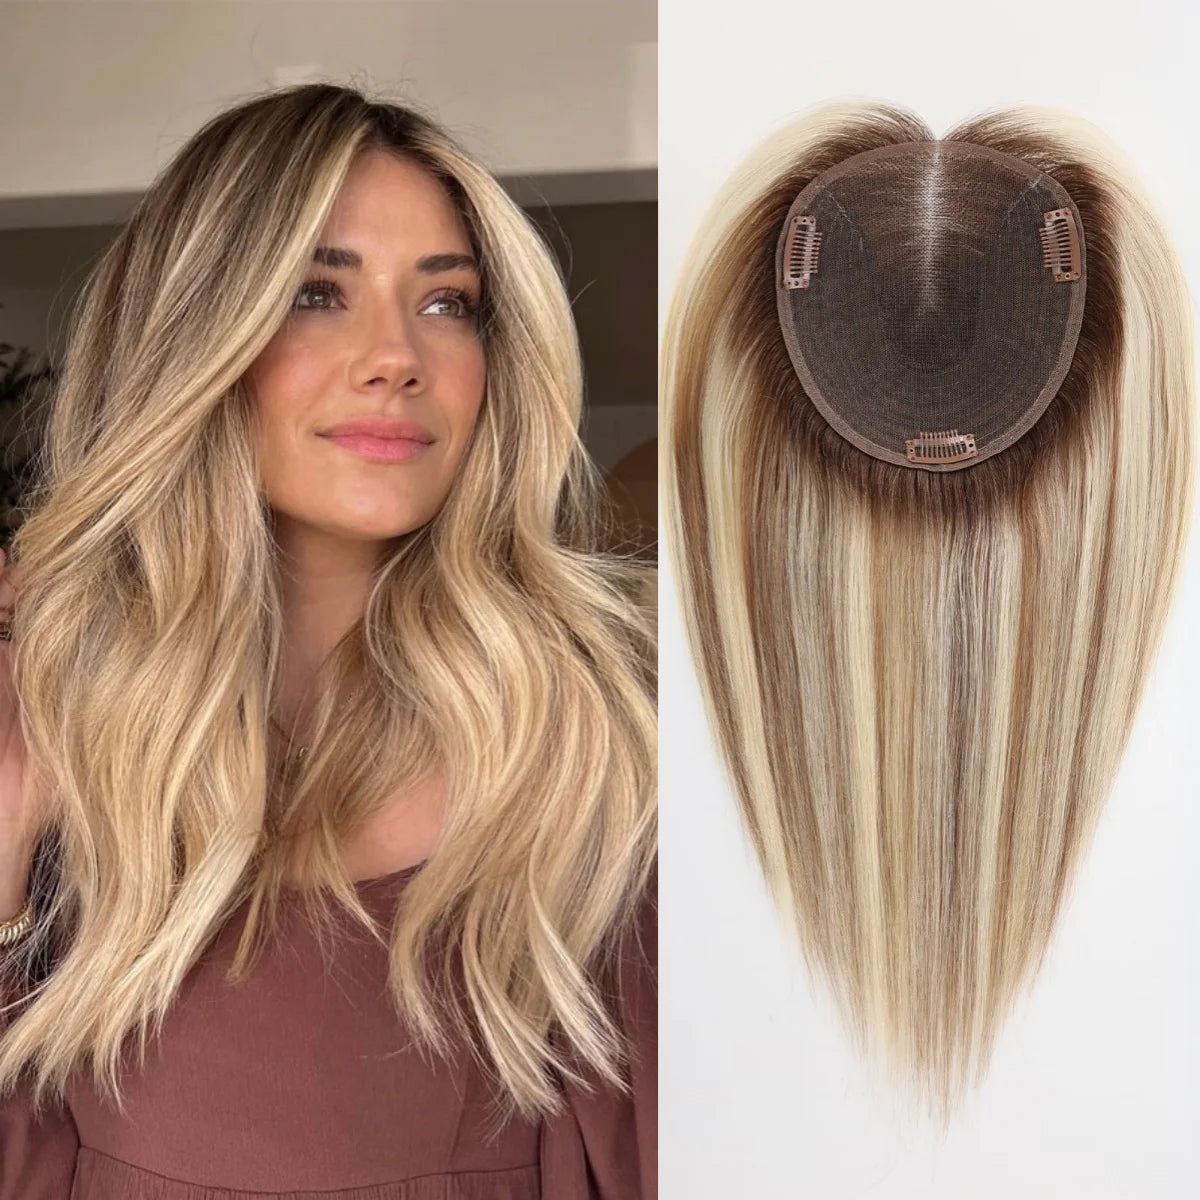
Remy Human Hair Topper with Bangs – Clip-In Silk Base Hairpiece for Thinning Hair | Silkara™

Natural-Looking Hair That Blends Seamlessly
Designed to move, feel, and look just like your real hair so no one can tell the difference.
At Silkara, we believe great hair should feel as natural as it looks. Every extension in our collection is crafted from 100% Remy Human Hair — the same direction, same cuticle, same quality from root to tip. That means no tangling, no matting, and a seamless blend that even your closest friends won't notice.

100% Remy Human Hair
Same cuticle direction from root to tip — no tangling, no shedding, just natural movement every day.

40+ Shades Matched to You
Our free Colour Match quiz finds your exact shade so your extensions blend seamlessly — every time.

Australian Women, Australian Standards
Designed and tested for Australian hair types, humidity, and lifestyles — not made for someone else's market.
Wear It Today, Love It Tomorrow
Same-day dispatch before 12PM. Fast tracked delivery. Easy 14-day returns. We make the whole experience effortless.

"Watch Real Women Transform Their Hair With Silkara."
See how easy it is to go from flat to full, thin to thick instantly.
Get the Look
Shop the exact styles worn by our customers and recreate the look at home.


Genius Weft Human Hair Extensions – Seamless Remy Balayage Weft (Sew-In)

Machine Weft Human Hair Extensions – Straight Remy Hair Weaving Bundles 100g

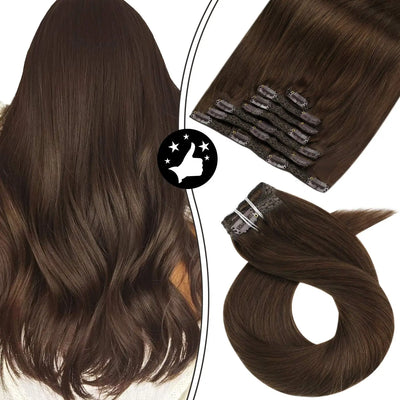
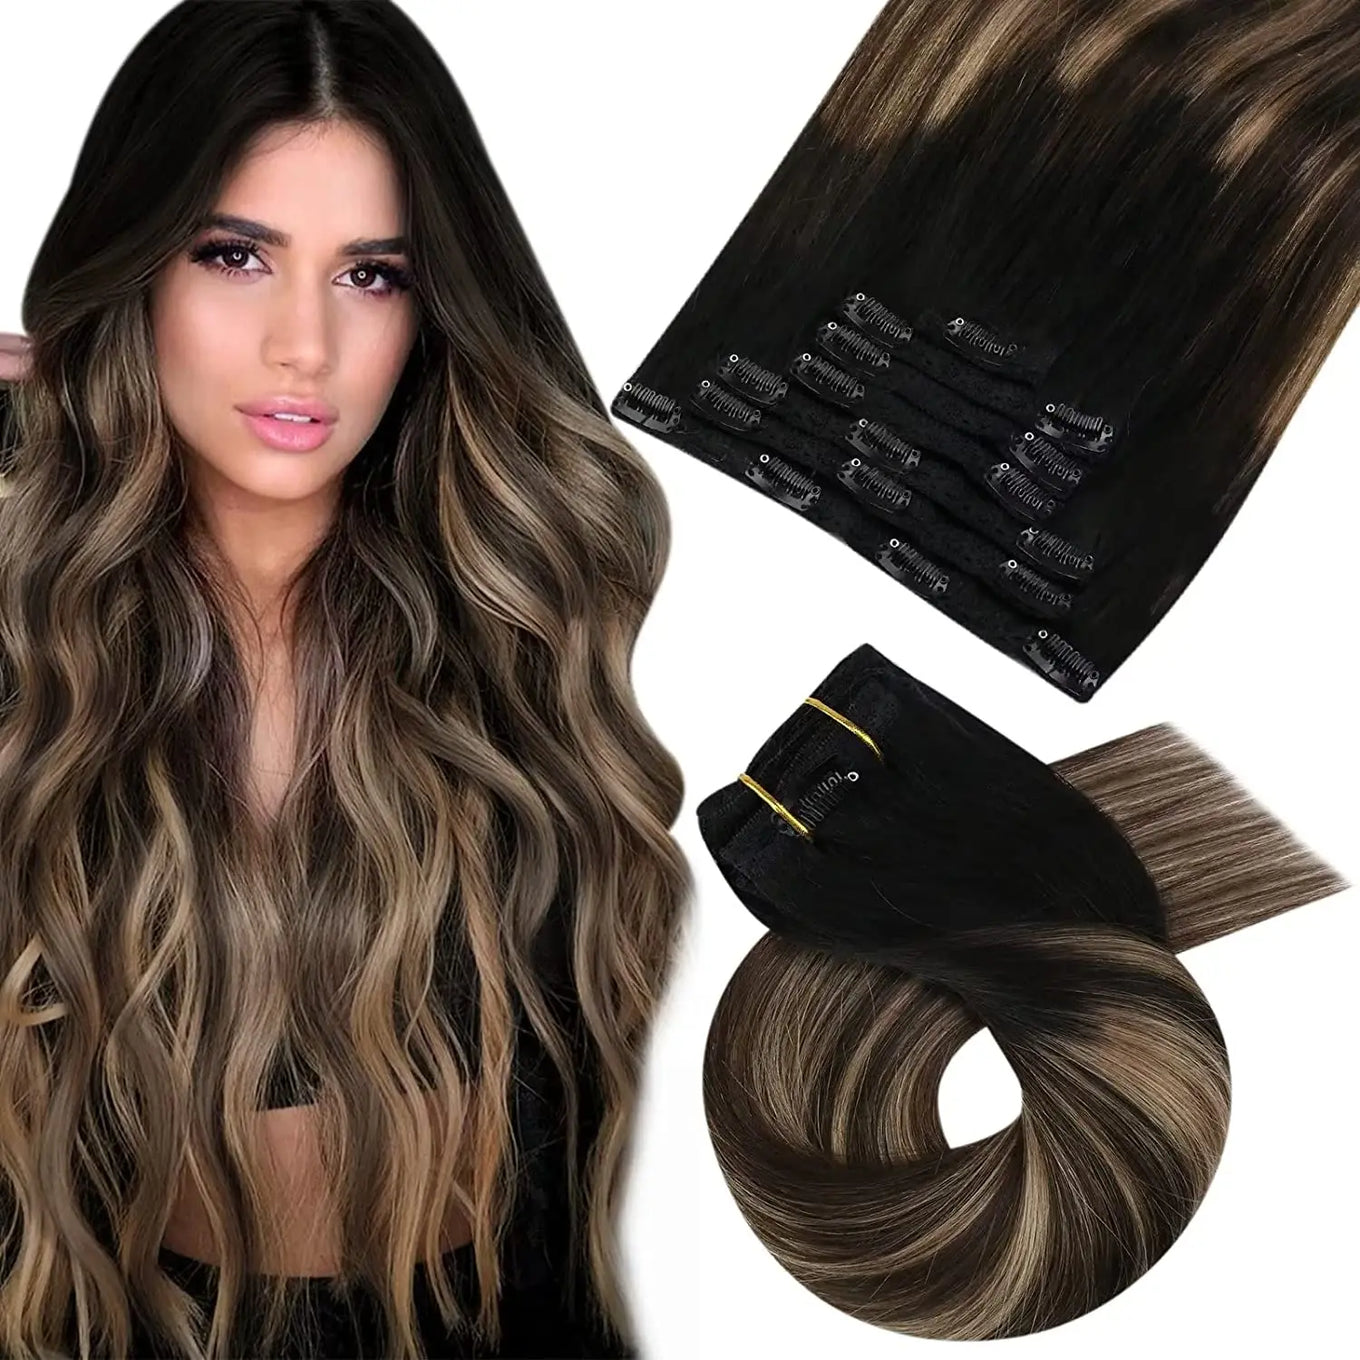
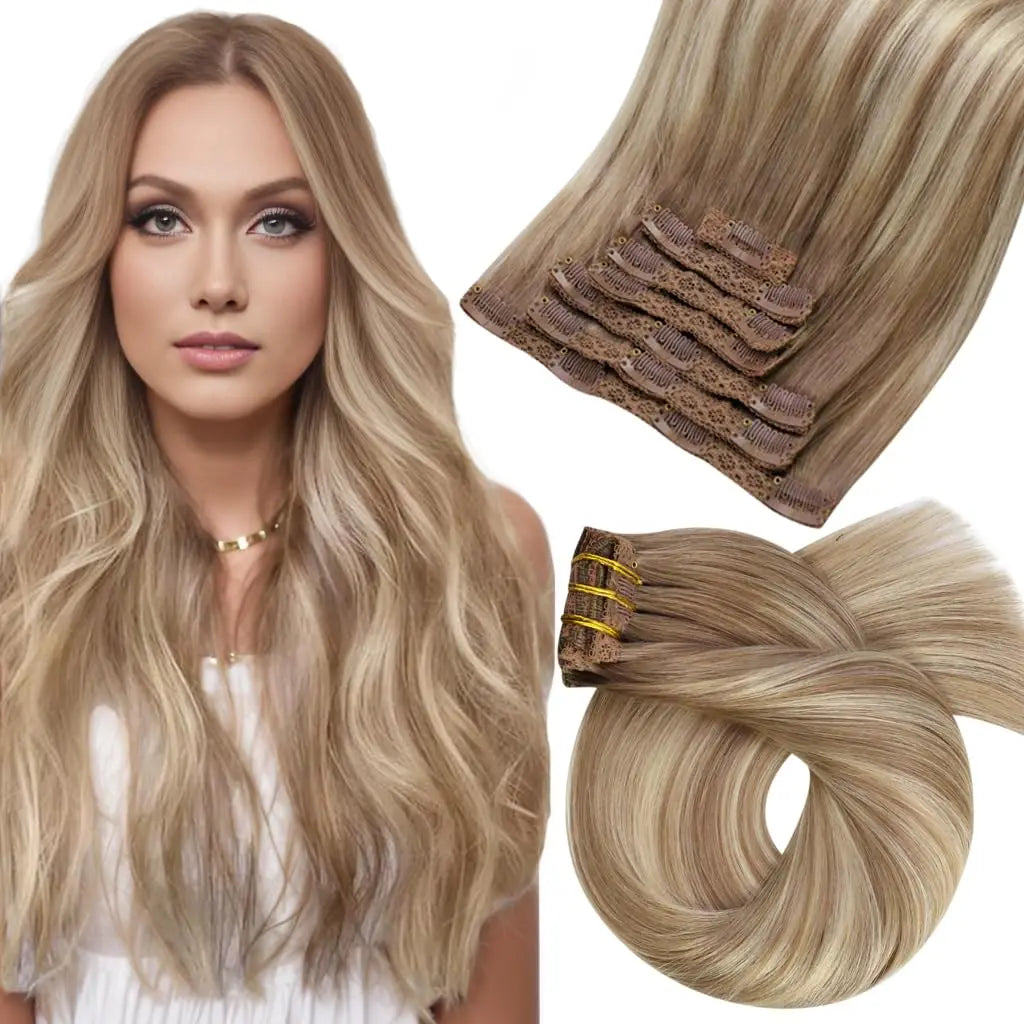
7-Piece Clip-In Human Hair Extensions – 16–24” Straight Remy Hair (105g)

100% Human hair - Clip in 5&7 pcs - 18-24 inch
Before & After: Silkara Hair Extensions
From flat and thin to full and voluminous — in just minutes.


Trending Now
See what everyone is loving right now.

Remy Human Hair Topper with Bangs – Clip-In Silk Base Hairpiece for Thinning Hair | Silkara™

12” Human Hair Topper – Swiss Silk Base, No Bangs, 60g Clip-In


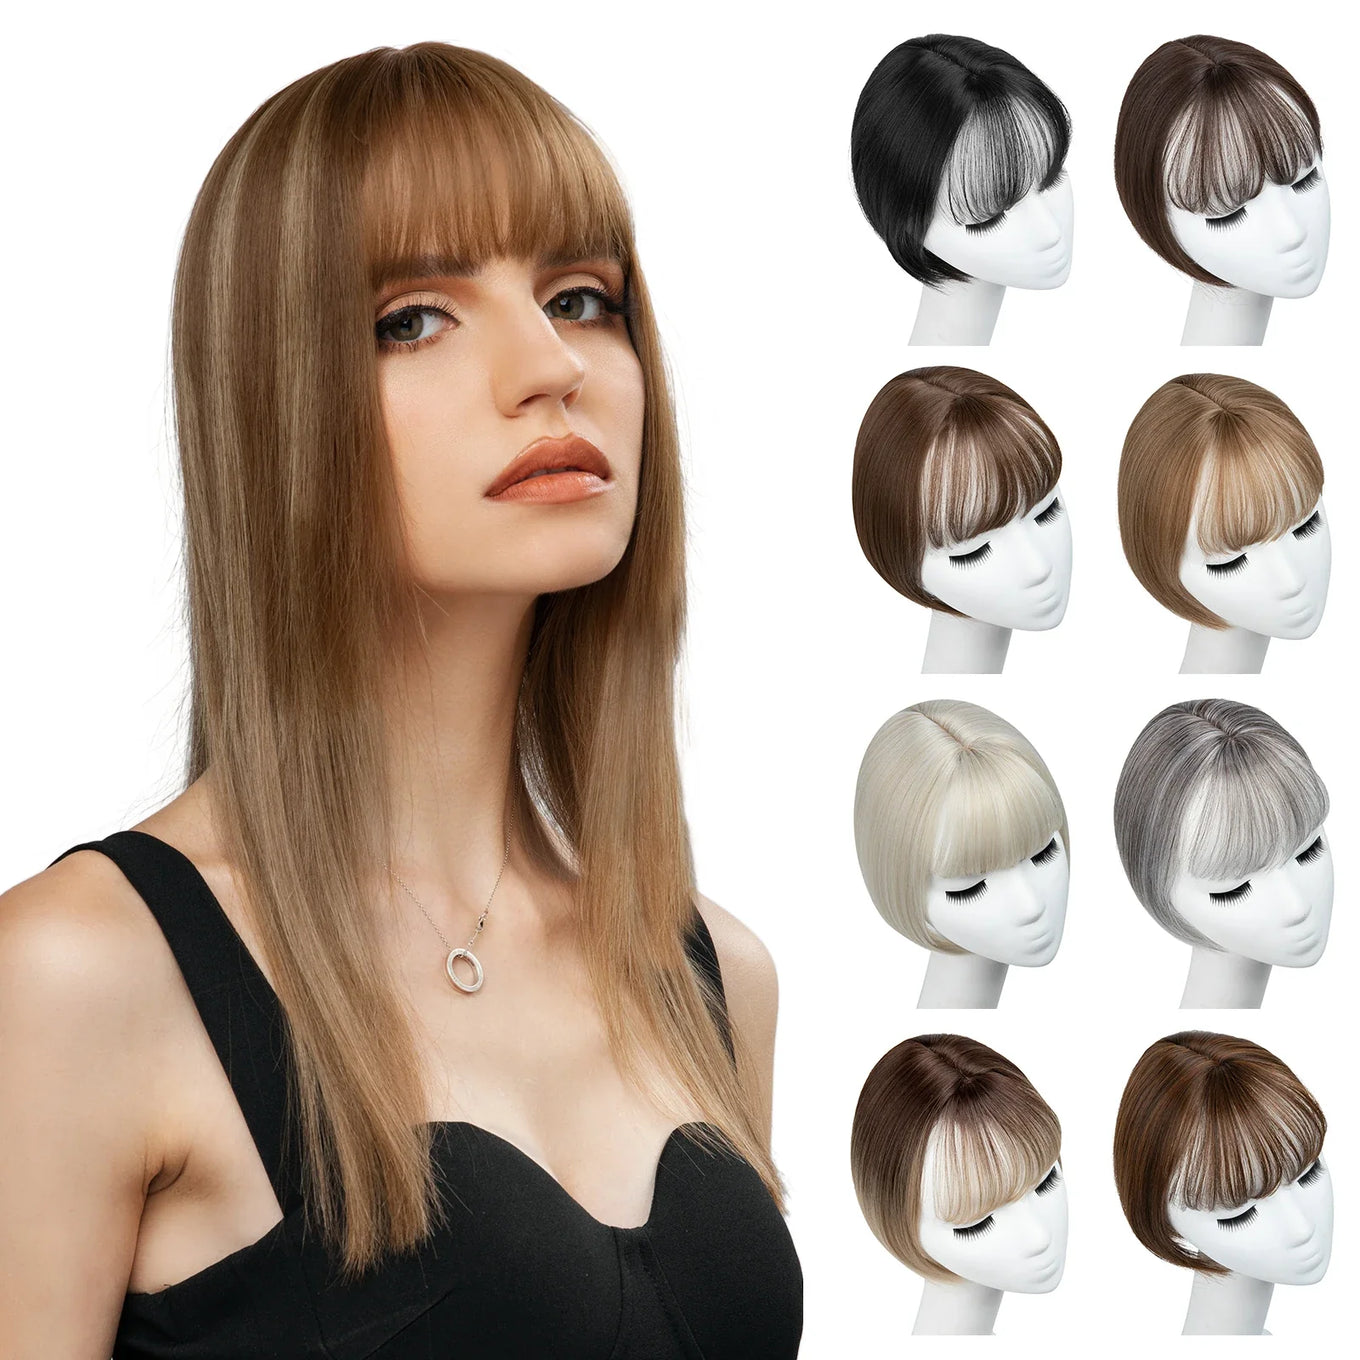
Natural-Look Hair Topper with Bangs – Medium-Length Clip-In Wig for Women (Straight, 120% Density)

Silkara™ Clip in Hair Topper With Bangs
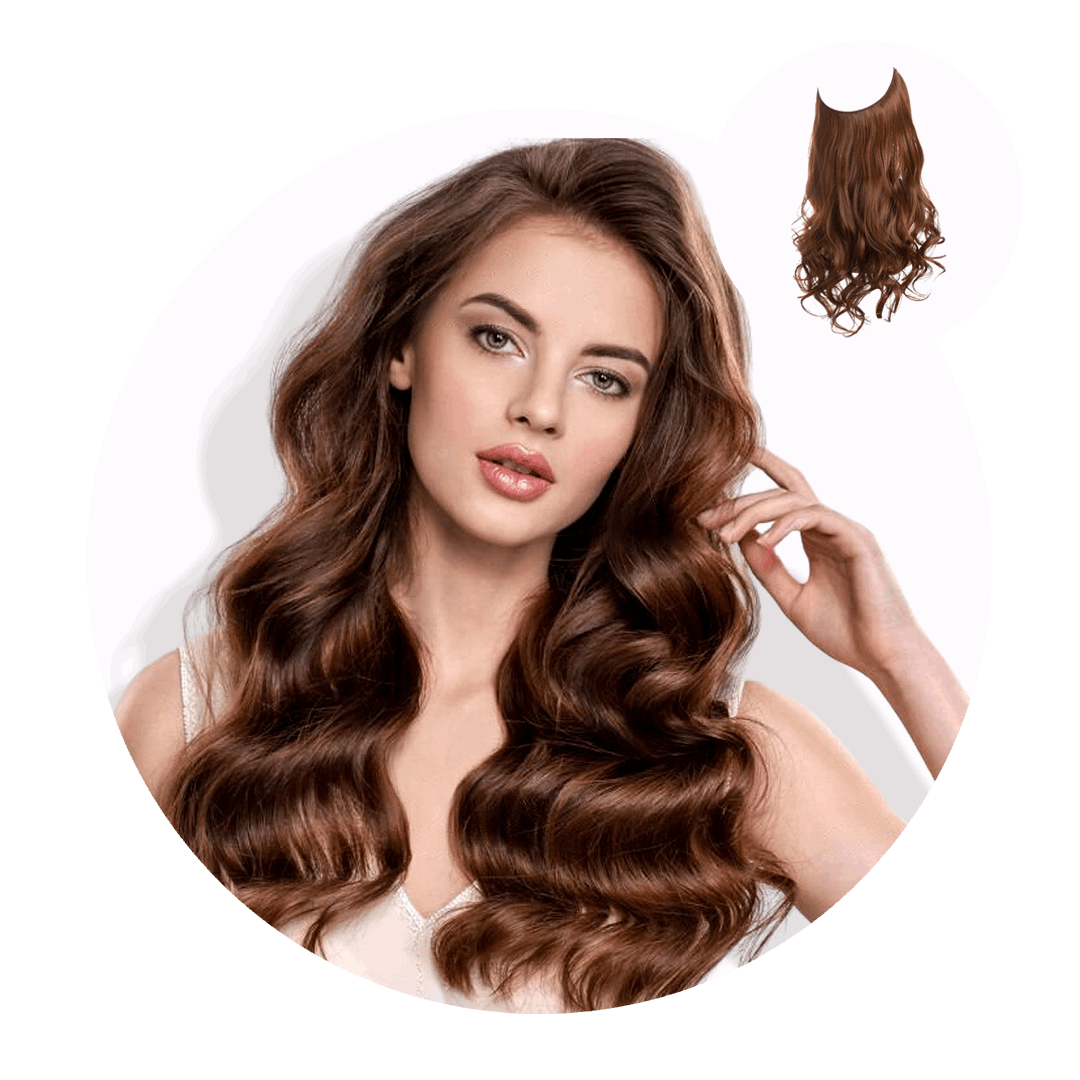

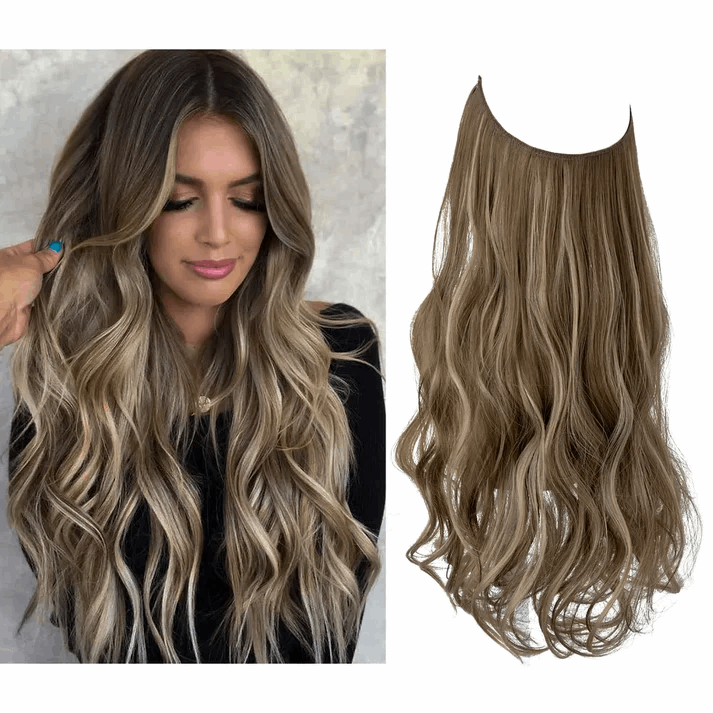
Silkara™ Secret Halo Hair Extensions 14,16,18 inches (Wavy-No Clip)


Silkara™ Secret Halo Hair Extensions 18, 22 Inches (Wavy-No Clip)
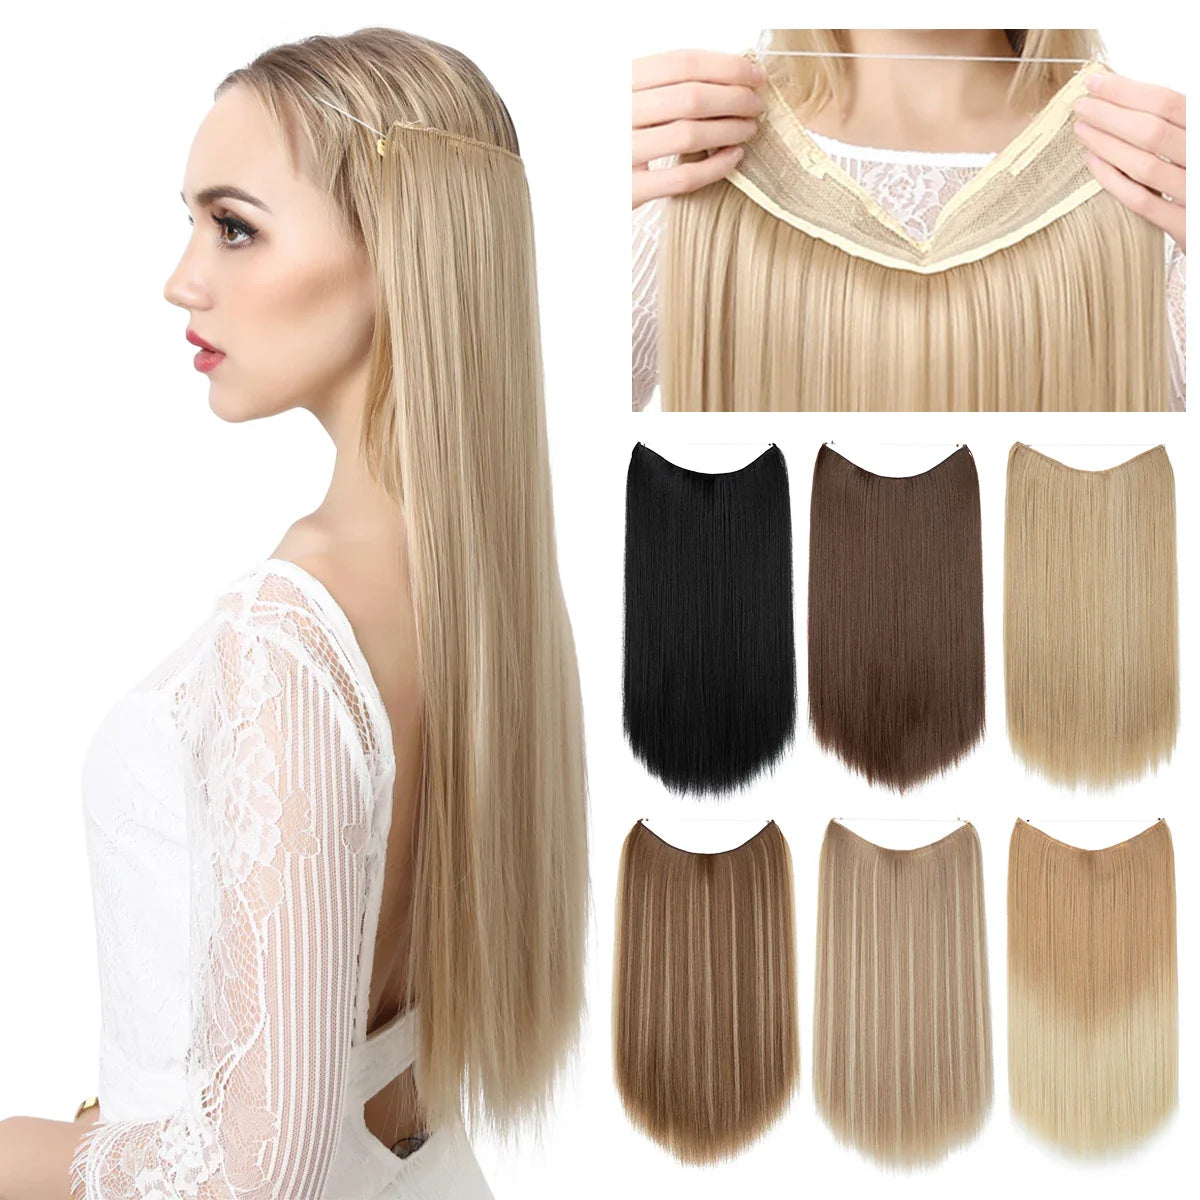

Silkara™ Secret Halo Hair Extensions 14, 16 Inches (Straight-No Clip)

Silkara™ Secret Halo Hair Extensions 14, 16 Inches (Wavy-No Clip)
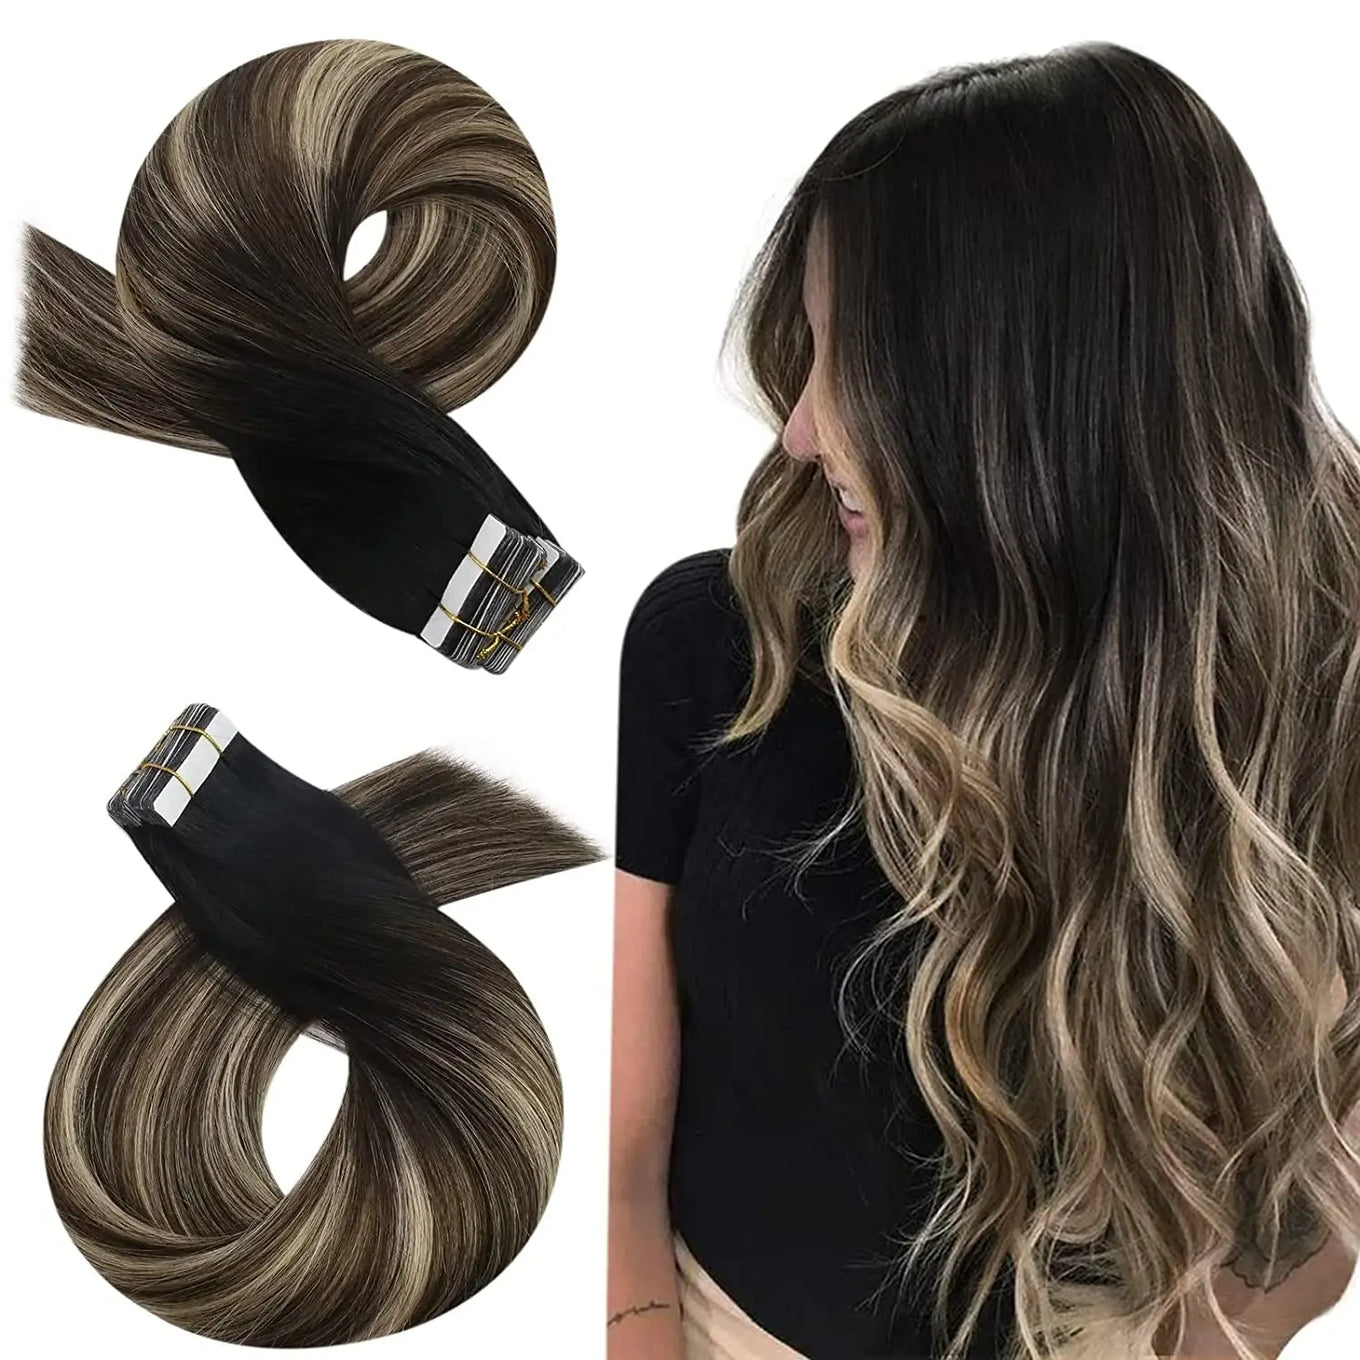

Premium Remy Human Hair Tape-In Extensions – 20 Pieces
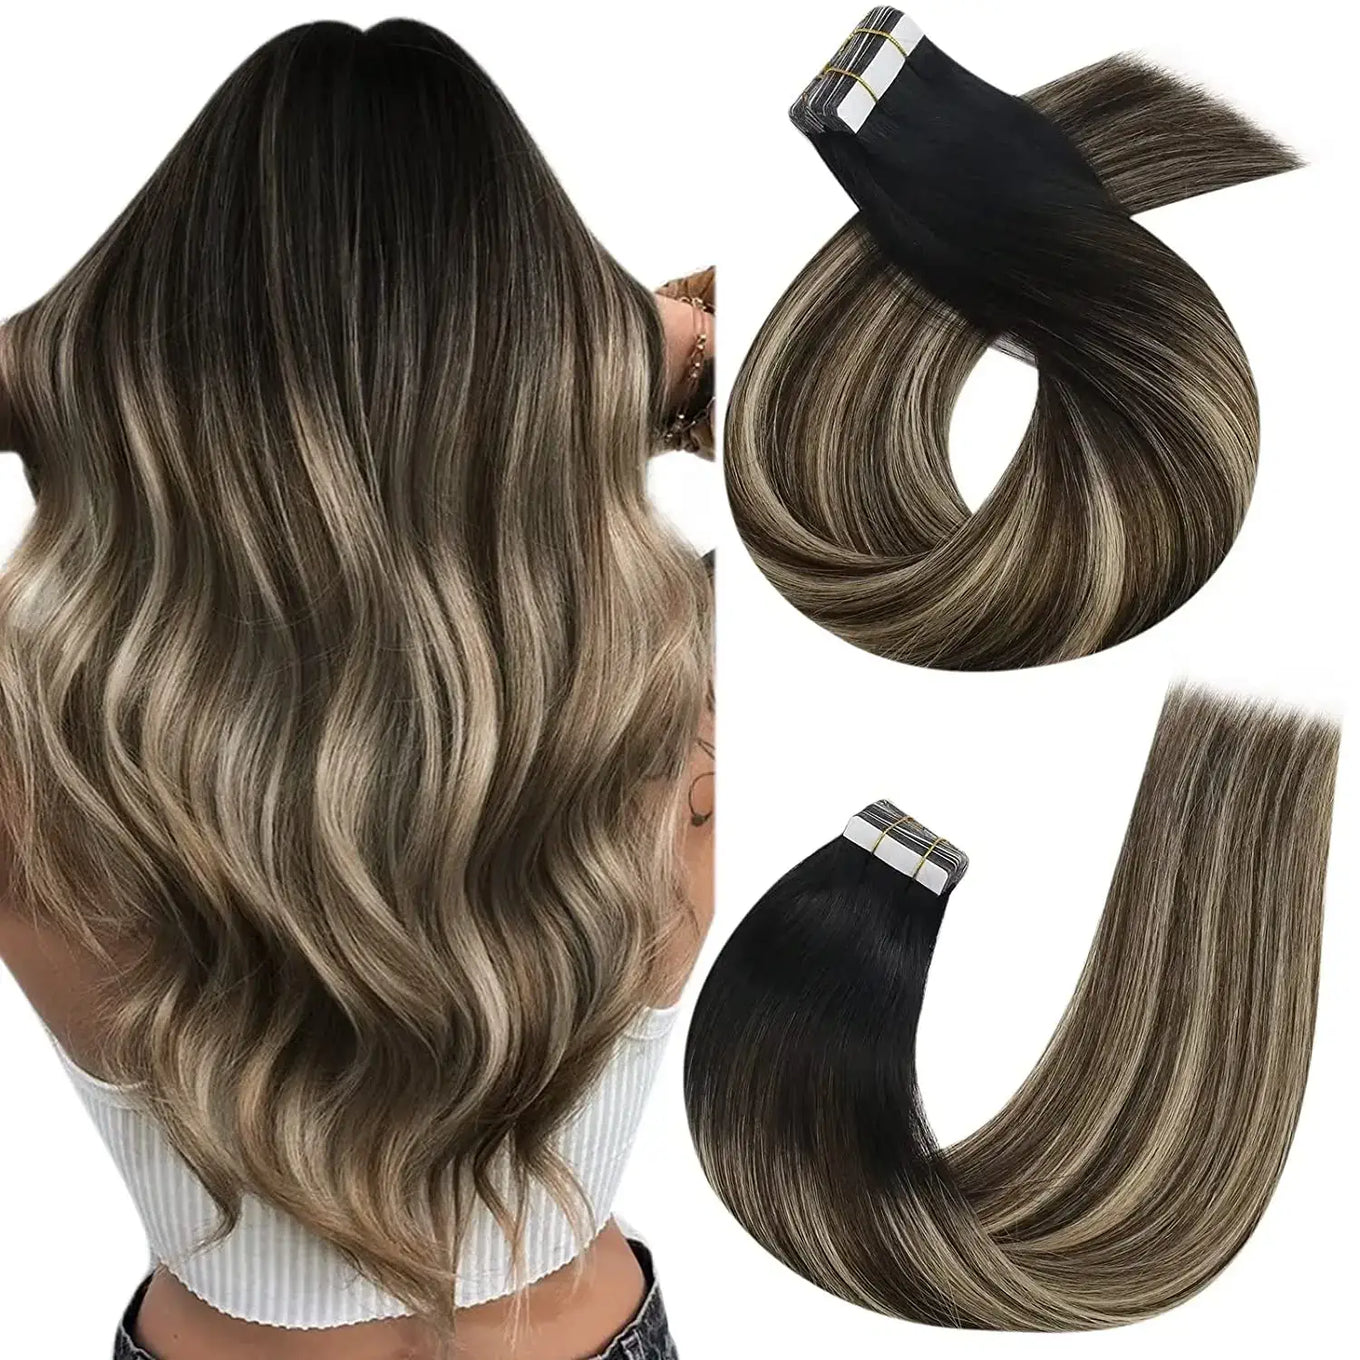

Premium Remy Human Hair Tape-In Extensions – 40 Pieces
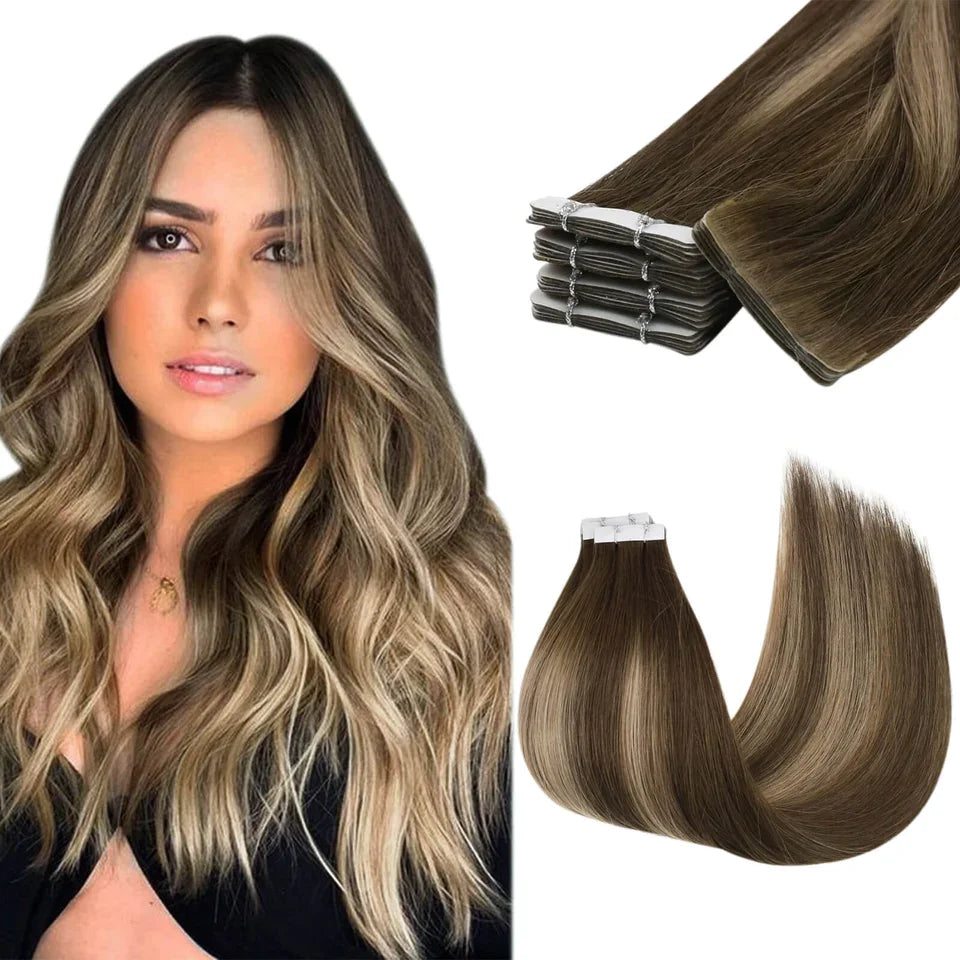

Virgin Remy Tape-In Hair Extensions – Invisible Injection Tape, Double Drawn, Natural Straight (20pcs)
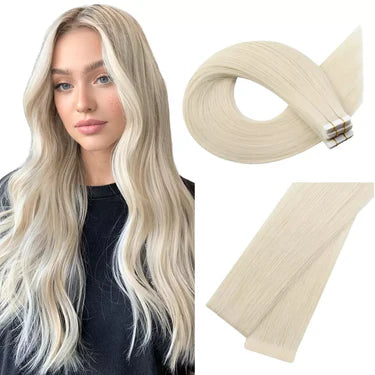

Virgin Tape-In Human Hair Extensions – Straight Remy Hair 2.5g/pc (14–24”)
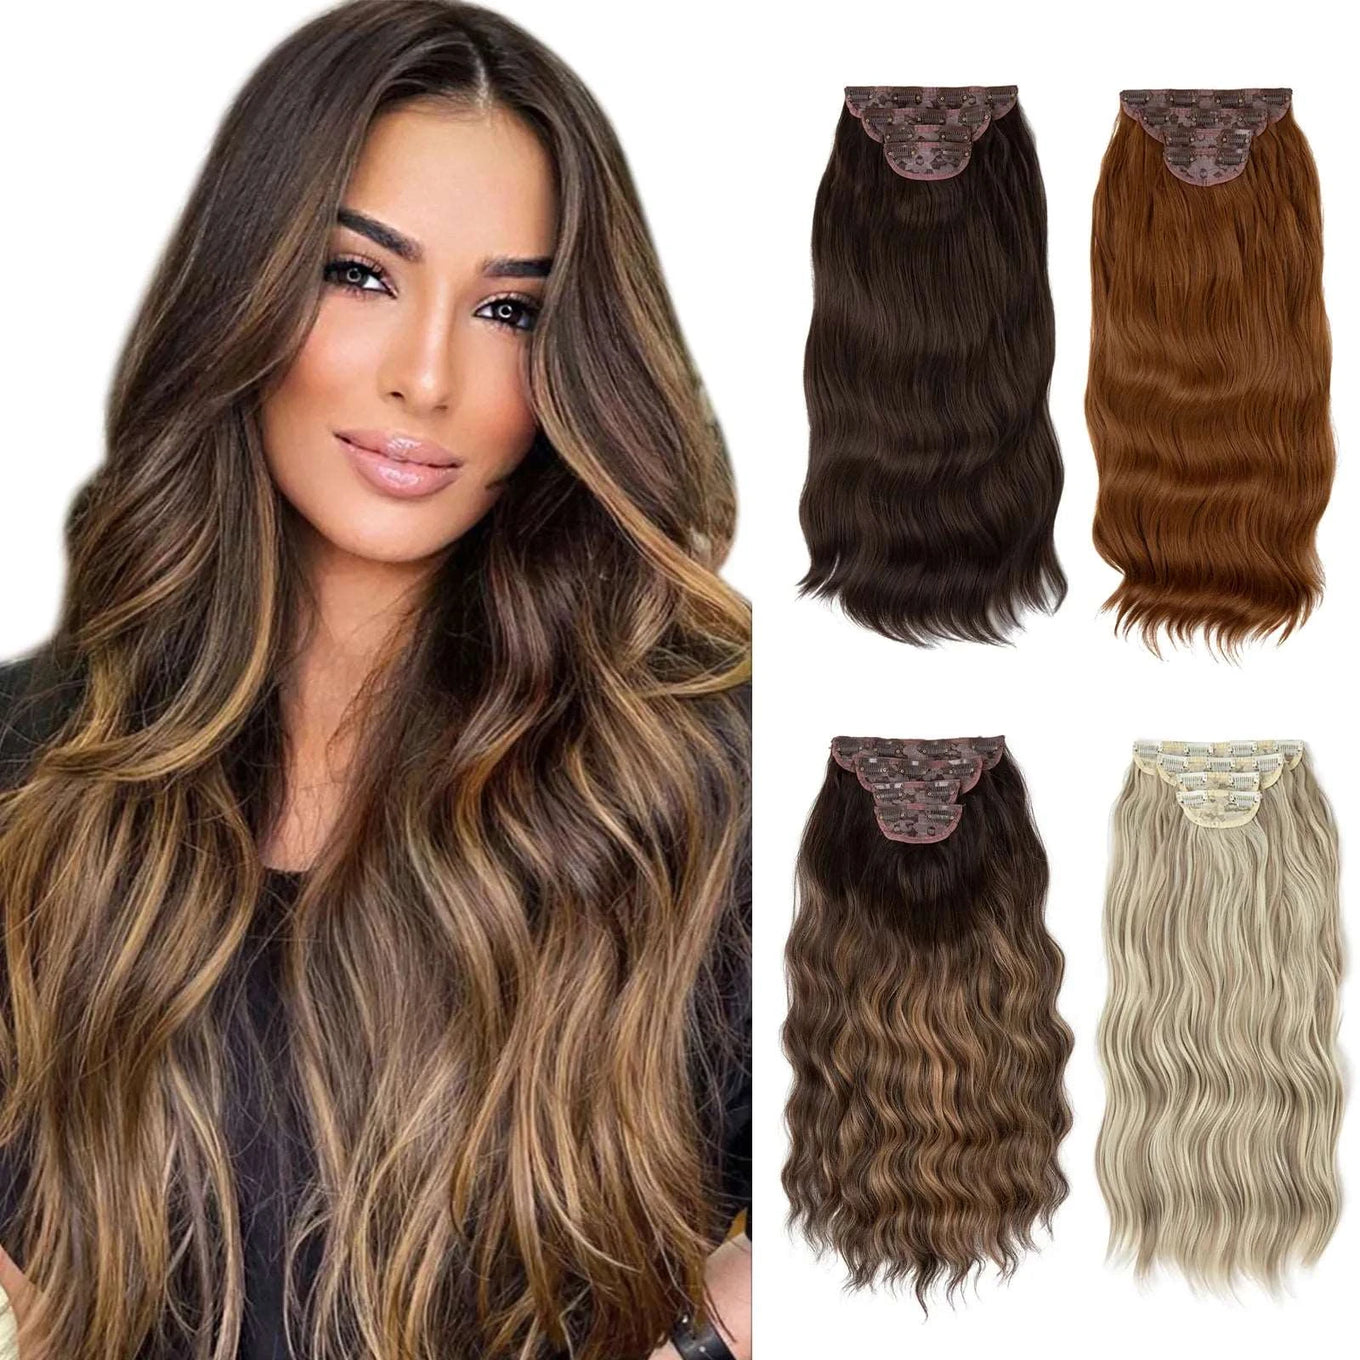

Silkara™ 4pcs Clip In Extensions 22" Full Hair Set

100% Human hair - Clip in 5&7 pcs - 10-16 inch

100% Human hair - Clip in 5&7 pcs - 18-24 inch
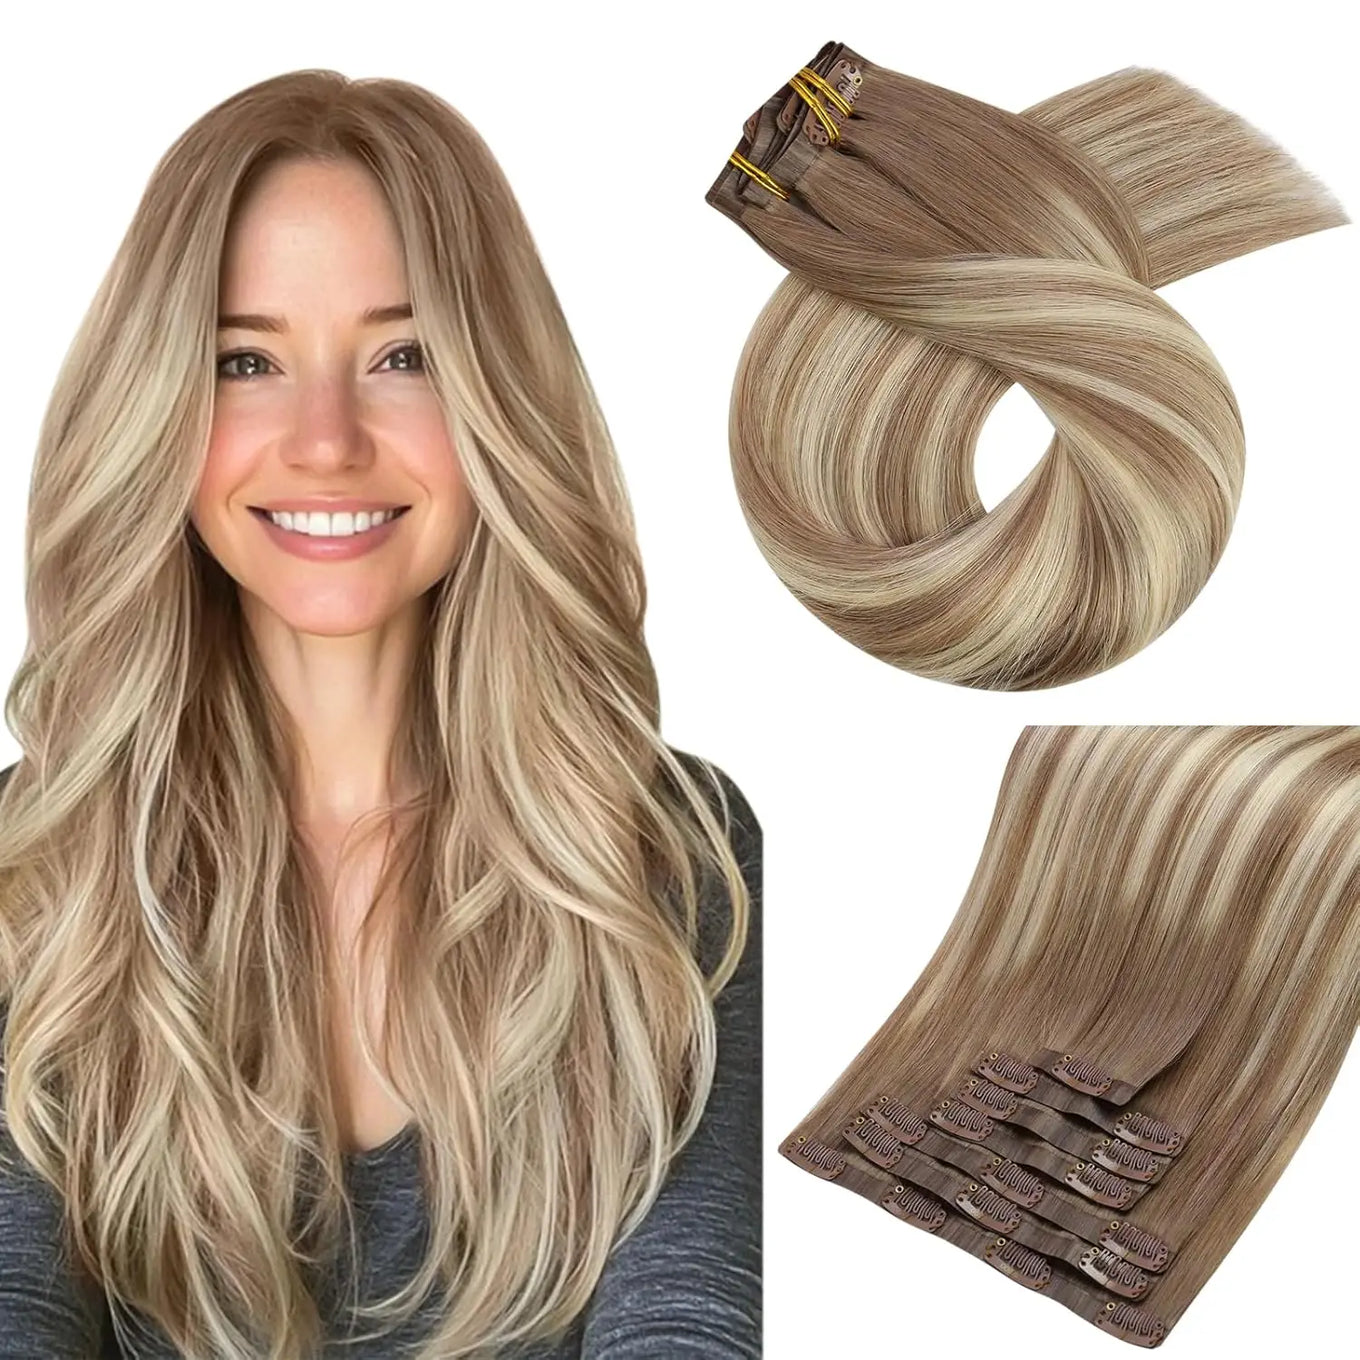

Seamless PU Clip-In Human Hair Extensions – 7 Piece Full Head Remy Set (105g)
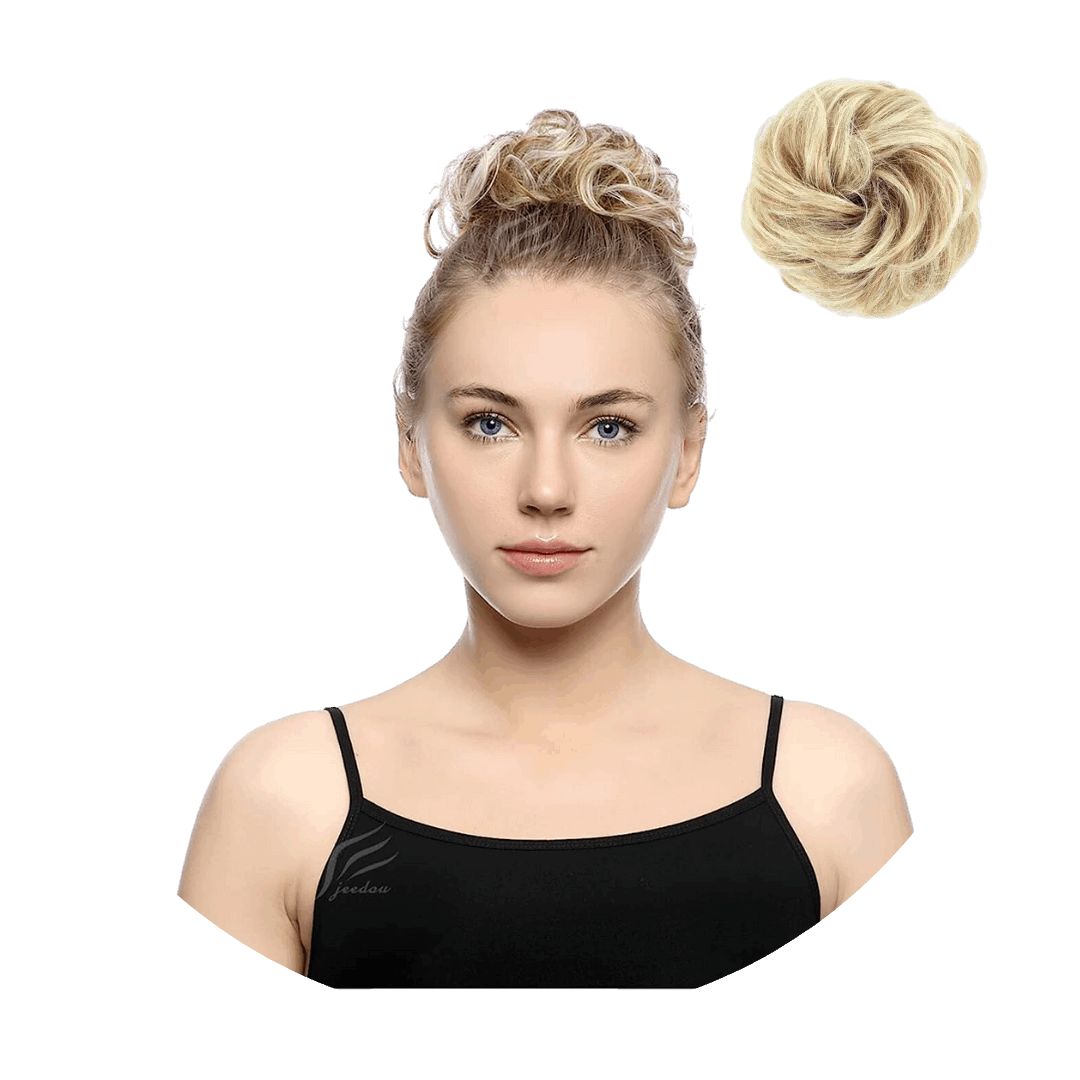

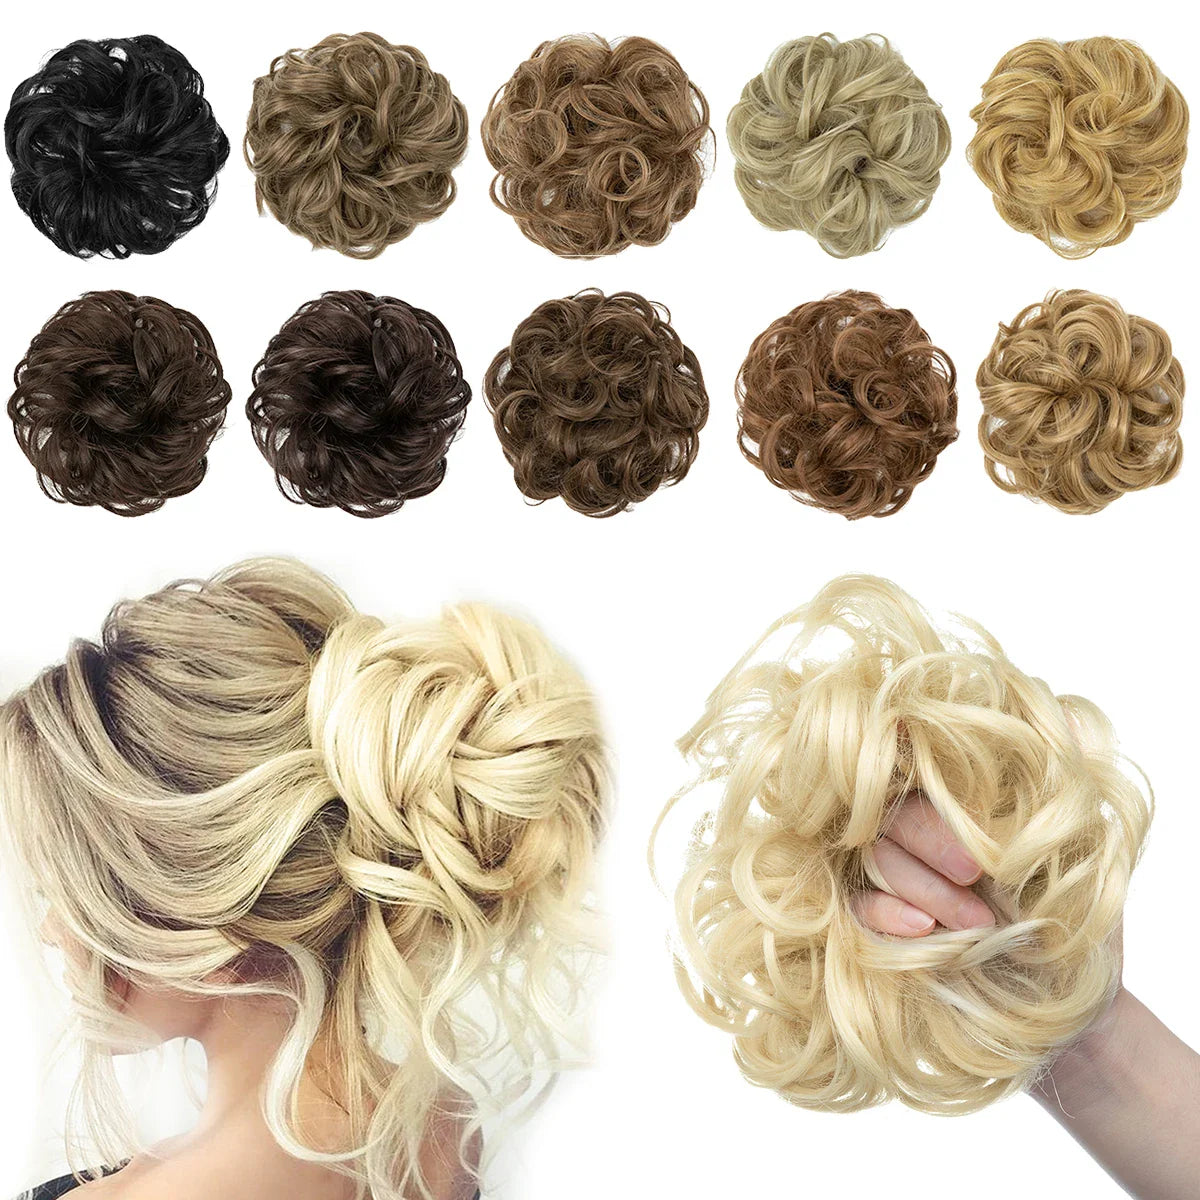
Silkara™ Secret Hair Instant Curly Messy Bun

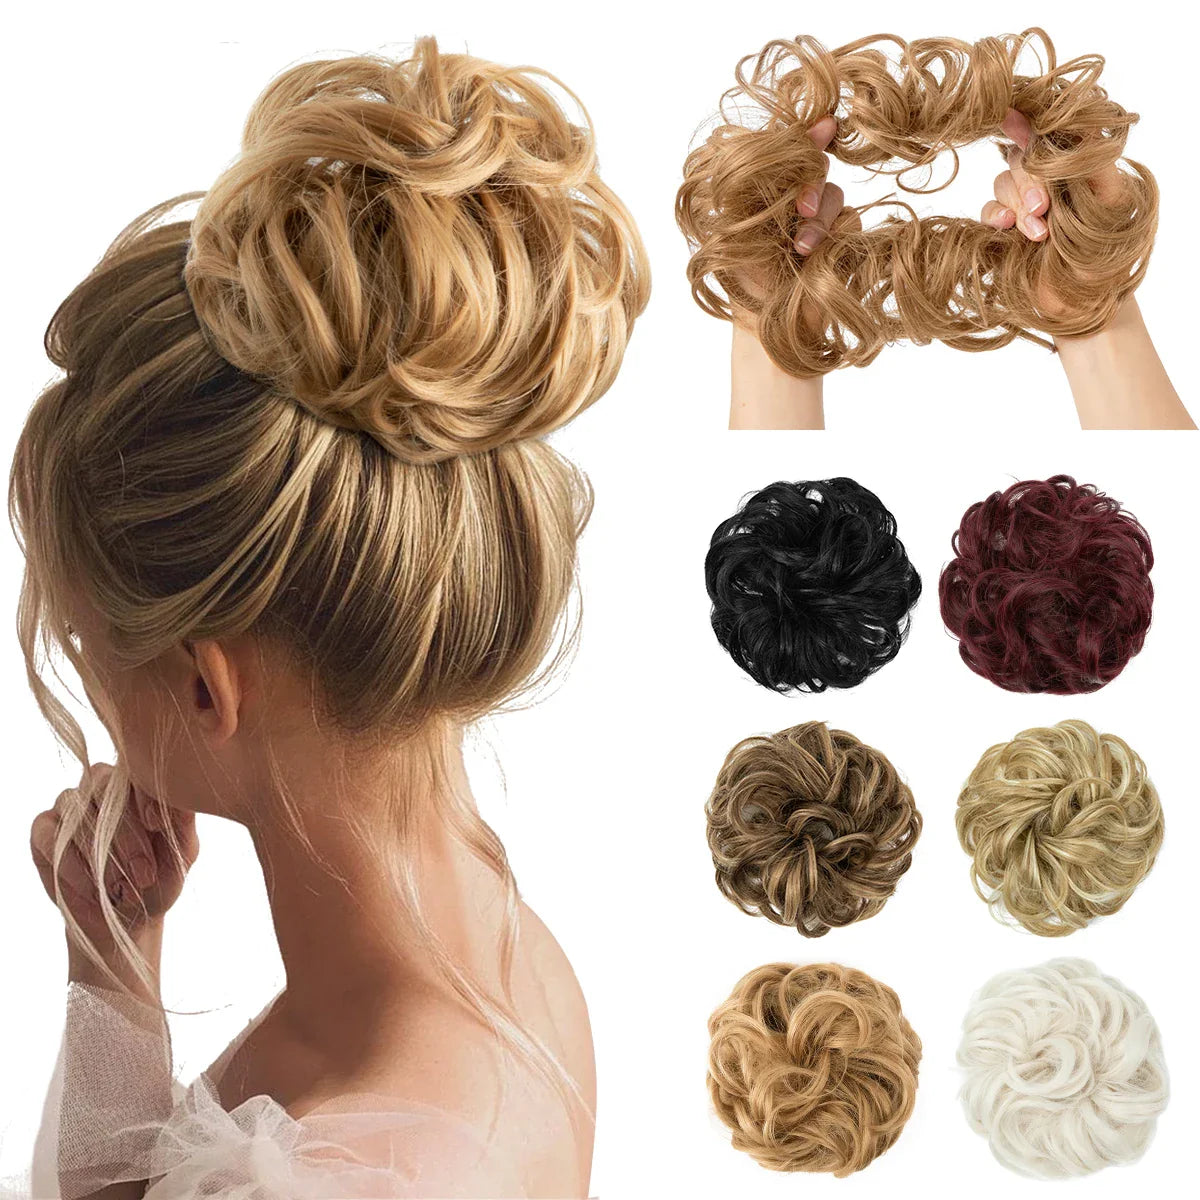
Silkara™ Hair Messy Curly Hair Bun Top (Thin & Thick)
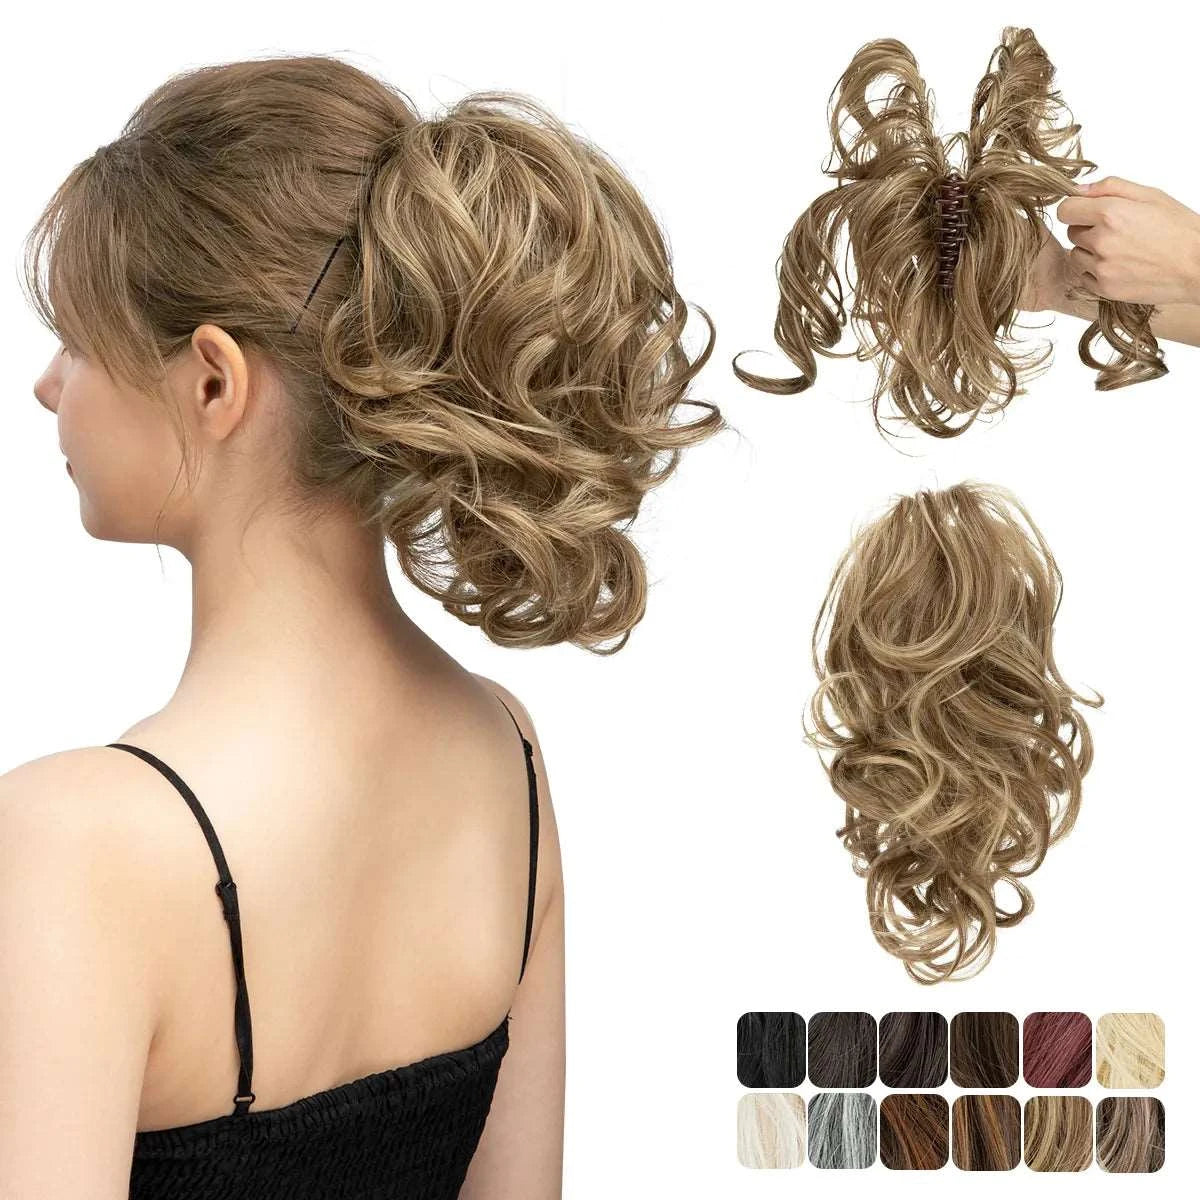

Silkara™ Diy Claw Clip In Ponytail Hair Extensions

Silkara™ Messy Chignon Premium Big Curly Elastic Hair Scrunchies Bun

From Sydney, With Love. 🇦🇺
Silkara Hair began in Sydney, Australia, with a simple mission: to make beautiful, voluminous hair accessible to everyone, instantly.
We noticed a gap in the market. Salon extensions were prohibitively expensive and often damaging. We set out to change that.
Today, we offer the best of both worlds: our signature Japanese Fiber for affordable, everyday glam, and our Premium 100% Remy Human Hair for the ultimate luxury experience. Whether you're looking for a quick confidence boost or a long-term investment, we have the perfect match for you.
Everything You Need to Know.
Can't find what you're looking for? Our team is always happy to help — reach us via live chat or email and we'll get back to you within a few hours.

How do I know which hair extension is right for me?
How do I know which hair extension is right for me?
It depends on your hair goals! If you want quick volume and length, our halo and clip-ins are perfect for beginners. For a more permanent solution, tape-ins are great. You can also get a free colour match here 🎨
Is the hair real or synthetic?
Is the hair real or synthetic?
Great question – we offer both, and each has its own amazing benefits!
💫 Our synthetic hair isn’t the typical shiny, plastic-looking fiber you may have seen elsewhere. It’s made with a next-generation material designed to look and feel just like real human hair – soft, natural, and beautifully blended. Many of our customers are honestly surprised when they try it – it’s a total game-changer!
✨ It’s also a great option for those who prefer not to wear human hair for personal or energetic reasons. If that’s you, you’ll love how our synthetic pieces give you stunning results – without compromise.
👩🦱 Prefer human hair? Our 100% Remy human hair extensions are among the highest quality in Australia, ethically sourced and salon-worthy. They’re soft, luxurious, long-lasting, and blend flawlessly for that effortless look you’ll fall in love with.
No matter which option you choose – synthetic or human – you’ll feel confident, beautiful, and totally you 💖
Are the extensions suitable for thin & thick hair?
Are the extensions suitable for thin & thick hair?
Yes, the extensions are suitable for any hair type.
Can the extensions be reused?
Can the extensions be reused?
Yes, the extensions can be reused several times.
Can the extensions be curled or straightened?
Can the extensions be curled or straightened?
the extensions are suitable for both curling and straightening. It's important to carefully monitor the heat setting; maintain a temperature range of 160-185°F (71-85°C). At temperatures below 16°F (-9°C), the extensions will remain unaffected, and at temperatures exceeding 185°F (85°C), they risk melting.
Be aware that once the extensions have been curled or straightened, they are not eligible for return.
Is it possible to dye the extensions?
Is it possible to dye the extensions?
You can also dye your extensions, but we have a large variety of variants, in which everyone should find a suitable variant.
"Your hair journey starts here — and we're with you every step."
Articles
Whether you’re new to hair extensions or a long-time wearer, our expert articles are here to help. Discover colour matching tips, styling tutorials, care guides, product comparisons and beauty advice to keep your human hair and synthetic hair extensions looking their best. Learn from the experts at Silkara Hair and shop with confidence.

Virtual Try-On Results vs Real Life: What To Expect
Virtual try-on is useful, but it is not exact. In most cases, it gets you about 70–80% of the way there, and colour previews sit at roughly 70% tone accuracy. That makes it good for checking shape, length, face framing, and colour direction - but less exact for density, blending, texture, placement, and lighting. If I were using it to shop for a topper, halo, clip-ins, bangs, ponytail, or bun, I’d use it like this: Use the preview for direction, not a final answer Trust shape more than detail Double-check colour with daylight photos Measure topper base size in cm Read density and fit details before ordering Expect the in-person look to shift based on haircut, clipping, styling, head shape, and your own hair texture That’s the core point: the screen shows an idea; wear shows the result. If I keep that in mind, I’m far less likely to be disappointed. I Tested AI Hair Color Matching for Extensions - Here’s What Happened sbb-itb-08feb2fQuick comparison What I can usually trust more What I treat with care Face framing Exact colour match General length Thickness and volume Overall shape Root blending Basic crown coverage view Placement on my head Warm vs cool colour direction Texture, movement, and shine So if I want to get more from virtual try-on, I use it to narrow choices first, then I confirm the parts AI can miss with photos, measurements, and product specs. How AI Hair Virtual Try-On Works AI maps your face shape and hairline, then places a digital hairstyle over your photo. For the clearest result, pull your hair back, use soft daylight, and keep the camera at eye level. Shadows, filters, and steep angles can throw off the placement. What the Software Reads From Your Photo The software looks at your face shape, hairline position, and facial proportions to work out where the digital style should sit. Lighting plays a big part here. Poor light can create shadows that the system reads the wrong way. Most tools also work from a single static image. So they’re reading a flat photo, not how your hair moves or how texture shifts in person. What AI Predicts Well AI is most useful for showing direction, not exact results. For Silkara Hair shoppers, that’s often what matters most when judging fringe shape, length, and crown coverage. It’s also fairly good at showing how a shade may read against your complexion, whether it looks warmer, cooler, lighter, or darker. The same goes for face framing. You can get a solid sense of whether a style works with your features, even if the final in-person result may look a bit different. That’s why some try-on results look close, while others still need a real-world check. Where Virtual Try-On Is Accurate and Where It Falls Short Virtual Try-On vs Real Life: What AI Gets Right and Wrong Virtual try-on realism usually lands at around 70–80% accuracy [2]. That’s a useful benchmark, but not a guarantee. Think of it as a working limit. AI tends to read shape first, and that’s also where it performs best. Where it starts to wobble is with finish, density, and movement. Usually Close: Face Framing, Length and Overall Shape This is why AI tends to do best with shape rather than fine detail. It reads silhouette and proportion more reliably than the small stuff. General length comparisons also come through well, so in most cases you can trust the broad feel of whether a style looks short, mid-length, or long on your face. Less Exact: Colour, Density and Texture The finer points are less dependable. Colour tools can point you in a warm-versus-cool direction, but they can’t account for undertones, porosity, or previous colour history. Virtual colour tools usually reach about 70% colour tone accuracy [1], so they’re better used as a guide than an exact preview. AI also tends to make hair look fuller than it may appear in person. For toppers and extensions, that means the model can suggest the right style direction while still missing how well the hair blends. The biggest gap between screen and real life shows up in detail-level features. What AI Shows Well What Can Change in Real Life Face framing, silhouette and general proportions Cowlicks and growth patterns can change how hair parts and sits General length relative to your face Curl shrinkage and neck length change where the style falls Colour direction, such as warm vs cool tones Undertones, porosity and previous colour history change the result Topper placement and crown coverage Scalp visibility, blending and edge detection change the finish Overall volume and fullness effect Natural density and daily styling change the result On screen, you’re looking at a static snapshot. Real life adds movement, gravity, head shape, and texture. Results can shift once haircut, placement, and blending enter the picture. Why Real-Life Results Can Look Different Virtual try-on gives you a solid sense of a style’s shape. But once you wear the piece on a real head, a few other things come into play: placement, movement and how it blends with your own hair. That’s usually where the result starts to shift. The preview shows an idea. Real wear shows how the piece looks after it’s cut, clipped and styled. The main differences usually come down to fit, density, texture and lighting. Haircut, Placement and Blending The first mismatch often shows up where the piece meets your natural hair. If your hair hasn’t been layered or trimmed to blend into the piece, you can end up with a visible step between lengths. It’s a bit like joining two fabrics with different hems - the line stands out. Clip placement matters as well. Even a small shift can change how a topper sits at the crown or how a halo falls at the back. A piece that looked spot-on in the preview can sit a little off in person if the placement changes by even a small amount. Density, Texture and Growth Patterns Your own hair thickness and growth direction also shape the final look. Fine or thinning hair may give toppers less grip, while cowlicks or widow’s peaks can affect how clip-in bangs or fringes sit. Texture plays a part too. If your hair is uneven in texture, coverage can look different in person than it did in the preview. That’s one of those small details that seems minor at first, then makes a clear difference once the piece is on. Styling, Lighting and Head Shape The final result depends on how the piece sits, moves and catches the light once it’s worn. Getting close to a polished preview often takes some styling, such as blow-drying, smoothing or curling, along with a bit of product. Head shape and facial asymmetry can shift the way a halo, topper or fringe sits too. And colour can be sneaky: the same shade may look different under indoor lighting than it does in daylight. How To Use Virtual Try-On Wisely With Silkara Hair Use the preview to narrow your options, then check the practical details before you order. With Silkara Hair, virtual try-on works best as a filter. The product details are what should back up the final decision. Once you know where AI can get things wrong, the next step is simple: use it to build a shortlist. Use AI for Direction, Not Exact Results Use virtual try-on to narrow options, not to promise the final look. It helps you rule out styles that clearly don't suit you - like a fringe that feels too heavy, an extension length that looks too long, or a topper coverage area that seems bigger than you need. So use the AI to sort through the big choices: curtain fringe vs. straight fringe halo vs. clip-in lighter colour family vs. darker Then double-check the fine points with product information and colour matching. After that, look at the details AI can't measure. Confirm Colour, Base Size and Fit Before Ordering Once the AI has pointed you in the right direction, three things are worth checking properly before you commit. Colour is the hardest one. Screens show colour differently from real hair, so digital shades are only a guide. Silkara Hair offers a free colour matching service using customer photos. Use clear daylight photos facing a window, without heavy filters or harsh overhead light. That gives a better read on your hair tone than an AI preview. Base size matters most for toppers. AI can estimate coverage, but it can't measure the exact area of thinning on your scalp. Measure the thinning area with a soft tape measure in centimetres, then compare it with the base measurements in the product details. If the base is too small, it won't cover enough. If it's too large, blending can be harder. Density and volume should also be checked in the product specs. A halo extension wears differently from clip-ins, and the density listed on each product gives you a clearer sense of the finished weight and volume than a digital overlay can. What to Check Why the Preview Falls Short What to Do Instead Colour Screens show colour differently from real hair, so digital shades are only a guide Send a natural-light photo for free colour matching Topper base size AI can estimate coverage, but not the exact area of thinning Measure the thinning area in centimetres with a soft tape measure Density and volume Previews often look fuller and more idealised than real hair Read product specs for actual hair weight and thickness Application method The preview shows style, not wearability or maintenance Match the piece to your hair thickness and daily routine Conclusion: Set Realistic Expectations and Get Better Results AI virtual try-on helps with shape, length, and colour direction, but it can't fully show density, growth patterns, root blending, or lighting. That's why expectations matter just as much as the tool itself. Treat virtual try-on as a way to explore, not a promise. That simple shift usually leads to better satisfaction with the final result. Once you look at it that way, the next checks are pretty straightforward. The same idea applies to any Silkara Hair piece, from toppers and fringe pieces to halo extensions, clip-ins, ponytails, and buns. The AI preview helps narrow your options. Then colour matching, product photos, and base size guidance help confirm the fit. Silkara Hair's colour matching, product photos, and base size guidance make it easier to choose with more confidence. FAQs How accurate is virtual try-on really? Virtual try-on is a handy way to get a feel for how a style, colour or accessory might look with your face shape and proportions. But it’s best to treat it as a guide, not an exact preview. AI can’t fully recreate your hair density, texture, growth patterns, or how your hair reacts to humidity and wind. For the closest result, use a clear, front-facing photo taken in natural daylight, with your hair tied back. Why does the real-life result look different? Real-life results can look different from virtual try-on images because AI works in a controlled digital setting, while your hair has to deal with physics and your own anatomy. A virtual preview gives you an idealised, static version of a style. It doesn't always show your natural hair density, texture, growth patterns, daily styling habits, or how the hair solution will blend with your features, hairline, and existing hair. What should I check before ordering? Use the virtual try-on as a guide to see how different styles or colours may look with your features, rather than as an exact preview. What you see on screen can differ from what you get in person, depending on your hair density, texture, and growth pattern. Before you buy, use our free colour match service and check your measurements with a soft tape measure. Leave 1 to 2 cm so the clips can attach securely to healthy hair. Related Blog Posts 6 Ways to Match Hair Extensions to Natural Hair Color Why Doesn’t My Colour Match Exactly? How To Take Photos For The Best Colour Match Why Multi-Dimensional Colours Blend Better Than Solid Colours
Learn more
Why Human Hair May Feel Different Than Expected
If human hair feels too silky, too dry, or a bit like synthetic hair at first touch, that usually points to processing - not fake hair. In most cases, the hair has been cleaned, coated, conditioned, styled, and packed before it gets to you. That can change how it feels on day one. Here’s the short version: Too slippery or glassy? A silicone coating may be sitting on the surface. Dry after the first wash? The coating may have rinsed out, leaving the hair’s normal feel behind. Tangles fast? Cuticles may not be aligned, or the hair may have been heavily processed. Feels different from your own hair? Texture, density, and base fit may be the issue - not just hair quality. What should I do first? Wash it once, use conditioner, air-dry it, and judge it after that. A few facts matter here: Silicone coatings often wear off after 3 to 6 washes. Human hair pieces dry out faster because they do not get scalp oils. Remy hair with aligned cuticles tends to feel smoother and tangle less than mixed-direction hair. My take: the first wash tells you more than the first touch. If the hair settles, moves well, and stays soft with gentle care, that’s a good sign. If it turns rough, mats, or loses its feel fast, the issue is more likely processing, coating, or a poor match to your own hair. That’s the main point of this article: don’t judge human hair straight out of the box - judge it after one gentle wash and a few wears. How to Tell the Quality of Human Hair Extensions- DoctoredLocks.com sbb-itb-08feb2fHow processing changes the feel of human hair Not all human hair is handled the same way before it gets to you. How it's collected, sorted, and treated has a direct effect on how it feels in your hand, how it moves, and how well it lasts with regular wear. The main things that shape that feel are cuticle alignment, surface coatings, and chemical treatment. Remy hair and cuticle alignment The cuticle is the outer layer of each hair strand. It's made up of tiny overlapping scales, a bit like roof tiles. In Remy human hair, those cuticles stay aligned from root to tip. That matters because aligned cuticles help the hair feel smoother and tangle less. When every strand runs in the same direction, the hair tends to move more naturally too. Non-Remy hair is different. Its cuticles are often mixed in different directions, which can lead to friction and tangling. To deal with that, manufacturers may use a chemical stripping process to smooth the cuticle scales. At first, the hair can feel soft and polished. But that smoothness comes at a cost: the hair has already been weakened at a structural level [2]. If you want a topper that keeps feeling natural after repeated washing and wear, cuticle alignment isn't a small detail. It's one of the main things doing the heavy lifting. Silicone coatings and an overly silky feel Some human hair pieces are coated with silicone during manufacturing. This gives the hair a slick, almost glass-like finish. On first touch, that can seem like a good sign. But sometimes it's hiding the hair's actual texture. The issue is simple: silicone doesn't stay forever. It usually washes away after 3 to 6 washes [1]. Once that happens, the hair underneath starts to show itself. If the base hair is high grade and the cuticles are aligned, it should still feel soft and easy to handle. If the coating was hiding lower-grade or unevenly processed hair, you may start to notice tangling and dryness pretty fast. A handy check is to rub a dry strand between your fingers. Silicone-coated hair can feel overly slick or like there's a layer sitting on top. Natural high-grade hair usually has a slight texture instead of that slippery finish [1]. Once the coating is gone, there's nowhere to hide. What you're left with is the hair's actual feel. Over-processing, colouring, and dryness Chemical treatment doesn't just change softness on day one. It also affects how the hair behaves over time. Colouring and bleaching are common in hair manufacturing, and if they're done with care, they don't always ruin the hair. But heavy processing can do damage. Repeated dyeing, harsh bleaching, and other strong chemical treatments can weaken the cuticle layer in a big way. Hair like this may look fine straight out of the box, then start to feel dry, scratchy, or fragile after it's been worn and styled for a while [2]. This becomes a bigger issue with daily wear. A piece might feel nice in the packaging, but that doesn't mean much if it goes downhill after regular brushing, washing, and styling. Over-processed hair also tends to struggle with more heat styling later on. It can lose softness and become harder to manage. Put plainly, the state of the cuticle at the start shapes how long a topper keeps its look and feel. Why texture often changes after washing and styling What the first wash can tell you about the hair The first wash removes the factory finish, residue, and any coating sitting on the surface. So the hair may stop feeling as slippery as it did straight out of the box. That shift is normal. It’s often the point where you start to feel the hair as it actually is, not how it was prepped for sale. Good hair should still feel soft and easy to handle, just less coated and more natural. How heat and frequent washing cause dryness Once that surface finish is gone, day-to-day care matters a lot more. Topper and extension hair doesn’t get oils from the scalp, so it dries out faster than natural growing hair. That’s why washing too often can be hard on it. It can leave the hair dry and brittle over time. Hot water, harsh shampoos, and high heat make that happen faster. Lukewarm water and low heat help slow that dryness down. How to bring back softness with gentle care If you want that cleaner texture to stay soft instead of turning dry, gentler care usually makes the biggest difference. Use: a sulphate-free cleanser a moisturising conditioner through the mid-lengths and ends a wide-toothed comb, starting at the ends and working upward That approach helps limit breakage. Air-dry when you can. If you do need heat, keep it low. If the hair starts to feel dry, soak it in water and conditioner. Then use a small amount of argan oil on the mid-lengths and ends to add softness between washes. Over time, habits like these give you a clearer sense of the hair’s condition. How to judge topper quality by feel and behaviour Human Hair Feel: Signs of Quality vs. Over-Processing Signs the hair is healthy and natural-looking Once that box-fresh finish fades, pay attention to how the hair feels and moves. Good Remy hair usually has a slight natural resistance when you rub a dry strand between your fingers. That small bit of texture can point to aligned cuticles. The hair should move freely, sit flat, and not puff up or twist in odd directions. During normal wear, tangling should stay minimal. If it swings and settles like your own hair, that’s a good sign. Signs the hair may be coated or over-processed Judge quality by looking at three things together: feel, movement, and how the hair responds after washing. One clear red flag is hair that feels glassy, slippery, or plasticky when you rub a dry strand. High-quality natural hair has a slight, healthy texture, while coated hair can feel overly smooth [1]. That “too silky to be true” feel can seem nice at first. But if the hair loses its nice finish fast, mats easily, or starts behaving differently after a wash, that can point to coating or heavy processing. Why base size, density, and texture match also matter Hair quality is only one part of the picture. A topper can still look off if the base size, density, or texture doesn’t match your own hair. What you want is simple: it should blend in and move like your hair, not just match the colour. If the density is too thick, the base is the wrong size, or the texture fights against your natural pattern, the topper can look a bit “stuck on” even if the hair itself is good. Conclusion: What to do if your human hair piece feels different than expected If your topper or extensions feel drier or slicker than you expected, the first wash often changes that. In many cases, that shift is temporary, not a sign the hair is fake. Once you know the hair is coated or freshly processed, start with a gentle reset. Mix a small amount of shampoo into cold water and let the piece soak for about 5 minutes. Then follow with a conditioning soak and let it air-dry on its own. Add a small amount of argan oil to the mid-lengths and ends so it blends more naturally with your own hair. Between washes, treat it gently and use a wide-toothed comb. After the first wash, protect the finish with low-heat styling and a light touch. Gentle washing and low-heat care help bring back softness and movement. If the hair still feels different, judge it by how it wears, not by softness alone. The best result comes from matching texture, density, and colour to your own hair. If it still feels off after gentle care, the issue is usually the fit, the texture match, or the processing quality. FAQs How do I tell if it’s coated? A silicone coating often gives the game away the moment you touch the hair out of the packet. It usually feels very shiny and almost too smooth. Sellers often use this kind of coating to cover up lower-grade, non-Remy hair. The bigger clue shows up after a few washes. If the hair starts to feel dry, tangles more easily, or loses that soft feel, the coating is probably washing away. High-quality Remy human hair keeps its natural movement and softness with regular care. Can human hair feel fake at first? Yes. It’s common for human hair toppers and extensions to feel a bit different when you first open them. That usually comes down to the manufacturing process, not the quality of the hair. A light silicone or conditioning coating can make the hair feel extra silky, or even slightly plasticky, at first. Once that protective layer washes out, the texture may feel different from your own hair because it doesn’t get your scalp’s natural oils. When should I worry about poor quality? Be concerned if your hairpiece shows structural breakdown. That can look like heavy tangling, matting, or dryness that gets worse even after washing and styling. Poor-quality hair can also feel brittle, lose its shine after the first few wears, and shed too much at the roots. In some cases, the weight feels uneven, which can make the piece sit stiffly instead of lying flat against your scalp. Related Blog Posts Factors Affecting Human Hair Extensions Durability Human Hair Toppers Weft hair extensions, use case, types and benefits Why Doesn’t My Colour Match Exactly?
Learn more
How To Blend A Topper Into A Bob Haircut
A topper blends into a bob when four things match: flat base, right length, light density, and the same part. If one is off, a bob shows it fast. Here’s the short version of how I’d do it: Start with clean, dry hair so clips hold better. Flatten bulk at the crown and sides so the base sits close to the scalp. Choose a topper slightly longer than the bob - about 2.5–5 cm longer gives room to trim. Keep density light to moderate so the top doesn’t look too thick next to the sides and back. Place the front edge 2.5–5 cm behind the hairline and clip in front, back, then sides. Leave a little of your own hair out at the front and sides to cover the base edge. Point-cut the join instead of cutting straight across, so the ends look softer. A bob has less room to hide mistakes than long hair. The crown is more visible, the outline is sharper, and extra bulk on top can show at once. That’s why I’d focus on prep, placement, and light finishing - not heavy styling. A few numbers matter here: 15–30 cm topper lengths tend to suit most bob lengths, and trimming with the topper just 2.5–5 cm longer than your cut makes blending much easier. Use this as your quick guide before you start: Area What I’d aim for Base Small or compact, sitting flat Length 2.5–5 cm longer than the bob Density Light to moderate Front placement 2.5–5 cm behind hairline Clip order Front → back → sides Finish Point-cut, light thinning if needed If I wanted the blend to last all day, I’d keep the shape light, match the texture to the bob first, and check the part and edges in natural light. Prepare the bob so the topper sits flat Start with clean, dry and detangled hair A bob shows every bump, so the hair underneath needs to be smooth before you clip in the topper. Oil and product build-up can stop the clips from gripping well [1]. "Wash and dry your hair thoroughly to keep it fresh and free from heavy oils." - Noelle Salon [1] Once your hair is fully dry, brush it through from root to ends. Knots and tangles near the roots can stop the base from sitting flush against the scalp and may leave ridges under the topper. If your hair feels a bit too slippery, mist the roots with dry shampoo or texture spray to give the clips more grip. It also helps to match your natural hair texture to the topper before clipping it in. With the hair clean and dry, the next job is to deal with any extra bulk around the crown. Flatten bulky spots at the crown and sides Bulk at the crown and sides can stop the topper from sitting flat. Thick bobs often hold volume right where the topper base needs to go. When that happens, the topper can lift away from the scalp and take on a helmet-like look. Before you place the topper, check the crown and sides for any bulky sections. Pin those areas flat against the head with bobby pins. As you secure each clip, press the base flat against your head. That small step can help stop bumps from forming underneath. After clipping it in, run your fingers along the edges of the base. If you feel bumps, unclip the topper and pin the natural hair underneath a bit tighter before trying again. A smooth base helps the topper sit flush. Once the base is flat, match the topper's length, density and parting to the bob. Match the topper to the bob before you clip it in Once your bob is prepped and lying flat, check the topper before you clip it in. The length, density, part, and base size need to suit the cut as a whole. If one of those is off, the blend can look awkward fast. Length, density and parting must work together Pick a topper that's 2.5–5 cm longer than your bob. That extra length gives you space to trim and feather the ends after it's clipped in, so it melts into your cut instead of leaving a blunt line. Density is where short styles often go sideways. If there's too much hair in the piece, the shape can turn round and puffy, which makes the topper stand out. "A common mistake is going too thick. That creates a 'mushroom head' effect and instantly gives the hairpiece away." - Leo, Hairstylist [3] For bobs, natural or moderate density tends to work best for a soft finish. The part matters too. Match the topper's parting to your own. If you normally wear a side part and place a centre-part topper on top, it will usually show. Fit table: matching a topper to a bob Use this table to line up topper length, density, and base size with your bob. Bob Style Recommended Topper Length Ideal Density Best Base Parting Strategy Jaw-length bob 15–20 cm Light to moderate Small silk or monofilament Align with your natural part; place the front edge 2.5–5 cm behind the hairline Chin-length bob 20–25 cm Natural or moderate Compact silk Centre or side part; leave a thin section of your own hair at the front to soften the edge Longer bob (lob) 25–30 cm Moderate Medium mono or silk Multi-directional parting; blend into existing layers The base should cover the thinning area, but it shouldn't run into the denser crown and sides. If it reaches thicker hair, the clips can end up sitting on bulk instead of flat against the scalp. When that happens, the topper may lift and look less secure. Once the fit looks right, clip it in and blend the front, part line, and sides. sbb-itb-08feb2fPlace, secure and blend the topper into the bob How to Blend a Topper Into a Bob Haircut: Step-by-Step Guide Position the topper and secure the clips in the right order Once your topper matches your bob, it’s time to clip it in properly so it sits flat and blends in with your own hair. Open all the clips before you place the topper. This helps you avoid pulling on your own hair while you’re trying to secure it. [1] Set the topper over your head and line up its part with your natural part. The front edge should sit about 2.5-5 cm behind your natural hairline. That small gap matters. It gives you room to pull some of your own hair forward and cover the base edge, which helps hide the join. If your hair is fine or silky, lightly roughen each clip point first so the clips have a better grip. [1][2] "Place the front clip about 1-2 inches behind your natural hairline. Secure the front clip first. Hold the base flat and taut against your head. Clip the back next, then the sides." - Henry Xiang, Founder at Alpha Hair [2] Clip the topper in this order: front first, then the back, then the sides. As you go, keep the base flat against your head. After that, check around the edge for any bumps, lifting or gaps. If a section isn’t sitting right, unclip it and secure it again. [1][2] Blend the front, part line and side sections Once the base is secure, the next step is making the front and sides look soft and natural. Leave out a few thin sections at the front and sides, then smooth them over the base edge with your fingers. This helps keep the blunt line of the bob from looking too harsh. Use a paddle brush or a wide-tooth comb to blend the topper into your bob, and keep one hand lightly on the base while you do it so nothing shifts out of place. [1][2] If the part still looks a bit sharp, use a root concealer spray or powder that matches your natural colour to soften the line. Then move your head from side to side and check that the topper stays secure. [1][2] Finish the shape and keep the blend natural all day Trim, layer and style the topper with the bob Once the topper is secure and the front is blended, the last step is making it look like it belongs with the bob. The goal is simple: style the topper and your bob as one shape, not two separate pieces. Start by styling the bob first. Straighten it, add a wave, or softly bevel the ends based on how you normally wear it. That matters because you want to trim the finished shape, not the unfinished one. When the bob already sits the way you like, the join is much easier to tidy up. Then use sharp scissors to point-cut where the topper meets your bob. Hold the scissors vertically and snip into the hair at a 45° angle instead of cutting straight across. That gives you a softer, feathered edge rather than a blunt line that can make the join stand out. If the area still feels a bit heavy, use thinning shears about 5–8 cm from the ends to take out some weight. [4] For very short bobs, the front hairline can be the hardest part to hide. In that case, a topper with a built-in fringe can do a lot of the work for you by helping cover the front join. [1][2] Key points to remember for a smooth bob blend "Always cut less than you think you need. You can always trim more, but you can't put hair back!" - Henry Xiang, Founder, Alpha Hair [4] Finish with small tweaks. Point-cut the join, soften the ends, and check the part in natural light. FAQs Can I wear a topper with a very short bob? Yes, you can absolutely wear a hair topper with a very short bob. It’s a simple way to add volume and coverage without wearing a full wig. For the most natural look, pick a lightweight topper that matches your hair length, density, and texture. With the right fit and clip placement, it can blend in well and feel secure and comfortable. How do I stop a topper looking bulky on a bob? Choose a smaller, lightweight topper so the base sits flat against your scalp and blends with your natural hair density. If there’s too much volume, it can swamp fine hair and make the separation stand out more. Size matters too. A base that’s too large can add bulk, while one that’s too small may not stay in place well. A professional stylist can trim and layer the topper while you’re wearing it, which helps it sit and look more natural. Should I trim the topper myself or see a hairdresser? For the most polished, natural finish, it’s a smart idea to see a professional stylist. They can cut and blend the topper while you’re wearing it, so it melts into your bob and looks like part of your own hair. You can style a human hair topper at home. But for precise shaping and a flawless, customised result, a stylist makes a big difference. Related Blog PostsCommon Mistakes That Make Hair Toppers Look Unnatural
Learn more