Articles


Melbourne Cup Hair: 4 Race Day Styles That Look Polished All Day
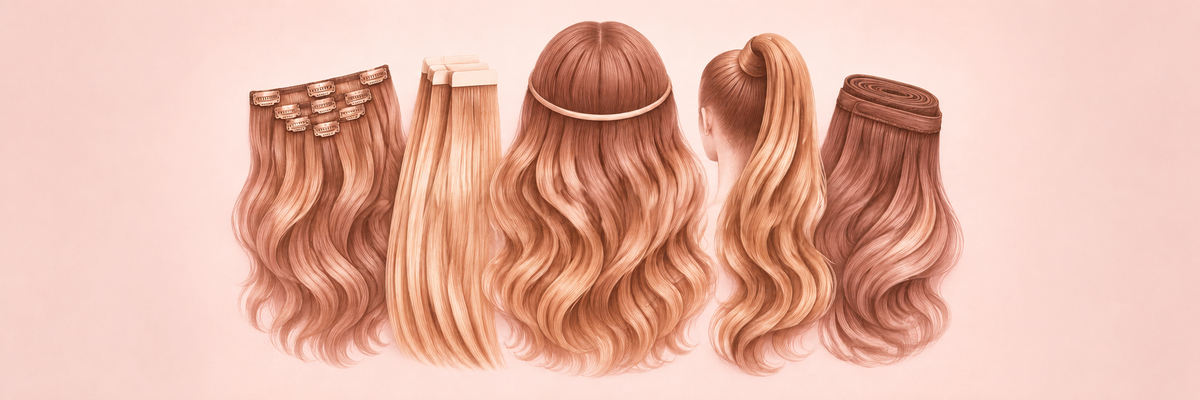
Race day hair, made easy. Discover 4 Melbourne Cup hairstyles, from messy buns to glam waves, and how Silkara® extensions give you fuller, longer hair in minutes.
Learn more
How Hair Toppers Hold Beach Waves and Curls
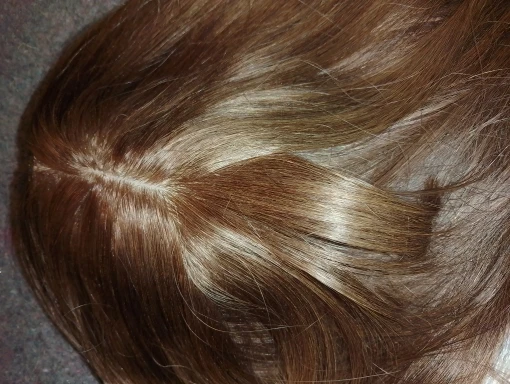
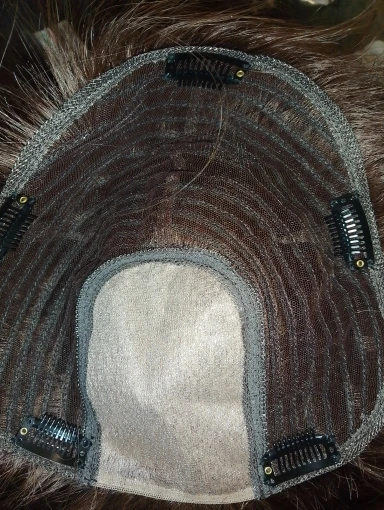
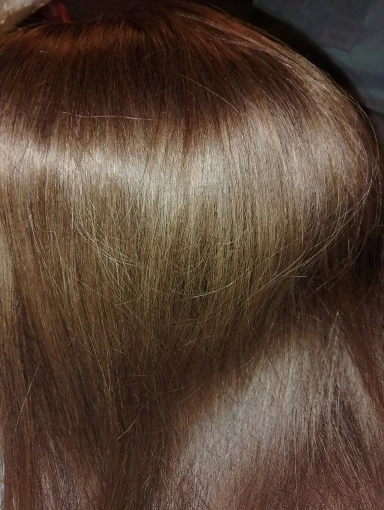
Yes - a human hair topper can hold beach waves and curls well, but only if I style it dry, use low-to-moderate heat, and keep heat off the base. In most cases, curl hold comes down to hair type, heat setting, tool choice, and humidity. A common starting point is 150–160°C, with 180°C only if the care guide allows it. If I want waves that last without flattening the crown, I focus on a few basics: Start with fully dry hair Use heat-safe human hair only Leave 2–3 cm near the base untouched Curl from the mid-lengths to the ends Let the hair cool before brushing Store the topper on a stand overnight A few tool choices make the finish easier to control: 32 mm curling iron: loose beach waves Curling wand: tighter curls that soften later Flat iron: soft S-bends Blow dryer + round brush: volume and soft shape with less direct heat Humidity can shorten wear time, and loose waves often fall faster on silky hair. By contrast, tighter curls often drop into a softer beach-wave look by the next day. So if I want the style to last, I usually set it a bit tighter than my end result. Styling a Real Hair Topper - Curls and Waves sbb-itb-08feb2fQuick Comparison Tool Look Heat level on hair Best use Curling iron (32 mm) Loose waves Medium Beachy finish Curling wand Defined curls Medium Curl that softens over time Flat iron S-waves Medium Smooth bends Blow dryer + round brush Volume and shape Lower direct heat Lift near the crown Bottom line: if the synthetic hair topper is dry, heat-safe, and styled with care, I can get waves or curls that last through the day without putting the base at risk. Can You Safely Curl a Human Hair Topper? Human hair toppers can usually be styled with heat, but the fibre type and the base construction set clear limits. Human hair will often handle heat well. Synthetic toppers are different - only use heat if the care guide says the fibre is heat-safe. Before you curl anything, make sure the topper is fully dry and free of tangles. That part matters more than people think. Wet or snagged hair is far more likely to stretch, fray, or lose shape. And one rule is non-negotiable: keep heat away from the base. Style the lengths, not the foundation. Curl hold also varies from topper to topper. Density, length, and overall condition all play a part. Hair that’s coloured or chemically processed needs a gentler touch, since it can dry out more easily under heat. Once you’ve confirmed the topper is heat-safe, the next step is simple: pick the tool that gives you the curl shape you want. When Heat Styling Is Suitable for a Topper Curl hold tends to be better on hair that is denser, longer, and in better condition. If the hair has been coloured or chemically processed, use lower heat and work more carefully. After you’ve confirmed the topper is heat-safe, the next decision is the tool that will shape the wave. Which Tools Work Best for Beach Waves and Curls Hair Topper Styling Tools: Waves & Curls Comparison Guide Once the topper is fully dry, the next step is picking the tool that will shape the wave. And this part matters more than people think. Each tool gives a different finish on a human hair topper, and each one puts a different kind of heat and tension on the topper base. Tool Best for Curling iron (32 mm) Loose beach waves Curling wand Defined curls that soften over time Flat iron S-waves and soft bends Blow dryer and round brush Shape and volume with less concentrated heat Curling Irons and Wands for Loose Waves or Defined Curls Barrel size makes the biggest difference here. A barrel around 32 mm creates relaxed, loose waves. Go smaller, and you'll get tighter curls that tend to drop and soften as the day goes on. Curling irons use a clip to hold the hair in place while it sets, so they can feel easier to handle. Wands, on the other hand, need you to wrap the hair by hand, which takes a steadier touch. For both tools, work from the mid-lengths to the ends. That helps keep heat away from the crown and base, which is exactly where you want to be more careful. Flat Irons and Blow Dryers for Softer Bends and Movement A flat iron isn't just for straightening. It can also make soft, S-shaped bends that sit nicely on a topper. Rotate the iron as you glide through the hair to form gentle waves and bends. It's a good middle ground when you want something neater than a loose wave but not as set as a curl. A blow dryer with a round brush gives lift and soft movement through the whole piece. Since the heat is less direct than an iron, it's a gentler option overall. It works well when you want volume and shape without bringing strong heat too close to the base. Wide-Tooth Combs and Sectioning Clips That Protect the Base Start with a wide-tooth comb to detangle the hair gently, then use clips to section it. That keeps the rest of the hair out of the way and lets you work through one section at a time without pulling on the base. After choosing the tool, the next step is matching it to the right heat setting so the base stays flat. Safe Heat Ranges and How to Protect the Base Once you’ve picked your tool, the next step is simple: match the heat to the hair. In most cases, the lowest setting that holds the curl is the best place to start. Safe Heat Ranges for Routine Styling As a general guide, 160°C or below is a cautious starting point for routine styling on most human hair toppers[1]. Heat Range Temperature When to Use Low Below 150°C Refreshing existing waves or styling fine hair Moderate 150°C–160°C Everyday styling on most human hair toppers Maximum 180°C Only if specifically permitted by care instructions A single controlled pass is usually safer than going over the same section again and again. How to Curl the Lengths Without Flattening the Crown If you want to keep lift at the crown, don’t curl right up to the roots. Section the hair below the attachment area before you begin, and keep heat away from the clips, lace, and knots. A good rule of thumb is to leave the first 2–3 cm near the base straight. Then start your curls from the mid-lengths. That small change helps the crown stay lifted instead of getting pressed flat. How Long Waves and Curls Last and How to Keep Them Even with the right tool, waves don’t always last the same amount of time. A lot comes down to the hair itself and the weather on the day. Curl hold is shaped by hair texture, density, product weight, and humidity. What Affects Curl Hold from Morning to the Next Day Tighter curls often relax into beach waves by the next day, and that can actually look better if you want a softer finish. Loose waves tend to drop sooner, especially on silky hair or during humid Australian weather. How to Store and Refresh a Styled Topper Once the style has cooled, the main job is to keep the shape in place overnight. Let the curls cool completely before brushing or combing. Running a comb through warm hair can throw off the shape before it has set. Store the topper on a stand so the base keeps its shape overnight. The next morning, refresh it with low heat only where needed, and stick to the lengths. Small touch-ups usually work best and help protect the hair over time. Conclusion: The Simplest Way to Get Lasting Waves Without Damaging the Topper Let curls cool, use light products, and store the topper on a stand to help waves last longer. FAQs Will curls hold on fine or silky topper hair? Yes. Curls can hold well on fine, silky human hair toppers, and Silkara Hair’s 100% Remy human hair reacts to heat styling much like your own hair. For a better hold: Use a heat protectant Let the hair cool fully in the curled shape Keep styling tools at a safe, moderate temperature to help maintain the hair’s condition Can I safely curl a coloured human hair topper? Yes - if it’s made from 100% Remy human hair. That means you can curl or wave it much like your own hair. To help protect both the hair and the colour, apply a heat protectant first and keep your styling tools on a moderate setting, ideally below 180°C. Silkara Hair human hair toppers are made for flexible styling, including beach waves and curls, while still keeping a natural look and feel. How do I stop the topper base going flat? Avoid putting heavy styling products right at the base. They can weigh the hair down and flatten its natural lift. It’s better to work products through the mid-lengths and ends instead. The same goes for heat. Too much heat near the base can soften the material and affect the topper’s shape. Silkara Hair offers high-quality human hair toppers made to give you a natural, full look. Related Blog Posts Heatless Waves vs. Heat Curls: Pros and Cons Human Hair Toppers Human Hair Topper with Bang Hair Toppers: The Secret to Natural-Looking Coverage & Volume
Learn more
How to Style Ponytail Extensions Without Heat
You don’t need heat to make a ponytail extension look smooth, neat, and natural. I’d focus on 4 steps only: prep the hair, secure a firm base, hide the join, and shape the ponytail with braids, twists, or rollers. Here’s the short version: Start with clean, fully dry hair Detangle your hair and the extension gently Check if the piece is human hair or synthetic fibre Secure a snug ponytail base with an elastic Attach the extension close to the hair tie Wrap hair around the base to hide the attachment Use loose braids, twists, or foam rollers instead of heat Keep product light to avoid slipping and buildup Remove and store the extension with care A smooth finish often comes down to small details. For example, if the base is loose, the extension can shift. And if you use too much product, it can slide out. In my view, most styling issues come from just two things: a weak base or rough handling. What matters most: Dry hair holds better than damp hair Loose, heatless shaping puts less stress on the fibre Synthetic fibre usually needs more care than human hair A few bobby pins can help stop lifting at the base If you want a simple rule to remember, it’s this: smooth first, secure second, shape last. That gives you the best shot at a clean ponytail that stays in place through the day. Below, I’d break down each step in a simple way so you can do it without heat and without fuss. How to Style a Ponytail Extension Without Heat: 4-Step Guide HOW TO: 3 Easy HEATLESS Hairstyles with Hair Extensions Tutorial | Milabu sbb-itb-08feb2fPrepare Your Hair and Extension Before Styling Begin with clean, completely dry natural hair. Skip heavy oils, serums, and thick leave-ins near the attachment area, because they can make the extension slip and reduce hold. Brush your hair smooth before you gather it. Any knots or bumps can show through the base, and that can throw off the whole look. How to Brush and Detangle Without Damaging the Base Lay the extension flat before brushing so you don't put stress on the stitching. Start at the ends, then work your way up in small sections. As you brush, hold the hair close to the attachment point to help keep the stitching protected. Once the extension is smooth, you can gather your hair and secure the ponytail base. Check Your Fibre Type Before You Style Before you use water or any spray, check whether the ponytail extension is made from human hair or synthetic fibre. Synthetic fibre can frizz more easily or lose its shape, so it's worth checking first. After you confirm the fibre type, move on to securing the ponytail base. Build a Secure Ponytail Base Once the hair and fibre are prepped, it’s time to build the base that keeps the extension in place. Gather your hair at the height you want, smooth the sides, and secure it with a firm elastic. The base should feel snug. Then attach the ponytail extension as close to the hair tie as possible. If any sections feel loose, pin them down with bobby pins before you wrap the extension. That extra hold can make all the difference. Pick Your Ponytail Position and Gather the Hair Choose the height first: low, mid, or high. Then bring all your hair to that point. Smooth out bumps and flyaways before you secure it, because an uneven base will show through the extension. Attach the Extension Close to the Hair Tie Clip, wrap, or press the extension attachment right against the hair tie. The closer it sits to the base, the better it will hold and the more natural it will look. Once it’s attached, give it a quick check to make sure it feels stable before moving on. With the base secure, move on to hiding the attachment and shaping the ponytail. Wrap the Base and Shape the Ponytail Without Heat Once the base is secure, the next step is to hide the join and give the ponytail its final shape. Hide the Attachment Point for a Clean Finish Wrap the supplied hair wrap, Velcro panel, or a strand from the extension around the hair tie. Then pin the end flat underneath the ponytail so the base sits neat and flat. Add Soft Shape Using Braids, Twists or Rollers Once the base is hidden, choose the look you want: sleek or softly textured. For a sleek finish, finger-comb the extension straight down. If you want texture, go with loose braids, two-strand twists, or foam rollers. Keep each section loose so you don't put stress on the fibre. After you take the set out, shape the ends with your fingers rather than a brush. Then keep the shape in place with light, all-day care. Keep the Ponytail Looking Good All Day and Store It Correctly After shaping, a little upkeep goes a long way. Once the ponytail is set, the job shifts from styling to light maintenance. The main goal is simple: keep the attachment point secure, keep the fibre smooth, and avoid anything that might loosen the base. Stop Tangles, Frizz and Slipping During Wear Carry a wide-tooth comb and two or three bobby pins for quick touch-ups. If tangles show up, smooth them gently from the outside in. And when you freshen the style, hold the base with one hand so you don't put extra tension on the attachment point. Use only a small amount of product to smooth flyaways and help stop buildup. It can be tempting to keep tightening the extension through the day, but that usually does more harm than good. Each adjustment adds strain to the base and to your natural hair underneath. It also helps to shield the style from friction, rain and humidity. Remove and Store the Extension Without Causing Damage At the end of the day, slow down a bit during removal. Take the extension out carefully. Undo any wrapping first, then release the attachment gently and slide it free instead of pulling it loose. After that, detangle it softly before storage. Make sure the extension is fully dry before you put it away. Store it loosely in a clean, dry spot where it won't get crushed. Conclusion: Key Steps for a Smooth Heatless Ponytail A smooth heatless ponytail comes down to four steps: prep, a secure base, a neat wrap, and soft shaping. Start with dry, detangled hair. Then build a firm base and attach the extension close to the hair tie so it sits flat against your head. After that, wrap the base neatly to hide the attachment point. To finish, use loose braids, twists, or rollers to add shape without putting stress on the fibre. During wear, keep touch-ups light. When you're done, remove and store the ponytail gently so it stays in good condition. FAQs Can I style a synthetic ponytail extension without ruining it? Yes, you can style a synthetic ponytail extension without heat, as long as you avoid high-temperature tools that can melt or permanently damage the fibres. Stick to gentle styling methods, like rollers for curls or simple brushing and smoothing, to get the look you want while helping maintain the quality of the piece. Why does my ponytail extension keep slipping? A ponytail extension can slip if the base isn't fixed firmly enough to your natural hair. Tie your hair into a tight bun or ponytail with a strong hair tie. Then push the Silkara Hair internal comb or clip deep into the base of your hair tie. Wrap the extension base tightly, and use bobby pins for extra hold. How do I make the base look more natural? Take a small section of hair from the underside of the ponytail and wrap it firmly around the base to hide the attachment point and hair tie. Then tuck the end underneath with a discreet bobby pin so it sits flat against your head. For a smooth finish, brush your natural hair before you secure the extension. Silkara Hair extensions are made to blend in well and give a polished, high-quality look. Related Blog Posts Heatless Waves vs. Heat Curls: Pros and Cons Ponytail Hair Extensions: Add Instant Length & Volume to Your Pony Ultimate Guide to Voluminous Ponytails with Extensions Ultimate Guide to Heat Styling Synthetic Extensions
Learn more
Best Extension Lengths for Short Hair
If I have short hair, the safest rule is simple: I keep my extensions within about 5–10 cm of my own length for a smoother blend. That one step does most of the heavy lifting. Here’s the short version: Above chin: I’d look at 30–35 cm Chin to jaw bob: I’d look at 35–40 cm Jaw to collarbone lob: I’d look at 40–50 cm Shoulder length: I’d look at 50–55 cm A few things matter just as much as the number on the pack: Extensions are measured straight, so waves or curls will sit shorter Blunt cuts show the join more easily than soft layers Colour match matters because even a small shade miss can make the line stand out Placement and extension type change how well short hair hides clips, tapes, or wefts About 4 starting lengths and 5 extension types cover most short-hair cases, but the main aim stays the same: pick the shortest length that gives me the look I want without making the join obvious. Best Extension Lengths for Short Hair: Quick Match Guide How to choose the PERFECT length of hair extensions for your hair sbb-itb-08feb2fQuick Comparison Starting cut Best length range Main thing I watch for Very short / growing out 30–35 cm Nape line can show fast Short bob 35–40 cm Blunt jaw line needs softening Lob 40–50 cm Blunt ends may need layers Shoulder length 50–55 cm Easier blend, but hard ends can still show So if I want short hair extensions to look natural, I focus on length, cut shape, colour match, and attachment method instead of just buying the longest set. How Extension Lengths Work on Short Hair Extension length won’t land in the exact same spot on every person. Your height and neck length both change where the hair falls, so one length might work nicely on one short cut and sit too high or too low on another. You’ll often notice this most at the back of the neck. With short hair, it usually helps to keep your extension length within about 5–10 cm of your natural hair length, such as with 14 or 16-inch extensions. That gives you a softer blend and helps the extension sit more naturally. Use that as your starting point when matching the right length to each haircut in the table below. Quick Comparison Table Use the guide below to match your extension length to your starting cut. Each range follows the 5–10 cm blend rule from the previous section. Starting hair length Best extension length range Why it blends well Very short or growing out (above chin) 30–35 cm Adds length without an extreme jump; layers help disguise the gap Short bob (chin to jaw) 35–40 cm Sits past the collarbone; enough difference to change your look without clashing Lob (jaw to collarbone) 40–50 cm Reaches mid-back; soft layers at the ends help hide the join Shoulder length 50–55 cm Lands at mid-back to waist; closest match in texture, easiest to blend Next, we’ll look at each starting length in more detail. 1. Very Short Hair or Hair That's Growing Out With very short hair, the aim is simple: add some length without making the join obvious. Hair at this stage usually blends best with 30–35 cm extensions. That smaller jump in length looks more natural and makes the join much easier to hide. If you go too long too soon, the change can look harsh, especially around the nape. Soft layers make a big difference here. They help break up that line at the back of the neck, so the shift between your natural hair and the extensions looks less blunt. Styling matters too. Soft waves tend to hide the join far better than pin-straight hair. Straight styles can draw attention to any difference in thickness or texture, while waves help everything melt together a bit more smoothly. Once your hair reaches chin length, blending usually gets easier, and slightly longer extension lengths can sit more naturally. 2. Short Bob Once hair hits chin to jaw length, blending gets a lot easier. A short bob works well with 35–40 cm extensions. That gives you enough extra length to shift the shape without creating a harsh line at the jaw. A soft finish tends to blend better than a blunt edge. Choosing the right hair extensions is key to achieving this seamless transition. From here, a lob can handle slightly longer lengths more naturally. 3. Lob A lob gives you a bit more room to play with, which makes blending easier and cuts down the need for a big leap in length. A layered lob tends to work best with 16–20 inch extensions. That length falls past the collarbone, so you get enough extra hair to shift your look without making the join too hard to hide. If your lob is blunt, softer ends or light layers usually help stop the extensions from showing as a clear line. And if you style your hair in waves, the join is often much less obvious than it would be with a sleek, straight finish. When your hair already sits on the shoulders, you can usually go a little longer with fewer blending issues and less chance of ending up with a harsh line. 4. Shoulder-Length Hair Shoulder-length hair gives you the smoothest blend out of the shorter hair lengths. Suggested extension range 50–55 cm extensions are usually the sweet spot here. They give you a clear jump in length without pulling the join too high. Approximate finished position On most people, that finished length will sit around mid-back to waist, depending on your height and neck length. Best result The best result is a longer look with the least visible blend line. Main blending consideration Shoulder-length hair does a better job of hiding the join than shorter cuts. That said, blunt ends can still give the game away. If the ends look too sharp or heavy, the join can start to show. That’s why the focus at this stage shifts a bit. It’s less about getting enough length and more about making the join disappear. Keep the ends soft, and skip a blunt finish if you want the blend to look smooth. Even at this length, a hard end line can still stand out, so the next step is softening the transition. How to Avoid a Harsh Line with Short Hair Extensions Even if you pick the right length, short hair extensions can still look blunt if the colour is even slightly off. Start with colour matching. Screen colours can shift, so check the shade in natural light to help the join blend in instead of standing out. If your hair has highlights or regrowth, go for a multi-tonal shade instead of a flat colour. That small choice can make a big difference. Hair rarely sits in just one solid tone, so extensions shouldn’t either. Once the shade is right, the next part comes down to extension type and placement. That’s what shapes how smooth and natural the blend looks. Extension Types That Work Well on Short Hair Once you've settled on length and colour, the attachment method plays a big part in how natural extensions look on short hair. Not all extension types blend the same way. On shorter cuts, the method itself, the weft thickness, and how well the piece fits can make or break the final look. Tape-in extensions tend to work very well for short or fine hair. The adhesive bonds sit flat against the scalp, which helps avoid bulk at the root. That matters on short hair, because extra thickness can push your own hair out and make the join easier to spot. With tape-ins, the transition usually looks smoother. Clip-in extensions give you more control over where the hair sits. That makes them handy when you're trying to soften a blunt line. Instead of adding one thick section, you can place smaller pieces in layers to break up that harsh step between your own hair and the added length. Halo extensions create a similar visual effect. They use one wide weft attached to an invisible wire, so they're simple to put on and take off. But there's a catch: they need a bit more natural length to sit under. If the base cut is too short, there may not be enough hair to cover the top of the weft well. On a blunt bob, that can leave a visible line, so halos are usually a better match from lob length and up. Some pieces skip the blending issue altogether. Ponytail pieces and bun extensions wrap around the hair you've gathered at the base, then cover it. Because of that, there's no visible blend line to deal with. Toppers work a bit differently. They clip into the crown and add volume at the root, which can help soften the shift into longer lengths. Silkara Hair offers 100% Remy human hair extensions and hair pieces, with free colour matching and AI virtual try-on on selected products to help narrow the right shade, base and length. [1] Use the table below to match each type to the cut it suits best. Extension Type Best For Key Advantage on Short Hair Tape-in Bobs, fine hair Lies flat; no bulk at the join Clip-in Lobs, shoulder-length Flexible placement breaks up blunt lines Halo Lobs, shoulder-length No clips or glue; easy on and off Topper All short cuts Adds root volume for a gradual transition Ponytail / Bun Any length that can be gathered No blending required Final Selection Checklist Use these checks to narrow down the right length from the table above. Measure from where the extensions will sit, then measure to the ends of your natural hair. This gives you a proper starting point. Decide where you want the final length to land. Then work backwards from the result you want, so you can pick the length that fits. Choose the shortest length that still reaches your target. Larger gaps are harder to blend, and that can make the finish look less natural. Allow for shrinkage and height, which change where the hair falls. Curly or wavy hair often sits shorter than it looks when measured flat. Check that your natural hair can cover clips, tapes or wefts. Then match the shade so the blend disappears. Match colour in natural daylight, not under screen or indoor light. Conclusion For short hair, the best extension length is the shortest one that blends neatly with your cut. Start with your own hair length, then go longer only if it still blends well. That’s the simplest way to avoid a harsh line and keep the finish natural. If you need help choosing, Silkara Hair offers free colour matching and AI virtual try-on on selected products. FAQs Can I wear long extensions with a short bob? Yes, you can. The key is picking the right length and density so your extensions blend smoothly with your own hair. Silkara Hair focuses on 100% Remy human hair extensions made to add length and volume with an easy at-home change. Done well, they help you avoid a harsh line and keep the finish looking natural. Do I need layers to blend extensions into short hair? It depends on your hair texture and the look you’re after, but layers usually help extensions blend more naturally with short hair. They create a smoother transition between your own hair and the extensions, so you’re less likely to end up with a harsh, blunt line. Silkara Hair can also offer personalised guidance on the right length and style for a smooth, natural-looking finish. Which extension type hides best in short hair? For short hair, a high-quality hair topper or halo extension usually gives the most natural blend. Why? Because both add volume and length while helping disguise the point where your own hair meets the extension. That makes the finish look smoother and less obvious. Silkara Hair offers 100% Remy human hair toppers and halo extensions made to blend in naturally, without harsh lines. Related Blog Posts Halo Hair Extension Length Guide: 14, 16, 18, 20 & 22 Inches Explained Best Halo Hair Extensions for Short Hair: How to Get a Seamless Blend Hair Extensions for Volume Only: How to Add Thickness Without Adding Length Best Hair Extensions for Shoulder-Length Hair: What Actually Blends Best?
Learn more
How to Create Bridal Half-Up Hair with Extensions
If I want a soft bridal half-up style with extensions, I focus on three things: hide the joins, keep the top light, and curl my own hair with the extensions together. That’s what makes the style look smooth instead of heavy or patchy. Here’s the short version: I start with clean, dry hair I match colour, length, density, and texture I place extensions below the crown I keep clips and wire out of tight sections I tease only the hidden root area I curl natural hair and extensions together I finish with light hairspray and check the style from every angle A bridal half-up style should look like my hair with more length and volume, not like separate pieces added in. Human hair extensions help with this because they tend to hold heat styling in a similar way to natural hair. In most bridal styling routines, even small placement errors near the crown can show once the top section is pinned back, so where I place each piece matters as much as how I style it. If I’m choosing between clip-ins and a halo, this is the main difference: Extension type Best for What I watch for Clip-in wefts Volume in the back or sides I need enough hair on top to cover each clip Halo Even volume around the head I make sure the wire sits under the top section The method is simple: prep first, place low, build light lift, then blend with curls. That gives me a soft bridal finish that stays neat through photos, the ceremony, and the reception. How to Create Bridal Half-Up Hair with Extensions: Step-by-Step Guide 1. Prepare your hair and choose the right extensions Start with clean, dry hair and check colour and texture Start with clean, dry, detangled hair. If your hair is damp or coated in styling product, extensions may not sit flat and the blend can look off. Match the extension texture to the curl or wave pattern you want at the end. Colour, density, and length should line up too, so the whole style looks even. Before you curl, use heat protection on both your own hair and the extensions. Choose clip-in wefts or a halo extension based on where you need volume Choose clip-in wefts if you want fullness in certain spots. Go with a halo if you want a more even boost all over. The right option depends on where you need volume and how easily it can stay hidden inside the half-up style. Extension Type Best Placement Volume Distribution How to hide it Clip-in Wefts Back and sides of the head Targeted fullness in specific areas Requires natural hair layers to cover clips Halo Extension Around the crown/mid-head Even fullness throughout the head Hidden by the top layer of natural hair Clip-in wefts are a good fit for brides who want extra fullness through the back or sides. A halo works better if you want a more even increase in density around the whole head. For a half-up bridal style, the halo’s single wire is easy to hide under the top half-up section. Placement comes first. Then you make sure every attachment point stays out of sight. Use human hair extensions for easier curl matching 100% Remy human hair holds curl and movement in a way that blends more naturally. It also reacts to heat tools much like your own hair, so curling and blending tend to look more even in the finished style. [1] Once you’ve chosen the extension type, place it below the crown so the half-up section hides every join. sbb-itb-08feb2f2. Place extensions below the crown so they stay hidden Section the hair and install the base layer first Create a clean horizontal part about 5 cm above the nape. Then clip the rest of the hair up and out of the way so you can work neatly underneath. Start with your widest weft and place it across the back of the head. This sets up an even base of volume. If you're using a halo extension, sit the wire at the crown or mid-head, then let your natural hair fall over the top. The aim is simple: add fullness at the base without pushing the top section up too much. That hidden layer gives the hair above it something secure to rest on. Keep all attachment points under the half-up section Every clip and the halo wire should sit below the crown. After placing each weft, drop a thin layer of natural hair over it before you add the next one. That small step helps hide the joins as you go. Also, avoid clipping into spots where the style will be pulled tight. If you place extensions in those tension zones, they can shift or peek through. Keeping attachments lower helps the half-up style look soft and smooth from every angle. Step-by-step summary table Step Action Purpose 1 Create a horizontal part ~5 cm above the nape Sets a hidden foundation for the base weft 2 Clip upper hair away and install the widest weft first Builds even volume across the back 3 For halos, place wire at the crown/mid-head Keeps the attachment point hidden 4 Release natural hair over each piece before adding the next Covers joins as you build 5 Keep all clips and wire below the crown Ensures nothing shows when the top section is gathered 6 Avoid clipping into tension zones near the crown Helps prevent shifting when the style is finished With the base set, the next move is light crown teasing to shape the half-up style. 3. Build the half-up shape with light crown teasing Trace a temple-to-temple section and leave soft pieces around the face Now that the extensions are tucked under the crown, trace a section from temple to temple to form the half-up area. Keep the hair below that part down so it continues to cover the extensions. Leave a few soft face-framing pieces out at the front, then move on to the root teasing. Tease only the hidden root area for controlled lift Work in small sections and tease only the hidden root area. That gives you lift without making the style look bulky. The key is simple: keep the top layer smooth, so the finish stays polished. Secure the upper section and loosen it slightly Gather the upper section at the back and secure it with a clear elastic or a pair of crossed bobby pins. Then gently loosen the top edge with your fingers to add a soft lift and shape the hairstyle into a soft bridal look. Half up half down style with hair extensions 4. Curl, blend and lock in the finished bridal style With the half-up shape in place, the last step is to curl, soften and set everything so it all flows as one style. Curl natural hair and extensions together for a close blend Curl each section of natural hair and extensions together so the bend and direction stay the same. That consistency helps the hair look like one piece and hides the join. Then leave the curls alone for a moment. If you touch them too soon, they can drop or split apart. Finish the face-framing pieces you left out earlier the same way, so they sit neatly with the rest of the style. Loosen the curls and check the style from every angle After the curls have cooled and set, gently break them up with your fingers to soften the look. At this stage, you're making sure the joins stay hidden as the curls relax. Check the style from every angle, especially around the crown and sides. Look out for any visible clips, wire or joins. If something seems slightly off, fix it now before moving on. Finish with flexible hold and check bridal accessories Mist the hair with flexible-hold hairspray in light layers. That helps keep the shape in place without making it stiff. Before you add a veil or comb, make sure the half-up section still feels secure. Conclusion: A quick review of the steps for a soft bridal half-up style A soft bridal half-up style comes together when each step supports hidden volume and an easy, natural finish. Keep extensions below the crown, add controlled lift with light root teasing, and curl the natural hair and extensions together so they blend closely. Finish with a flexible-hold spray, then make sure any bridal accessories sit snugly in the style. When it’s done well, the look stays secure, soft, and wedding-ready. FAQs How do I stop extensions showing in a half-up bridal style? Place the clips a bit lower on your head. Don’t set them too close to the hairline or right next to the section you’re pulling back, because your own hair needs enough room to fall over the wefts and hide them. A little teasing at the crown gives the clips a firmer base to grip onto. It also helps cover the tracks. For a smooth, natural-looking finish, curl your hair and the extensions together so they blend as one. Are clip-ins or a halo better for bridal half-up hair? It comes down to where you want more hair and how much control you want over placement. Clip-in extensions give you more control. You can place each weft exactly where you want extra fullness or length, especially around the crown and sides. A halo extension is faster to put on and gives you all-over length and fullness with a seamless look. Both Silkara Hair options are made to blend in naturally, and colour matching support can help you get a seamless finish. How can I make my curls blend with the extensions? Style your natural hair and the extensions together once they’re in place. When you curl both at the same time, you create one blended texture, which helps hide any transition points. Silkara Hair’s Remy human hair extensions hold their style well, making it easier to get a soft, natural-looking finish with extra volume and length across your bridal event. Related Blog Posts Clip-Ins vs. Halo Extensions for Updos Best Halo Hair Extensions for Short Hair: How to Get a Seamless Blend Best Hair Extensions for Shoulder-Length Hair: What Actually Blends Best? Best Hair Extensions for a Wedding: Halo, Clip-In or Ponytail?
Learn more
How to Care for Halo Hair Extensions: 8 Simple Tips
Discover 8 simple ways to care for your halo hair extensions and keep them soft, smooth and beautiful for longer. From brushing and washing to heat styling and storage, these easy Silkara tips will help you get the most from your extensions.
Learn more
Can Halo Hair Extensions Fall Out? How Secure Is an Invisible-Wire Halo?
Yes - a halo can stay on well all day, but only if the wire fit is right. If the wire sits flat, rests about 1–2 cm behind your hairline, and the weft sits under the occipital bone, it should feel snug and stay put. Here’s the short version: Most slipping comes from poor wire fit, not the halo itself. A loose wire can drift forward during the day. A tight wire can press at the temples and feel uncomfortable. Fine or silky hair may need backcombing, texturising spray, or a couple of bobby pins. For daily wear, a wire-only halo is often enough. For dancing, wind, or thin hair, clips or pins can add more hold. For sleep, swimming, and hard exercise, take it off. About 52–58 cm is the standard head size range many halos are made for, with small fit changes made through an adjuster. So if you’re asking, “Will it fall out?”, my answer is simple: not if it fits you properly. Fit check What it means Wire sits flat on the scalp Fit is likely right Wire lifts away from the head Too loose Temples feel pressure fast Too tight Weft stays put when you shake your head lightly Secure fit Halo moves towards your face Needs tightening If you want a halo that feels steady, I’d focus on fit first, then add pins only if your hair is very soft, fine, or slippery. How an invisible-wire halo stays in place A halo extension uses one weft of hair attached to a thin, clear wire. It sits on your head like a clear band, not with clips or bonds. Fit and placement are what make it feel secure. Where the wire sits across the crown The wire should sit about 1–2 cm behind your front hairline, resting across the top of the head. If it sits too far forward, the wire can show. Too far back, and it won’t feel as steady. That spot works because the back of the halo rests against a natural ridge on your head. Why the occipital bone stops the halo from sliding The weft sits lower than the wire and tucks under the occipital bone - the bony ridge at the back of your head - which helps stop the halo from sliding down. That’s the main reason a well-fitted halo stays put instead of dropping through the day. How your own hair helps hold the halo in place Your own hair does part of the work too. Let the top layer fall over the wire to hide it and add a bit of light downward pressure. If your hair is very fine or silky, lightly backcomb the crown area before placing the halo. That gives the wire a bit more grip. A small amount of texturising spray can help in the same way. Next, wire size matters most when it comes to whether the halo feels secure or slips. sbb-itb-08feb2fWhy getting the wire size right matters most Halo Hair Extension Fit Guide: Too Loose vs. Correct vs. Too Tight Wire fit is the biggest reason a halo either stays in place or starts drifting during the day. So before you judge how secure it feels, get the wire size right first. Silkara halos are made for a standard head circumference of about 52–58 cm [1]. Most halos also come with an adjuster, such as a sliding bead, hook, or tied section, so you can make small changes to the fit [2][3]. How to tell if the wire is too loose, correct or too tight Too loose: The wire sits away from the scalp. That leaves the weft with less support, so it can slide forward towards your face as the day goes on. Correct: The wire sits flat against the scalp, and the weft stays where you placed it - snug, steady, and easy to forget about. Too tight: The wire presses in like a tight headband, causing pressure at the temples that can turn uncomfortable after a few hours. A simple placement and shake test you can do at home Place the wire about 1–2 cm behind your front hairline. Press it lightly so it sits flat against your scalp. Then let the weft rest under the occipital bone at the back. Next, comb your top layer of hair over the wire. Turn your head gently from side to side and give it a small shake. If the weft moves or the wire slips towards your face, the circumference is too big. Tighten the adjuster a few millimetres at a time and test again, making sure the weft is still sitting under the occipital bone. If it starts pinching at the temples right away, loosen it slightly. A good fit passes the shake test without slipping or creating pressure points. Once the fit is right, optional clips are there for extra support, not to make up for a poor fit. When clips or pins give a halo extra hold If the wire fits well but you want a bit more hold, clips or pins can help. Who may want a clip-assisted halo Very fine, silky, or freshly washed hair can give the wire less to grip onto, so the halo may move unless you add clips or pins. A light mist of dry shampoo or texturising spray can help the wire sit better. If the adjuster is already at its smallest setting and the halo still feels a little loose, clips or pins can keep it steadier. They’re also a smart add-on if you’re going somewhere with more movement, like a wedding reception, a dance floor, or a windy outdoor event. In those cases, it’s best to put the clips in before you leave home. If your halo doesn’t have built-in clips, place two bobby pins over the wire at the temples, about 1–2 cm back from the hairline. That usually helps keep the halo in place. Wire-only wear versus wire plus clips For most day-to-day wear, wire-only is enough. If your hair is finer, the fit is a bit looser, or you’ll be moving around a lot, wire plus clips or pins tends to work better. "This works so much better than regular clip in extensions when you have thin hair. I put a combo of both and it looks really natural." - Dona Carroll, Verified Customer [1] Clips work best when they’re backing up a wire that already sits where it should. They add security, but they won’t solve a wire that still needs adjusting. What to expect in everyday wear and where to shop Silkara halos Everyday activities a well-fitted halo can handle Once you've done the fit test, the next thing most people want to know is simple: how does a halo hold up during a normal day? A well-fitted halo is made for everyday wear. That includes school drop-offs, office hours, lunch, and social events. Your own hair helps hide the wire and adds light pressure, which helps keep the halo sitting in place as you move through the day. Light social dancing is usually fine too. If you want a bit more hold, add a couple of bobby pins as backup. When to remove it and when to use extra support There are a few times when it's best to take your halo off. Remove it before sleep, swimming, and vigorous exercise. Sleeping in it can bend the wire overnight, and the hair may tangle in your bedding. Chlorine and salt water can also dry out and damage the hair. Here’s the quick guide for sleep, swimming, and exercise: Activity What to do Office, dining, social events Wear as normal Light social dancing Add bobby pins for extra hold Vigorous exercise Remove the halo Sleeping Always remove Swimming Always remove Shop Silkara halo hair extensions When you know the fit works, the next step is to pick your shade and place your order. Shop Silkara halo hair extensions at silkarahair.com.au. You can use the free Colour Match service to find your shade, then order with free Australia-wide shipping on orders over $150 and a 14-day colour exchange guarantee. [1] FAQs How do I measure my halo wire size? You don’t need exact head measurements. Silkara halo extensions come with a built-in adjustment feature, so they can fit any head size. Just tighten or loosen the transparent wire in small steps until it sits snugly 1 to 2 cm back from your front hairline. Check the fit as you go so it feels comfortable and stays in place. Will a halo work on very thin hair? Yes, halo extensions can work on thin hair if you have enough natural hair at the crown to hide the invisible wire. Silkara halo extensions are lightweight, and that helps spread the weight more evenly across your head. That makes them a gentle, damage-free pick for fine or fragile hair. If you want a bit more hold and a smoother blend, Silkara also offers clip-assisted options. And if your hair is very fine, a little teasing at the crown or a couple of bobby pins at the sides can help keep the wire in place for all-day wear. Can I wear a halo in windy weather? Yes, you can wear a halo in windy weather with confidence. The single-wire system sits neatly on your crown, which helps keep it steady when it’s breezy. If you want extra hold, the discreet built-in clips help secure the weft to your natural hair. You can also lightly tease the hair at the crown or place bobby pins over the wire at the sides for a bit more grip. Related Blog Posts Best Halo Hair Extensions for Short Hair: How to Get a Seamless Blend Halo Extensions vs Tape-In Extensions: Which Costs Less in the Long Run?
Learn more
Hair Extensions for Grey Hair: How to Match Silver, White & Salt-and-Pepper Hair
Grey hair matching is less about picking “grey” and more about matching tone, light-to-dark mix, and placement. If I get those three right, the piece is far more likely to blend at the crown, part line, hairline, or ends. Here’s the short version: I match the lengths, not just the roots I check colour in natural daylight I look at cool, warm, or mixed undertones I pay attention to salt-and-pepper ratio, not one flat shade I choose the product by area: topper, halo, clip-ins, ponytail, bun, or fringe I use two clear photos for colour matching, front and back Silkara replies in 12–24 hours for photo shade help Natural grey hair often mixes white, silver, slate, charcoal, and darker strands. That means a flat extension can look off fast, especially beside hair that reflects light in a softer way. A close shade name is not enough. The blend has to work where the piece sits. Quick comparison Hair goal Best product type What I focus on when matching Crown thinning Hair topper Part-line blend and salt-and-pepper mix Length and volume Halo or clip-ins Mid-length and end colour Front softening Clip-in fringe/bangs Face-frame tone Fast styling Ponytail or bun Overall colour balance One simple point runs through the whole piece: blend beats label. If the tone, depth, and strand mix line up with my own hair, silver, white, and salt-and-pepper extensions look far more natural. Understanding Grey, Silver, White and Salt-and-Pepper Hair Colour Grey hair usually sits in cool silver, bright white, or mixed salt-and-pepper tones. So when you’re matching extensions, the goal isn’t one flat colour. It’s the blend. Cool silver tends to look icy or steel-grey. White hair can look crisp and cool, or softer with a creamy, pearl-like cast. Salt-and-pepper hair has a lot more going on. Lighter salt-and-pepper has more dark strands, while heavier salt-and-pepper leans more silver. That’s why the wrong grey can stand out straight away next to natural hair. When you compare your hair, look at two things: how much dark versus light you can see whether the overall tone looks cool or warm Lighting can throw you off. Indoor light often makes grey hair look warmer, while harsh sunlight can wash out the mix. For the best read, check your hair in natural daylight [1][2]. How Undertones Show Up in Grey and White Hair Even without pigment, grey and white hair still shows undertones. Cool greys can lean blue, violet, or steel. Warm greys can look more champagne, pearl, or soft beige. A simple way to check is to hold a section of hair against white paper in natural daylight. If it looks blue or violet, you’re cool-toned. If it looks creamy, yellow, or beige, you’re warm-toned [2][3]. With salt-and-pepper hair, there’s one more thing to watch: the darker “pepper” strands. Are they near-black, dark brown, or soft brown? That darker base matters, and it needs to be part of the match [4]. Once you know if your hair reads cool or warm, the colour match usually gets a lot closer. Why Tonal Variation Matters More Than a Single Flat Grey Hair that looks natural almost always has strand variation. That mix is what makes the blend work. A solid grey extension next to hair with light and dark movement can look obvious, simply because it has no depth [4][6]. A better way to match is to focus on the ratio of light to dark strands, along with the tone of both. That tends to work better than chasing one exact grey shade [4]. In many cases, a rooted extension with a darker base and lighter lengths blends better than a uniform grey. It mirrors the kind of variation that grey hair often has on its own. That’s why the next step is choosing the extension type and colour pattern that fits your grey tone. sbb-itb-08feb2fWhy Undertone and Dimension Matter When Choosing Extensions Once you know your undertone, use it to narrow down your Silkara match. Buying a grey extension by label alone is where many people come unstuck. A shade called "silver" in one range might look icy and blue-toned, while another with the same name can look warmer and more champagne [3][5]. That’s why undertone matters more than the name on the box. Shade labels shift from one range to the next. Dimension matters too. A flat piece can stand out against grey hair [6][5]. In many cases, the mix of light and dark strands matters more than choosing something labelled "grey" or "silver" [5][4]. For mature hair, the best test is simple: does the piece disappear at the part line and crown? Use the light-to-dark ratio in your own hair as your main guide. Common Colour-Matching Mistakes With Silver, White and Salt-and-Pepper Hair A few mistakes show up again and again. Matching the roots instead of the lengths. Match the lengths, not the roots, because extensions sit through the mid-lengths and ends [2][1]. Checking colour under indoor lighting. Look at colour in natural daylight, not indoor light [2][3]. Choosing by label without checking undertone or strand mix. Many grey extensions are toned blonde hair, and when the toner fades, they can leave yellow or violet casts [4]. If you're unsure, send Silkara a daylight photo for a free colour match. How Going Slightly Lighter or Darker Can Improve the Blend Instead of chasing one exact label, focus on the overall balance of light and dark already in your hair. Hair that is mostly white or silver often blends best with silver or platinum tones, while hair with more dark strands can suit darker grey or slate shades [2][5]. With salt-and-pepper hair, a blended mix often looks more natural than one flat colour because it mirrors the salt-to-pepper ratio already in your hair [5][4]. Think of it like fabric with texture versus a solid block of colour. One tends to melt in. The other can sit on top. The aim is a natural match, not a harsh contrast. Once your undertone is clear, the next step is choosing the Silkara hair extension collection that blends best at the crown, part line or through the lengths. Choosing the Right Silkara Hair Product for Grey Hair Grey Hair Extensions: Which Product Suits Your Hair Goal? Choose your Silkara product based on where you need coverage: the crown, the lengths, or the front hairline. That matters more than the shade name alone. The goal is simple: pick the piece that blends where it sits. A shade can look right in theory, but still look off once it’s in place. Hair Toppers for Crown Thinning and Part-Line Coverage A human hair topper is the most precise option for thinning at the crown or a widening part. Because it sits on the top of the head, the colour needs to match the salt-and-pepper mix of your own hair, not just the general shade. That’s the part many people miss. Grey hair often has more than one tone running through it, so a topper needs to disappear at the part line. If the piece is too silver for darker grey hair, or too dark for mostly white hair, it can stand out instead of blending in. Halo and Clip-In Extensions for Length and Volume If your main concern is flat, fine mid-lengths and ends, rather than crown coverage, halo extensions or clip-in extensions make more sense. Halo extensions work well if you want extra length and volume without clips. For fine grey hair, clip-ins with slim wefts that sit flat are easier to blend [2]. When matching the shade, use the visible lengths and ends as your guide, because that’s where the blend shows most. Ponytails, Buns and Clip-In Bangs for Fast Styling and Coverage For quick everyday styling or event prep, ponytail extensions and hair buns are easy, low-effort options that give hair a polished look fast. Clip-in bangs and wispy fringes can also help if you want softer face framing or need to soften thinning at the front hairline. Concern Recommended Silkara Product Effort Level Crown thinning Human Hair Topper Low - quick clip-in Flat lengths and ends Halo Extensions or Clip-In Extensions Very low to low Front hairline thinning or face framing Clip-In Bangs / Wispy Fringe Low - instant style Everyday or event styling Ponytail Extension or Hair Bun Very low - fast attachment If your grey sits between two shades, send Silkara a daylight photo for the closest match. How to Get an Accurate Grey Hair Colour Match With Silkara Hair Once you know if you need crown, length, or front coverage, choosing a colour gets a lot easier. With grey hair, the key thing is tone, not the shade name on the label. That’s where the photo match helps. It works best when you already have a rough sense of whether your grey looks cool, warm, or mixed. Silkara’s free photo match can narrow down the closest tone, with a response time of 12–24 hours [1]. How to Take Better Colour-Matching Photos in Natural Daylight For the best match, take two clear photos - one from the front and one from the back - with your hair fully down from root to tip [1]. A few details make a big difference: Take the photos in bright, indirect natural daylight Make sure your hair is dry and worn down [1] Skip ponytails and buns, because the team needs to see the full colour pattern from roots to ends [1] If you use purple shampoo often, wash first with a clarifying shampoo to remove residue that can shift how the tone looks [2] Don’t use filters, even subtle ones, because they can hide the cool or warm undertones that matter most for a precise match [1][3] Think of it this way: if the light is off, the match can be off too. What Silkara Hair Looks at in Your Photo Match Request The matching team looks at a few things in your photos: the ratio of light to dark strands, the tone family, and whether your hair is mostly even-toned or strongly mixed [2][4][5]. For salt-and-pepper hair, the darker base matters just as much as the silver. If those darker strands lean more ash brown than black, that can change the recommendation [4][2]. Product choice matters too. The same shade can look different on a topper, halo, or clip-in, depending on where it sits on your head. So when you send your request, tell the team which Silkara product you’re looking at. That helps them shape the blending approach around the placement of the piece [1]. Comparison Table: Which Silkara Hair Option Suits Your Grey Hair Goal Use this table to match your main hair goal with the right Silkara piece. Silkara Hair Option Best Use Coverage Area Blend Comfort Typical Maintenance Hair Toppers Crown thinning and part-line coverage Crown and part-line Moderate - requires precise ratio match at the part High - lightweight, no tension on sides Low to moderate Halo Extensions Instant length and volume Mid-lengths to ends Easy - sits under a top layer of natural hair Very high - no clips or glue Low Clip-In Extensions Customisable volume and length Full head (sides and back) Moderate - requires strategic weft placement Moderate - clips may feel heavier on fine hair Moderate Ponytail Extensions / Buns Fast everyday or event styling Ponytail or bun area Very easy - wraps around existing hair High Very low Clip-In Bangs Front hairline softening and face framing Front hairline and forehead Moderate - needs to blend with face-frame colour High Low If your grey sits between two shades, or you’re not sure which product fits your main concern, the photo match service is a solid next step. Conclusion: Focus on Blend, Comfort and Colour Support Once you know your undertone and how much coverage you want, the last step is picking a piece that blends neatly through the part, crown, or lengths. With grey hair, the best match comes from tone and dimension, not a flat grey shade. Start with undertone. Then look for a shade with enough depth and variation to melt into your own hair. Flat grey pieces often stand out next to natural silver, white, or salt-and-pepper hair. But shade alone isn't enough. The product shape also needs to work for how you'll wear it day to day. Choose the Silkara piece that fits your main goal: Crown coverage Added length and volume Quick styling Silkara also offers a free photo colour-matching service. Send two clear daylight photos and note which product you want matched. That gives you a better shot at a clean blend, with less guesswork and more confidence, plus a result that looks natural on you. FAQs How do I know if my grey hair is cool or warm-toned? Check your hair in natural daylight and hold it next to a sheet of pure white paper. If your hair looks blue, violet, or steel, it’s cool-toned. If it looks champagne or warm beige, it’s warm-toned. There’s another simple way to double-check: look at the veins on your wrist. Green usually points to a warm undertone, blue or purple points to a cool undertone, and a mix of both often means your undertone is neutral. If you want the closest undertone match, use Silkara’s free photo colour-matching service. Just send two clear photos taken in natural light. What if my hair is between silver and salt-and-pepper shades? If your hair sits somewhere between silver and salt-and-pepper, don’t lock yourself into just one shade. Take a look at a small section of your hair in natural daylight. That makes it much easier to spot the mix of white and dark strands, and see which tone stands out more. For the best blend, use Silkara Hair’s free photo colour-matching service for personalised guidance. Which Silkara Hair piece is best for crown thinning versus extra length? Choose based on your main goal: coverage or length. If you have thinning at the crown or along the part line, a hair topper is usually the best pick. It sits over the sparse area and adds density and lift where you need it most. If your crown still has enough density but you want more length and fullness, halo or clip-in extensions make more sense. Need both? Pair a topper with halo or clip-in extensions. Related Blog Posts Why Doesn’t My Colour Match Exactly? Why Multi-Dimensional Colours Blend Better Than Solid Colours How to Read Silkara Hair Colour Codes: P27-613, P18-613, 22H613, 27H613 & More Dirty Blonde vs Ash Blonde vs Beige Blonde: Which Hair Extension Shade Do I Need?
Learn more
Messy Bun Hairpiece for Thin Hair: How to Choose a Natural Size and Colour
If your bun hairpiece looks too big or the colour is off, it will stand out fast. I’d keep it simple: pick a bun that ends up about 1.5 to 2 times the width of your own bun, match the shade to your mid-lengths and ends, and shape it with your fingers so it doesn’t look too round or stiff. Here’s the short version: Start with your own bun size. Measure your bun across the middle in cm before you buy anything. Go smaller if you’re unsure. Thin hair usually looks better with a softer bun than a dense one. Use placement well. Put the piece over a small ponytail or bun and pin into the elastic, not into fine strands. Match colour in daylight. Check the shade in indirect natural light, not under warm indoor bulbs. If your hair has highlights or regrowth, choose a blended shade. A flat single colour can look too even in a textured bun. Shape it after you put it on. Lift small sections a few millimetres at a time for a softer finish. One detail matters more than most people think: a bun hairpiece works on thin hair because the base is small, so your hairline and part still show. That helps the style look like your hair, not a separate piece. MESSY BUN HACK FOR FINE & THIN HAIR! You Have To Try This! sbb-itb-08feb2fQuick comparison What to check What I’d look for What to avoid Size Finished bun about 1.5 to 2 times your own bun width A bun that looks far too large for the ponytail under it Shape Soft, slightly uneven texture A very round, dense, uniform bun Colour match Match to mid-lengths and ends Matching to roots only Shade type Blended tones for highlighted or multi-tone hair Flat solid shades when your hair has tone changes Attachment Stretch over a small bun and pin at the base Pulling it tight over sparse areas If I wanted the most natural look on thin hair, I’d focus on just three things: size, placement, and colour. Check your natural bun size before choosing a hairpiece Before you start browsing hairpieces, pause for a minute and look at what your own hair does on its own. That’s the baseline. You’re not trying to build a giant bun out of nowhere. You want something that still looks like your bun, just with a bit more body. How to measure your natural bun size Brush your hair back and tie it into a mid or high ponytail with a standard elastic. Then twist the ponytail and wrap it into the smallest secure bun you can make. Pin it in place with a hair tie or a few bobby pins. Next, measure the bun across its widest point in centimetres. Also pay attention to how it sits. Is it flat? Is it bulky? Can you see scalp through it? That little check tells you a lot. Use that width as your starting point when choosing a hairpiece. Why an oversized bun can look unnatural on thin hair A bun tends to look off when the hairpiece is far bigger than the ponytail underneath. That mismatch is usually what gives it away. A very dense bun can also look too round and too even. Real buns usually have a softer shape, with a few irregular bits and a little texture. That’s what makes them believable. A good rule is to aim for a finished bun that’s about 1.5 to 2 times wider than your natural bun. Bun size guide for Silkara messy buns Use the table below to match your natural bun width to a Silkara size. Natural hair starting point Natural bun width (approx.) Recommended Silkara bun Typical result Short fine hair (jawline to collarbone) 3–4 cm Small messy bun - e.g. Silkara™ Secret Hair Instant Curly Messy Bun Softly textured bun around 7–8 cm wide; gentle everyday fullness Shoulder-length fine hair 4–6 cm Small to medium - e.g. Silkara™ Hair Messy Curly Hair Bun Top (thin variation) Natural-looking bun around 8–9 cm; believable width without bulk Medium-length, low-density hair 5–7 cm with visible gaps Medium-small - e.g. Silkara™ Hair Messy Curly Bun Star Even coverage around 9–10 cm; fills sparse areas, suits daily wear Silkara’s smaller buns are made for subtle everyday fullness. The Bun Star, for example, weighs just 55 g, which makes it a lighter option for fine hair [2]. If you’re between sizes, go smaller. It’s much easier to add shape than deal with a bun that looks too big from the start. Once the size is right, colour is the next step. How to attach and shape the hairpiece on thin hair How to Apply a Messy Bun Hairpiece on Thin Hair: Step-by-Step Guide Step-by-step application on a small bun Once you’ve picked the right size, placement and shaping make the biggest difference to how natural the bun looks. Start with dry, second-day hair and a thin, snag-free elastic. Pull your hair into a low or mid ponytail where it grips best, then twist it into a small, neat bun. Use a thin, snag-free elastic, as it tends to hold fine hair better. Keep the bun tidy, but don’t press it flat. To attach the Silkara™ Secret Hair Instant Curly Messy Bun or a similar smaller option, stretch the bun piece over your bun from back to front. Don’t drag it over the hairline. That can mess up baby hairs and make sparse spots stand out more. Loop it once for a softer look or twice if you want more hold. Then add two to four matte bobby pins around the base, at the top, bottom, left, and right. Slide each pin into the elastic underneath, not straight into thin strands. "Takes seconds to put on. People think its my own hair." - MS SHEILA TRIMBOLI [1] How to shape the bun for soft, even fullness After the hairpiece is in place, slide your fingers under the outer fibres and gently lift and spread small sections outward - left, right, top, and bottom - by only a few millimetres at a time. This helps spread the volume more evenly and gives the bun a softer, slightly uneven shape, which tends to look more like natural hair. If you can see scalp near the crown or around the elastic, lightly pull a few fibres across that area with your fingertips. Think placement, not tightness. Pulling the hairpiece tighter often makes the part line look wider and can make thinning more obvious. Finish with a light mist of flexible-hold hairspray from a distance so the shape stays in place while the fibres still move softly. Once the shape looks soft and secure, match the colour to your mid-lengths and ends. How to choose a colour that blends with your hair Once you’ve got the size right, colour does most of the heavy lifting. The goal isn’t a perfect match. It’s a close visual match that looks right at a glance. In a bun, twists and loops help blur small colour gaps. That’s why a shade can still work even if it’s not identical strand for strand. On fine hair, though, tone variation matters more. If the colour looks too flat, the bun shape can stand out. Match the bun colour to your mid-lengths and ends Match the bun to the hair that will sit around it, not to your roots. A simple way to do this is to tie your hair into the small bun you’d usually wear, then check the colour in indirect natural daylight. That gives you a better read on tone. Indoor lighting often makes hair seem warmer or darker than it is, which can throw the whole match off. If you have highlights, balayage, greys, or hair that shifts tone on its own, focus on the main shade you can see through the outer layers. If your roots are darker than the rest of your hair, go with your lengths and ends. Once the bun is on, the roots are mostly tucked away anyway. Solid shades versus blended shades: which looks more natural With a messy bun, a single flat shade can sometimes look a bit too uniform. Real hair usually reflects light in slightly different ways across each section. A blended or dimensional shade mirrors that variation, so it tends to melt into the style more easily. Here’s a simple guide: Colour Type Best For Visual Result Solid shades Hair that is one uniform tone from root to ends Can look flat if the match is off Blended / dual-tone Highlighted, foiled, balayage, or naturally multi-tonal hair Hides the join more easily Ombre / dark-root, light-end shades Hair with darker roots and lighter ends Mimics a natural growth pattern or salon-style gradient If your hair is one steady brunette tone or a fairly even natural colour, a solid shade can work well. But for most women, blended shades tend to look softer in a textured bun. That’s especially true if your hair has highlights, sun-lightening, grey blending, or visible regrowth. How Silkara Hair's colour matching support works Picking a shade from a screen isn’t easy. Silkara Hair offers a free colour match service to make that part simpler. Send an unfiltered photo in natural light, and the team can suggest the closest shade. Selected products also come with AI virtual try-on. Once the size and colour are right, the bun should read as your own hair at a glance. Conclusion: Start small, blend the colour, and build confidence If your natural bun is small, that’s your starting point. A messy bun hairpiece adds volume. It doesn’t need to change your hair shape or make it look overdone. The main thing is keeping it natural. That usually comes down to three simple factors: size, placement, and colour. A smaller Silkara messy bun for finer hair can feel like the easiest place to start, especially if you want to ease into the look instead of going too big straight away. Still not sure about the shade? Send a natural-light photo, and Silkara can help match your colour. FAQs Will a messy bun hairpiece work with very thin hair? Yes. A messy bun hairpiece can work well for thin hair because it adds instant volume and makes your bun look fuller without much effort. Silkara Hair’s pieces are lightweight, so they don’t feel heavy or awkward. They’re made to stay in place with elastic bands or clips, even if your natural bun is quite small. You also get extra texture, which helps your updo look thicker and more natural in seconds, without putting stress on your own hair. How do I choose between two bun sizes? Match the bun to the base of your natural bun so the extra fullness looks like it’s part of your own hair. Silkara’s elastic messy bun hairpieces stretch to fit different bun sizes. If you’re between sizes, the smaller option will often look better on thin or small buns and can help you avoid a bulky finish. Set the adjustable band in place before you secure it, then blend and brush the hairpiece for an easy, natural-looking result. What if my roots and ends are different colours? A natural look is still easy to get. Silkara Hair offers a free colour match service to help make that part simple. Just send a photo of your hair, and the team can suggest the best shade or a blended option for a smooth match from roots to ends. In many cases, blended shades look more natural than solid colours. They tend to give a softer finish with more depth, so the result feels less flat and more like your own hair. Related Blog Posts Want Long Hair and Crown Coverage? How to Choose Between a Topper, Halo and Extensions Small Messy Bun vs Big Curly Chignon: Which Bun Extension Should You Choose? Best Hair Topper for Thinning at the Crown: How Much Coverage Do You Need? Hair Topper vs Wig for Thinning Hair: Which One Should You Buy?
Learn more