

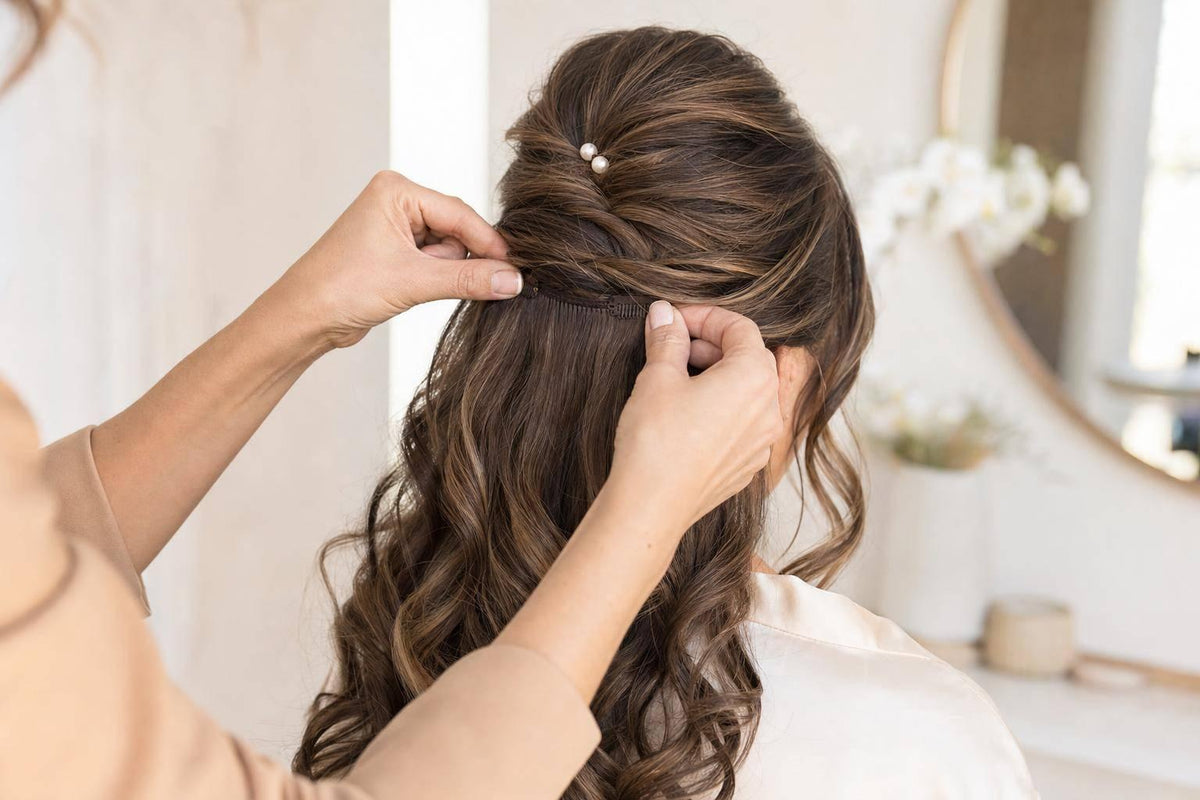
If I want a soft bridal half-up style with extensions, I focus on three things: hide the joins, keep the top light, and curl my own hair with the extensions together. That’s what makes the style look smooth instead of heavy or patchy.
Here’s the short version:
- I start with clean, dry hair
- I match colour, length, density, and texture
- I place extensions below the crown
- I keep clips and wire out of tight sections
- I tease only the hidden root area
- I curl natural hair and extensions together
- I finish with light hairspray and check the style from every angle
A bridal half-up style should look like my hair with more length and volume, not like separate pieces added in. Human hair extensions help with this because they tend to hold heat styling in a similar way to natural hair. In most bridal styling routines, even small placement errors near the crown can show once the top section is pinned back, so where I place each piece matters as much as how I style it.
If I’m choosing between clip-ins and a halo, this is the main difference:
| Extension type | Best for | What I watch for |
|---|---|---|
| Clip-in wefts | Volume in the back or sides | I need enough hair on top to cover each clip |
| Halo | Even volume around the head | I make sure the wire sits under the top section |
The method is simple: prep first, place low, build light lift, then blend with curls. That gives me a soft bridal finish that stays neat through photos, the ceremony, and the reception.
How to Create Bridal Half-Up Hair with Extensions: Step-by-Step Guide
1. Prepare your hair and choose the right extensions
Start with clean, dry hair and check colour and texture
Start with clean, dry, detangled hair. If your hair is damp or coated in styling product, extensions may not sit flat and the blend can look off.
Match the extension texture to the curl or wave pattern you want at the end. Colour, density, and length should line up too, so the whole style looks even. Before you curl, use heat protection on both your own hair and the extensions.
Choose clip-in wefts or a halo extension based on where you need volume
Choose clip-in wefts if you want fullness in certain spots. Go with a halo if you want a more even boost all over. The right option depends on where you need volume and how easily it can stay hidden inside the half-up style.
| Extension Type | Best Placement | Volume Distribution | How to hide it |
|---|---|---|---|
| Clip-in Wefts | Back and sides of the head | Targeted fullness in specific areas | Requires natural hair layers to cover clips |
| Halo Extension | Around the crown/mid-head | Even fullness throughout the head | Hidden by the top layer of natural hair |
Clip-in wefts are a good fit for brides who want extra fullness through the back or sides. A halo works better if you want a more even increase in density around the whole head. For a half-up bridal style, the halo’s single wire is easy to hide under the top half-up section.
Placement comes first. Then you make sure every attachment point stays out of sight.
Use human hair extensions for easier curl matching
100% Remy human hair holds curl and movement in a way that blends more naturally. It also reacts to heat tools much like your own hair, so curling and blending tend to look more even in the finished style. [1]
Once you’ve chosen the extension type, place it below the crown so the half-up section hides every join.
sbb-itb-08feb2f
2. Place extensions below the crown so they stay hidden
Section the hair and install the base layer first
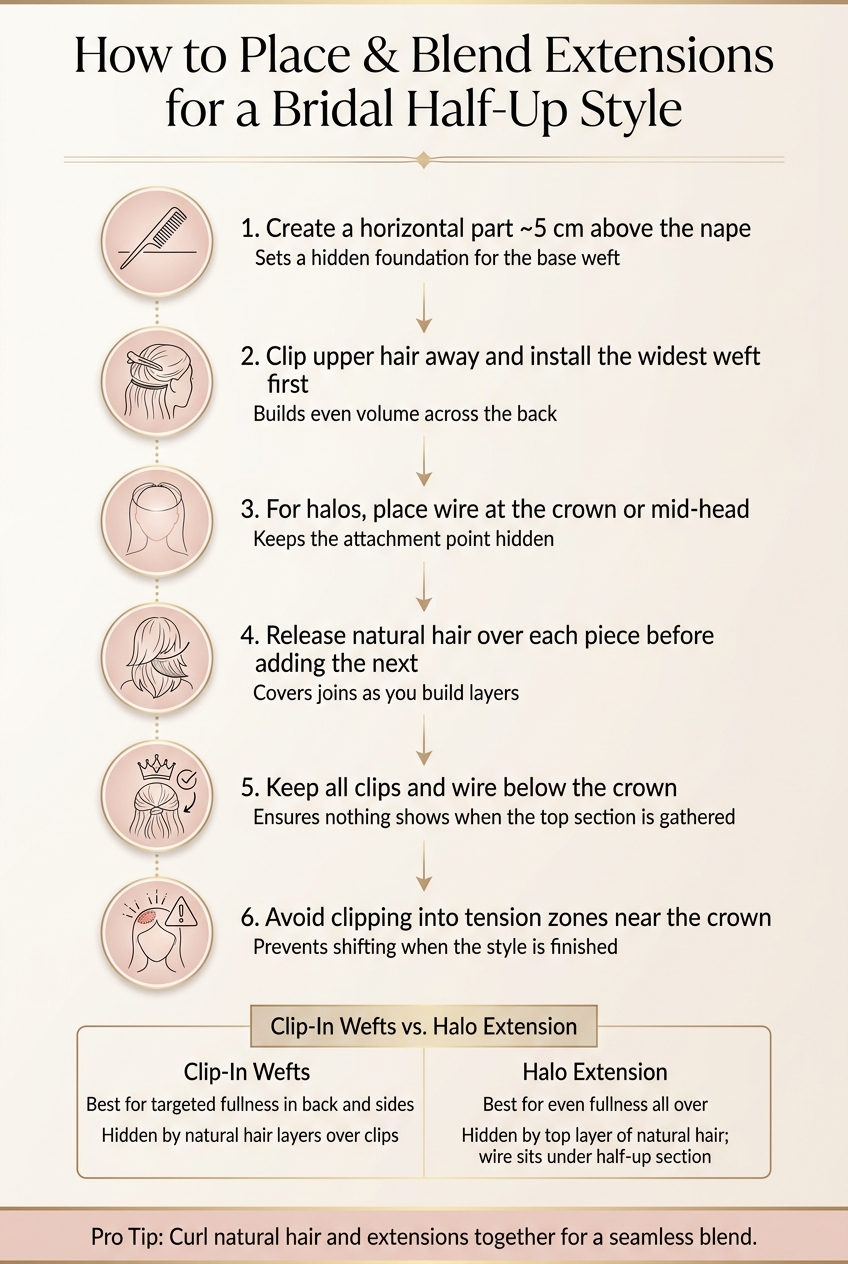
Create a clean horizontal part about 5 cm above the nape. Then clip the rest of the hair up and out of the way so you can work neatly underneath.
Start with your widest weft and place it across the back of the head. This sets up an even base of volume. If you're using a halo extension, sit the wire at the crown or mid-head, then let your natural hair fall over the top. The aim is simple: add fullness at the base without pushing the top section up too much. That hidden layer gives the hair above it something secure to rest on.
Keep all attachment points under the half-up section
Every clip and the halo wire should sit below the crown. After placing each weft, drop a thin layer of natural hair over it before you add the next one. That small step helps hide the joins as you go.
Also, avoid clipping into spots where the style will be pulled tight. If you place extensions in those tension zones, they can shift or peek through. Keeping attachments lower helps the half-up style look soft and smooth from every angle.
Step-by-step summary table
| Step | Action | Purpose |
|---|---|---|
| 1 | Create a horizontal part ~5 cm above the nape | Sets a hidden foundation for the base weft |
| 2 | Clip upper hair away and install the widest weft first | Builds even volume across the back |
| 3 | For halos, place wire at the crown/mid-head | Keeps the attachment point hidden |
| 4 | Release natural hair over each piece before adding the next | Covers joins as you build |
| 5 | Keep all clips and wire below the crown | Ensures nothing shows when the top section is gathered |
| 6 | Avoid clipping into tension zones near the crown | Helps prevent shifting when the style is finished |
With the base set, the next move is light crown teasing to shape the half-up style.
3. Build the half-up shape with light crown teasing
Trace a temple-to-temple section and leave soft pieces around the face
Now that the extensions are tucked under the crown, trace a section from temple to temple to form the half-up area. Keep the hair below that part down so it continues to cover the extensions. Leave a few soft face-framing pieces out at the front, then move on to the root teasing.
Tease only the hidden root area for controlled lift
Work in small sections and tease only the hidden root area. That gives you lift without making the style look bulky. The key is simple: keep the top layer smooth, so the finish stays polished.
Secure the upper section and loosen it slightly
Gather the upper section at the back and secure it with a clear elastic or a pair of crossed bobby pins. Then gently loosen the top edge with your fingers to add a soft lift and shape the hairstyle into a soft bridal look.
Half up half down style with hair extensions
4. Curl, blend and lock in the finished bridal style
With the half-up shape in place, the last step is to curl, soften and set everything so it all flows as one style.
Curl natural hair and extensions together for a close blend
Curl each section of natural hair and extensions together so the bend and direction stay the same. That consistency helps the hair look like one piece and hides the join.
Then leave the curls alone for a moment. If you touch them too soon, they can drop or split apart. Finish the face-framing pieces you left out earlier the same way, so they sit neatly with the rest of the style.
Loosen the curls and check the style from every angle
After the curls have cooled and set, gently break them up with your fingers to soften the look. At this stage, you're making sure the joins stay hidden as the curls relax.
Check the style from every angle, especially around the crown and sides. Look out for any visible clips, wire or joins. If something seems slightly off, fix it now before moving on.
Finish with flexible hold and check bridal accessories
Mist the hair with flexible-hold hairspray in light layers. That helps keep the shape in place without making it stiff. Before you add a veil or comb, make sure the half-up section still feels secure.
Conclusion: A quick review of the steps for a soft bridal half-up style
A soft bridal half-up style comes together when each step supports hidden volume and an easy, natural finish. Keep extensions below the crown, add controlled lift with light root teasing, and curl the natural hair and extensions together so they blend closely. Finish with a flexible-hold spray, then make sure any bridal accessories sit snugly in the style. When it’s done well, the look stays secure, soft, and wedding-ready.
FAQs
How do I stop extensions showing in a half-up bridal style?
Place the clips a bit lower on your head. Don’t set them too close to the hairline or right next to the section you’re pulling back, because your own hair needs enough room to fall over the wefts and hide them.
A little teasing at the crown gives the clips a firmer base to grip onto. It also helps cover the tracks. For a smooth, natural-looking finish, curl your hair and the extensions together so they blend as one.
Are clip-ins or a halo better for bridal half-up hair?
It comes down to where you want more hair and how much control you want over placement.
Clip-in extensions give you more control. You can place each weft exactly where you want extra fullness or length, especially around the crown and sides.
A halo extension is faster to put on and gives you all-over length and fullness with a seamless look.
Both Silkara Hair options are made to blend in naturally, and colour matching support can help you get a seamless finish.
How can I make my curls blend with the extensions?
Style your natural hair and the extensions together once they’re in place. When you curl both at the same time, you create one blended texture, which helps hide any transition points.
Silkara Hair’s Remy human hair extensions hold their style well, making it easier to get a soft, natural-looking finish with extra volume and length across your bridal event.