If I choose the wrong density, even a good colour match can still look off. The short answer is simple: light density suits early thinning, medium suits most day-to-day wear, and full volume suits more advanced hair loss or bigger styles.
Here’s what matters most:
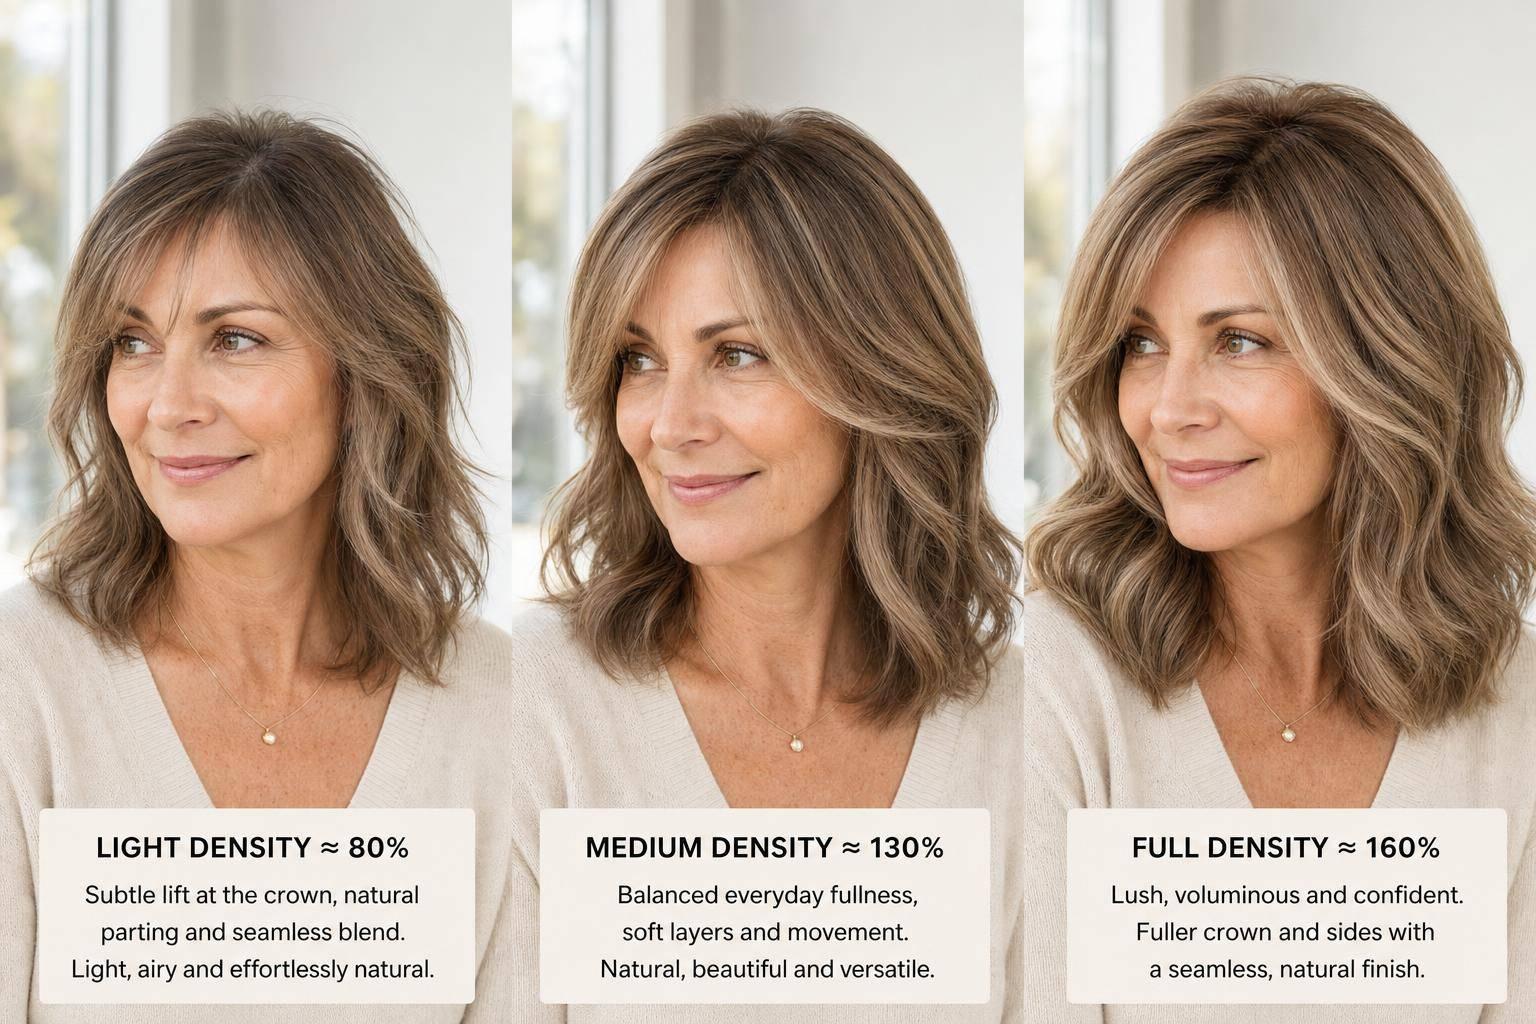
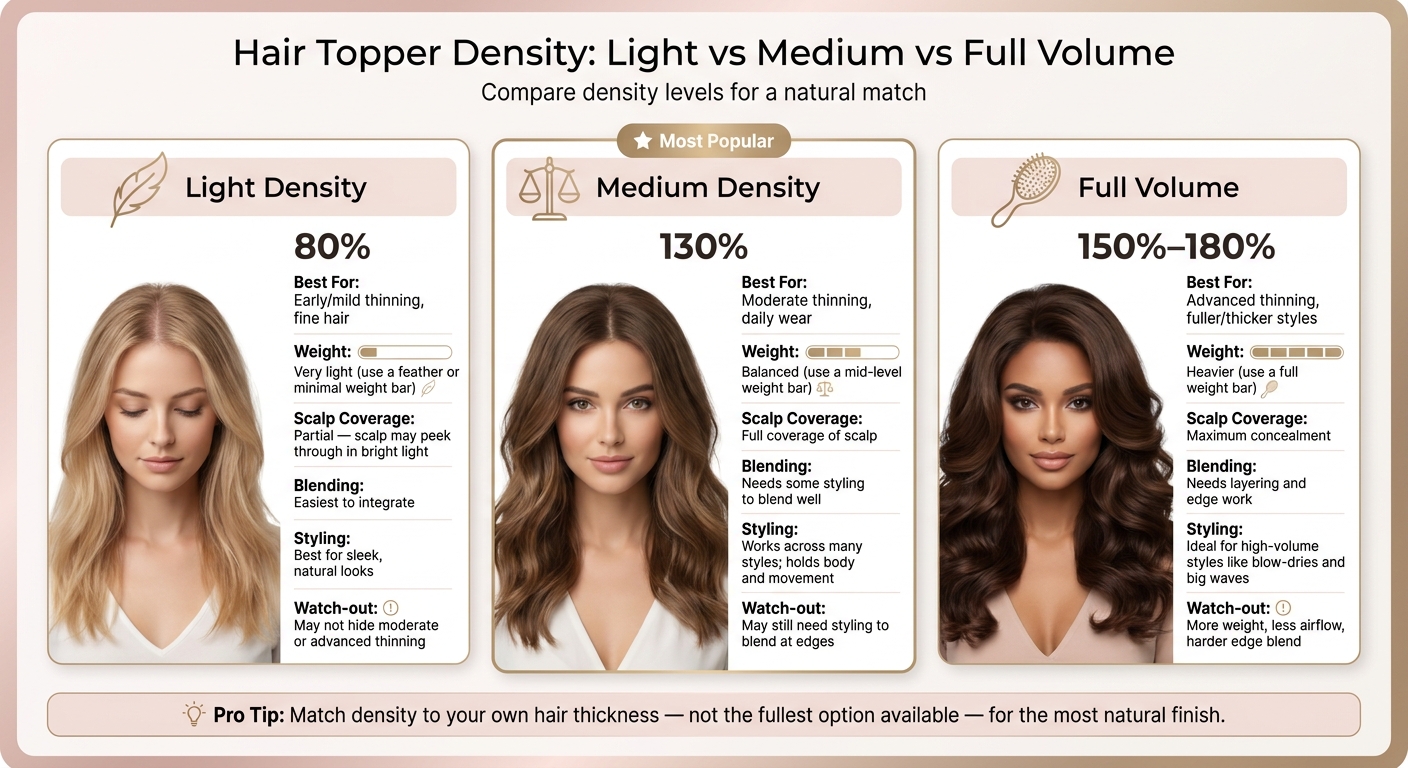
- Light density is often about 80% and works best if I have fine hair, a slightly broader part, or early crown thinning.
- Medium density is often about 130% and is the safest starting point for many women because it gives more cover without too much bulk.
- Full volume is often about 150% to 180% and suits larger areas of visible scalp, but it can feel heavier and take more work to blend.
- If I need more cover, a larger base can be a better fix than adding more hair density.
- For the best match, I should compare the topper to the hair at the sides and back, not the thin area on top.
- Colour, layers, and placement matter just as much as density.
Hair Topper Density Details
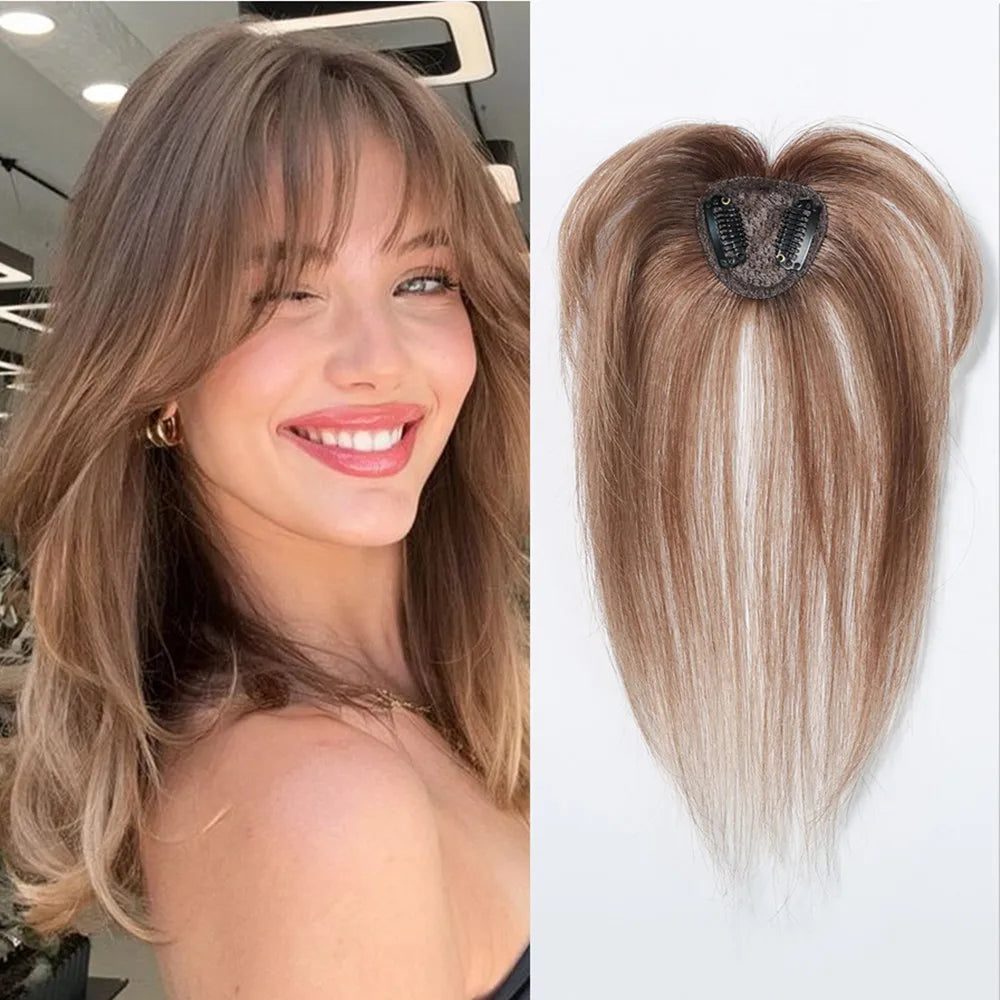
For those seeking a natural look with a 120% density hair topper, synthetic options provide a lightweight way to add volume.
sbb-itb-08feb2f
Quick comparison
| Density | Typical % | Best for | Main watch-out |
|---|---|---|---|
| Light | 80% | Mild thinning, fine hair | Scalp may still show in bright light |
| Medium | 130% | Moderate thinning, daily wear | May still need some styling to blend well |
| Full volume | 150%–180% | Advanced thinning, clip in hair topper with bangs | More weight, less airflow, harder edge blend |
I’d keep one rule in mind: match the topper to my own hair thickness, not to the look I wish I had. That usually gives the most natural finish and the best comfort through the day.
Light Density vs Medium vs Full Volume: Key Differences
Hair Topper Density Comparison: Light vs Medium vs Full Volume
Density changes more than fullness. It also affects coverage, weight, and how well the topper blends with your own hair. That’s why the right pick should line up with your stage of thinning. Here’s how each density level tends to work in day-to-day wear.
Light density toppers: mild thinning and soft volume
A light density topper - usually around 80% density[4][3] - is made to match naturally fine hair. It feels light on the scalp, moves with ease, and tends to blend well around the hairline. If you’re dealing with early-stage thinning, like a slightly wider part or a small patch of loss at the crown, this density often gives the most discreet look.
The downside is coverage. Because the hair is finer and less packed, a bit of scalp can still show in bright light. If your thinning has moved past the early stage, light density may not hide enough.
Medium density: balanced coverage for daily wear
Medium density - around 130%[4][3] - is the most common choice. It gives more scalp coverage than a light density topper, but still looks natural and avoids the bulky look that can come with heavier options. For moderate thinning, it offers a good middle ground: enough coverage, with movement that still feels like real hair.
It’s also the easiest density for everyday styling. Medium density toppers keep their body and shape well, so they work for casual wear and neater, more polished looks.
Full volume: advanced coverage and maximum thickness
Full volume toppers - usually 150% to 180% density[4][3] - are meant for more advanced thinning or larger areas of visible scalp. They offer the most concealment and suit women who want a thicker, more dramatic finish, including styles like a blow-dry or big waves.
The trade-off is extra weight and less airflow. Blending can take more effort too. If the topper is much fuller than the hair at your sides and back, the edge can look stepped rather than smooth.
| Feature | Light Density | Medium Density | Full Volume |
|---|---|---|---|
| Best for | Early/mild thinning, fine hair | Moderate thinning, daily wear | Advanced thinning, fuller styles |
| Weight | Very light | Balanced | Heavier |
| Scalp coverage | Scalp may peek through | Full coverage of scalp | Maximum concealment |
| Blending | Easiest to integrate | Needs styling | Needs layering |
| Styling | Best for sleek, natural looks | Works across many styles; holds body and movement | Ideal for high-volume styles |
From here, the next thing to figure out is how much visible scalp you want to hide.
How to Choose the Right Density for Your Hair Loss Stage
Once you know the difference between light, medium and full volume, the next step is to match density to your stage of thinning. The key idea is simple: choose the density that matches your own hair, not the fullest option on the shelf.
Matching density to mild, moderate and advanced thinning
Mild thinning usually looks best with light density. Moderate thinning tends to suit medium density. If thinning is more advanced, full volume often gives the cover people want.
That said, more cover doesn't always mean you need denser hair. In many cases, a larger base does the job better than moving straight to a heavier density[1]. If thinning has spread across a bigger area, a wider base may fix the coverage issue first.
Then there are the finer details. Once you've matched density to your stage, things like texture, length and scalp sensitivity help shape the final fit.
Other factors that affect your result
Texture, length and scalp sensitivity can change how natural the topper looks and how comfortable it feels through the day[2][4]. For example, if your scalp is sensitive, lighter densities are often easier to wear for long hours.
Density comparison table
| Density Level | Best Stage | Main Benefit |
|---|---|---|
| Light | Mild/early thinning | Lightweight, natural blend |
| Medium | Moderate thinning | Balanced coverage for daily wear |
| Full Volume | Advanced/extensive thinning | Maximum concealment and fullness |
After density is set, colour matching and styling do the final work.
Blending, Styling and Colour Matching for a Natural Finish
Getting the density right is only half the job. Once that part is sorted, blend, colour and styling decide whether the topper melts into your hair or stands out for the wrong reason.
How to avoid a topper that looks too thin or too thick
The main issue is simple: a topper can look too full or too sparse next to your own hair.
If the topper is too dense for your natural hair, it can create a visible step at the edge, where the topper ends and your own hair begins. That contrast is what gives the piece away. The fix is to keep the finish matched to your own hair thickness.
Soft layers can help a lot here. They let the topper flow into your cut instead of sitting on top of it like a separate piece. If it still looks bulky, lightly thinning the edges and the top layer can help soften the join.
Placement matters too. Set the base in your natural parting and thinning area, not on the hairline. When the base is sitting where it should, the next thing to check is the shade match.
Why colour matching and styling matter as much as density
Colour should match your mid-lengths and ends, not your roots. Roots are often darker and keep growing out, so they’re a poor guide if you want the match to last.
Blended or multi-dimensional tones are usually easier to work with than flat, solid colours because they mirror the natural variation in human hair. Silkara Hair offers a free colour match service using customer photos.
After colour, styling pulls everything together. Set the part while the hair is damp, then blow-dry with gentle tension to help hold a natural-looking part line. You can also lightly tease your natural hair at the roots where it meets the topper base so the piece lies flatter against your hair. Front-edge blending matters even more if you wear a fringe or soft bangs.
Conclusion: Choosing the Density That Looks Right and Feels Comfortable
The right density comes down to your stage of hair loss and how much hair you still have around the topper.
After you pick a density level, check how the topper sits against your own hair. The best match is the hair on the sides and back of your head, not the thinning area on top [1].
If you're wearing a topper for the first time and you're not sure where to begin, medium density is usually the safest place to start. A stylist can thin it out if needed [1].
In many cases, a slightly larger base blends better than simply adding more density.
Density and colour need to work together. When both match your own hair, the topper blends in instead of standing out.
FAQs
How do I know if my topper looks too dense?
A topper can look too dense when it has a lot more volume than your natural hair. When that happens, you may notice a visible step around the perimeter. It can also feel bulky and look less natural.
For a smoother blend, your stylist can lightly thin the topper, mainly at the surface and around the perimeter. The aim is simple: match the topper’s density to your natural hair.
Should I choose a larger base or higher density?
For more coverage, a larger base is often better than going with higher density. A bigger base covers more area. Higher density, on the other hand, adds more hair, weight, and bulk, which can look unnatural if it doesn’t match your own hair.
For the most seamless, comfortable blend, get the base size right first. Then choose a density that matches your natural hair. If you’re new to toppers, natural or medium density is usually the safest place to start.
Can a stylist thin out a medium density topper?
Yes. A stylist can lightly thin a medium-density topper if it feels a bit too thick. Done well, this can help it blend in more naturally with your own hair.
The main goal is to take out some bulk from the perimeter and the top surface. That’s usually where a topper can look a little heavy or sit too obviously against your natural hair.
What you want to avoid is aggressive thinning near the knots or the base. That area needs to stay intact so the topper keeps its shape and holds up over time.