Dyeing hair extensions at home can help you achieve a perfect colour match with your natural hair, but it requires the right materials, techniques, and care to avoid damage. Here’s what you need to know:
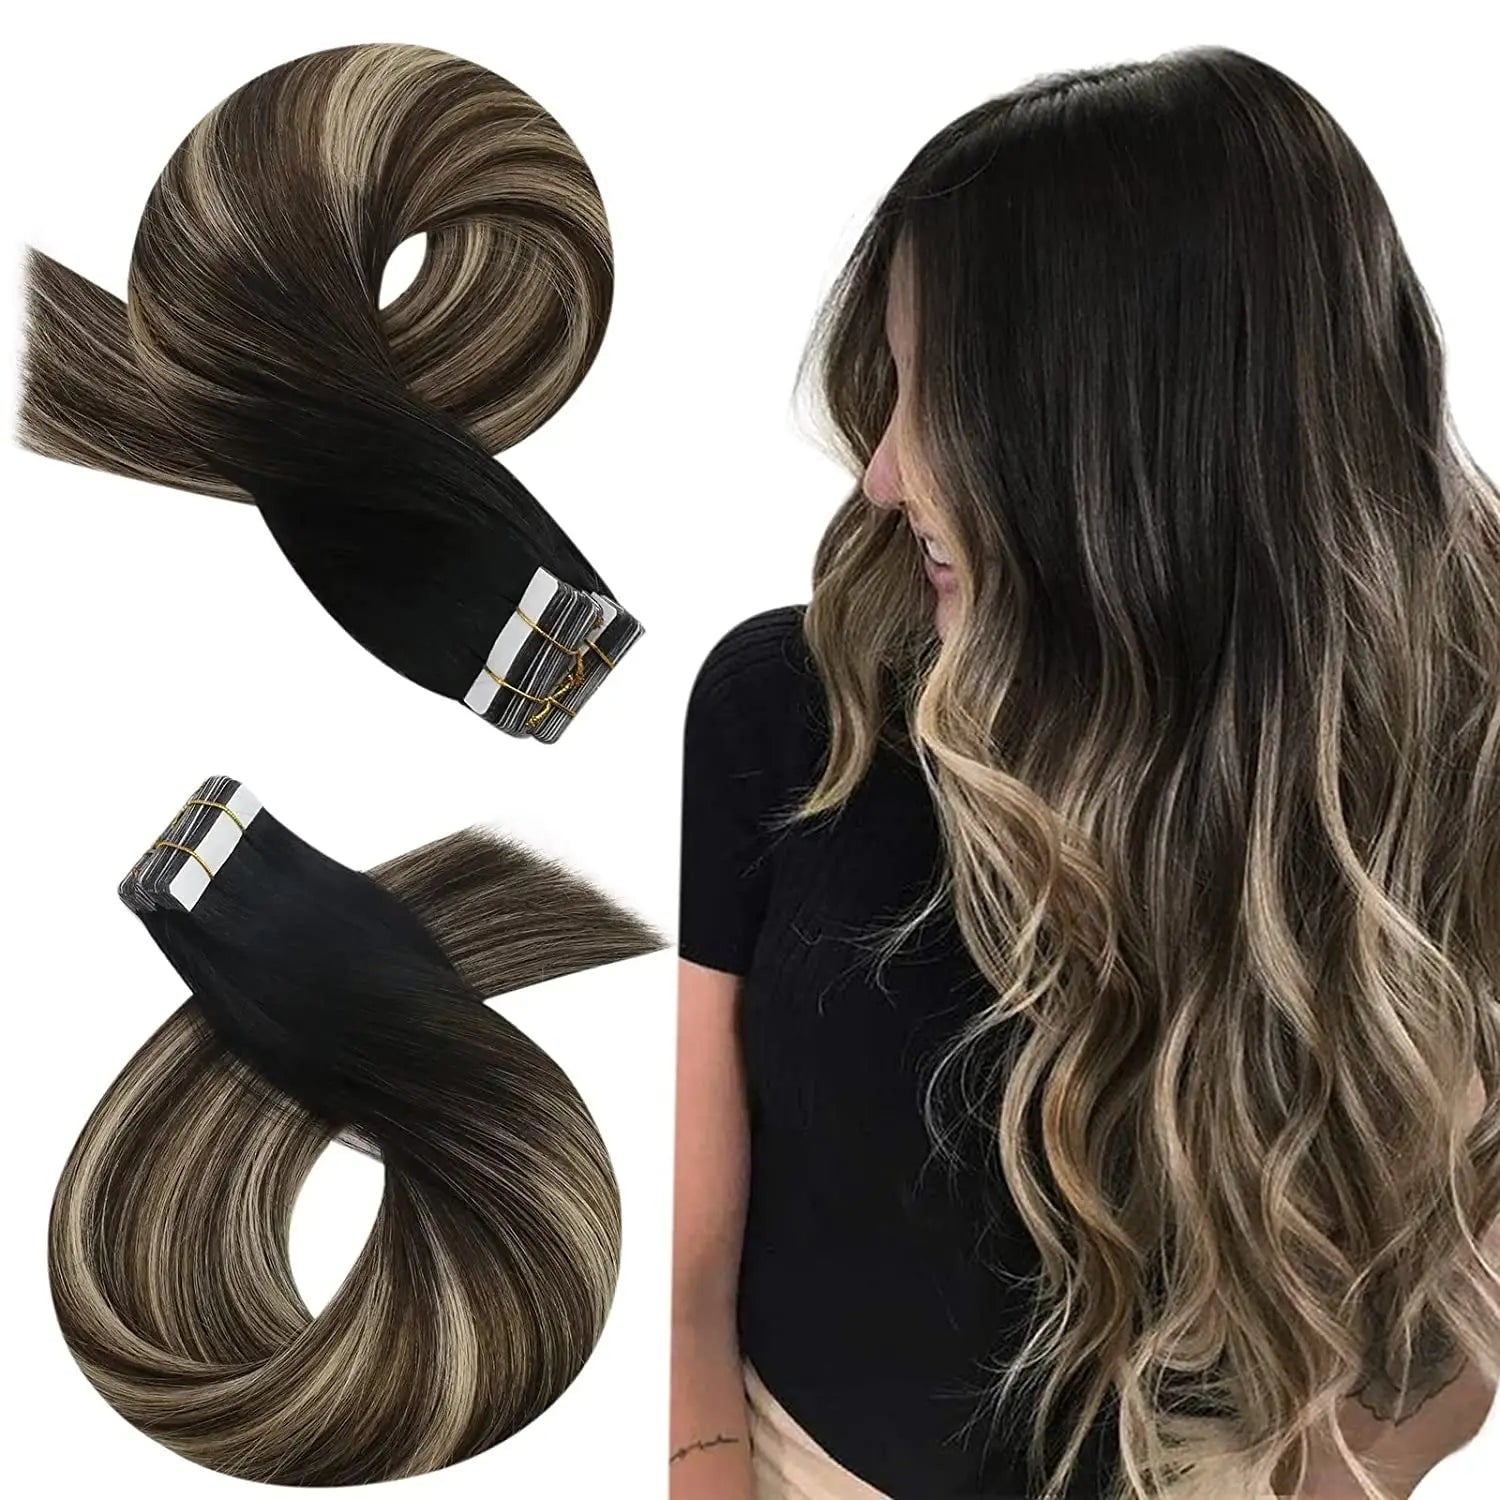
- Best Extensions for Dyeing: Use Virgin Remy human hair extensions for even colour absorption and durability. Avoid synthetic extensions - they can’t be dyed with regular products.
- Preparation: Gather professional dye, a matching developer (10 or 20 volume), and tools like a tint bowl, brush, gloves, and foil. Start with clean, detangled extensions and perform a strand test to check dye compatibility.
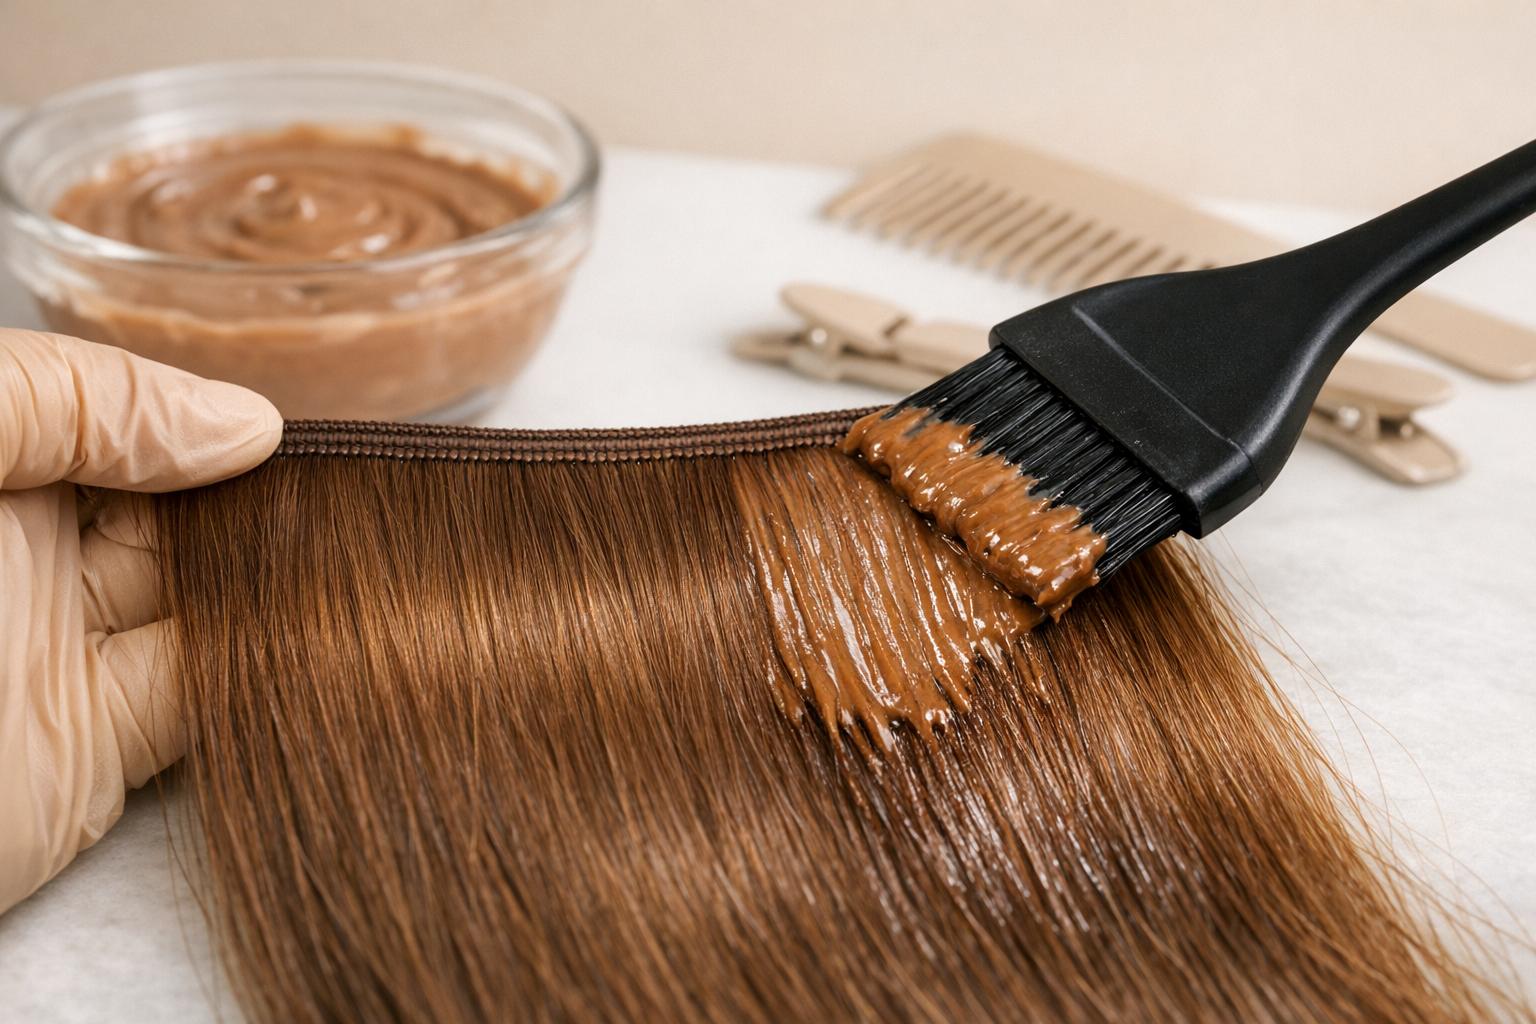
- Application Tips: Apply dye evenly in small sections, working from root to tip. Protect clips, tapes, or bonds with tape or plastic wrap. Monitor the process every 5–10 minutes.
- Post-Dye Care: Rinse thoroughly with lukewarm water, use sulphate-free products, and air-dry extensions to maintain quality and colour.
For bold colours, consider the watercolour method, and for dimension, try balayage or ombre techniques. Proper aftercare - like avoiding high heat and using UV-protectant sprays - will keep your extensions looking great longer. Stick to darker shades for safer results, and always prioritise high-quality materials for the best outcome.
Selecting Hair Extensions That Can Be Dyed
Virgin Remy Human Hair Extensions
When it comes to dyeing hair extensions, Virgin Remy human hair extensions are the top choice. These extensions are sourced from a single donor and have never undergone chemical processing. Because their cuticles remain intact and aligned, they allow dye to penetrate evenly, reducing the risk of patchy results. Plus, the natural oils in the hair help keep it hydrated during the dyeing process, minimising breakage and preserving its strength.
In comparison, non-Remy or processed hair often has mixed cuticle directions, which can lead to tangling and uneven colour absorption. Virgin Remy extensions, on the other hand, provide consistent texture and predictable dye results. They not only lift colour evenly but also hold pigment for longer. To ensure the best outcome, it’s always a good idea to perform a strand test on a small section of the hair to check porosity and dye uptake before proceeding.
Choosing Virgin Remy extensions sets the stage for a flawless colour match, making it easier to achieve the desired look without compromising quality.
Synthetic vs Human Hair Extensions
Synthetic extensions are a different story. They can't be dyed with regular hair dyes. Since they're made from plastic fibres, they don’t absorb dye like human hair does. Attempting to dye synthetic extensions with standard products can result in melting, clumping, or no visible colour change. While specialised dyes for synthetic hair exist, the results are often short-lived and less vibrant compared to human hair.
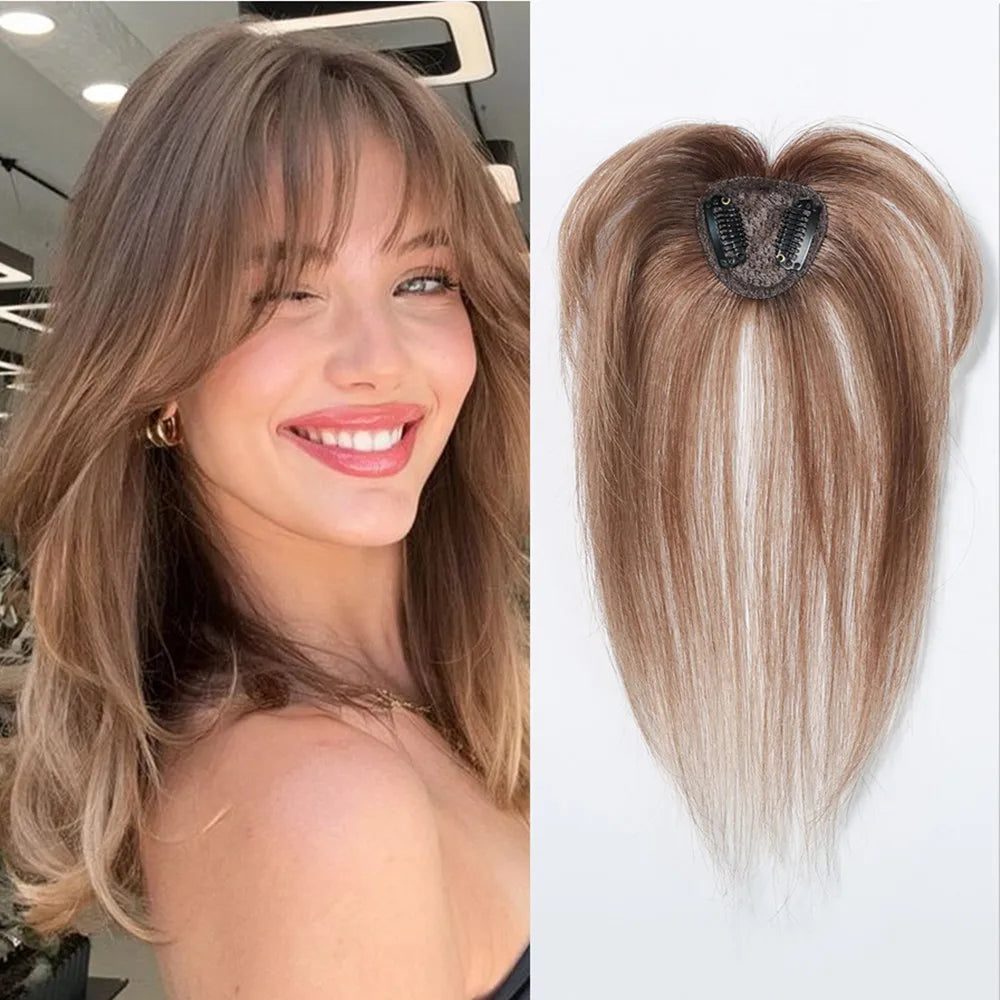
For those looking for dyeable options, Silkara Hair offers both synthetic and 100% human hair extensions. Their premium human hair extensions - available in styles like clip-ins, halo, and U-part - are crafted for salon-quality dyeing at home. With an impressive 4.8/5 star rating from over 6,000 reviews, customers frequently highlight how well these extensions blend with natural hair and maintain their quality through washing and styling. For custom colouring projects, their 100% Remy human hair range is the way to go.
Understanding the limitations of synthetic hair ensures you focus on the best techniques for dyeing high-quality human hair extensions.
Silkara Hair Colour Match Guarantee
If you're unsure about dyeing or selecting the right shade, Silkara Hair's Colour Match Guarantee is a fantastic alternative. Their team of experts offers free colour recommendations within 12–24 hours based on photos of your natural hair taken in daylight. Simply submit two clear photos (front and back) showing your hair worn down from root to tip, and they’ll match you to the perfect shade.
If the shade doesn’t suit you, they’ll help you find a replacement colour, eliminating the risks of over-processing or uneven dye results. This service is especially useful for Australians looking for quick, professional-looking results without the hassle of chemical treatments. Starting with a professionally matched base shade also makes it easier to customise the colour later if needed.
sbb-itb-08feb2f
Coloring Hair Extensions - DO'S & DONT'S TO AVOID SPOTTY HAIR COLOR ON EXTENSIONS #hairextensions
Tools and Preparation Before Dyeing
Hair Extension Developer Volume Guide: Effects and Best Uses
Required Supplies
To get started, you'll need a few essentials: professional hair dye (permanent, semi-permanent, or demi-permanent), a matching developer, a tint bowl, an application brush, gloves, foil sheets, clarifying shampoo, a moisture repair conditioner, and a hydrating mask. The clarifying shampoo is key - it removes product buildup from the extensions, ensuring the dye absorbs evenly. After dyeing, the conditioner and mask help restore the extensions' softness and strength.
If you're in Australia, sourcing these items is simple. Stores like Hair Supply Direct in Melbourne (locations in South Yarra and Ferntree Gully) and glamaCo in Queensland offer professional-quality products to both professionals and the public. Prices are quite reasonable: tint bowls start at $3.95, professional dyes such as Cristalli Hair Colour Creme range from $6.00 to $11.00 for a 100ml tube, and a 1,000ml bottle of L'Oreal INOA Oxydant developer costs about $24.00. For the best results, always pair your dye with the same brand of developer.
Once you've gathered your supplies, it’s time to set up your workspace.
Preparing Your Work Area
Choose a flat, spacious surface where you can spread out your human hair clip-in extensions without overlapping. Cover the area with tin foil to protect your furniture and keep the hair separated during the dye application. Proper lighting is essential for monitoring the process, and maintaining a warm room temperature will help the chemicals work effectively.
Before laying out the extensions, detangle them gently using a wide-tooth comb. Always perform a strand test on a small, hidden section of the hair to check how it reacts to the dye. When applying the dye, cover the extensions with plastic wrap to keep the formula from drying out during the processing time (usually 20–40 minutes). Check the colour every 5–10 minutes by wiping a small section with a paper towel, then reapply dye if needed.
With your workspace and extensions prepped, the next step is choosing the right developer for your desired result.
Developer Volumes and Their Effects
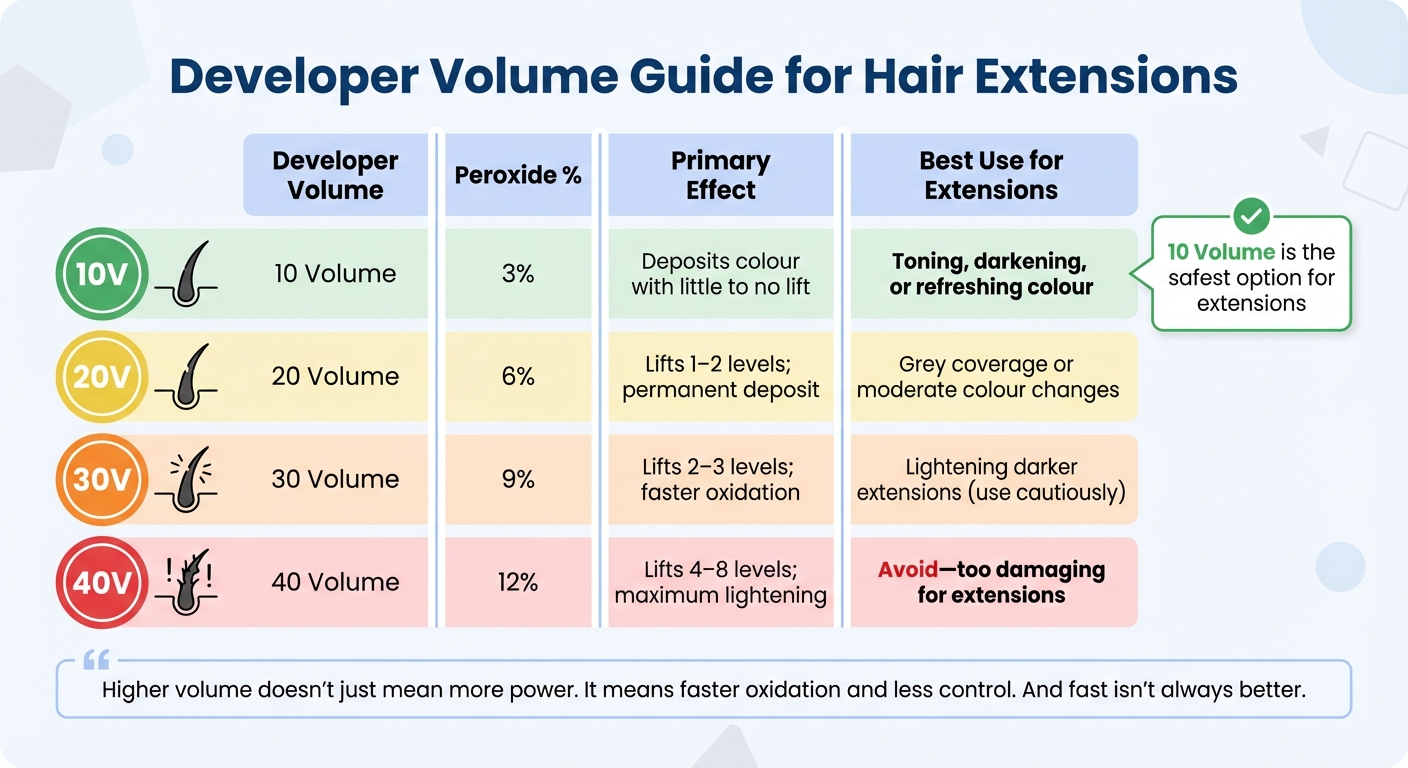
Developers, made from hydrogen peroxide, open the hair cuticle and activate the dye, allowing it to penetrate the hair shaft. The "volume" of the developer indicates its strength - higher volumes lift more pigment but can cause more damage. Since extensions are often pre-processed, selecting the correct volume is crucial to preserving their quality.
| Developer Volume | Peroxide % | Primary Effect | Best Use for Extensions |
|---|---|---|---|
| 10 Volume | 3% | Deposits colour with little to no lift | Toning, darkening, or refreshing colour |
| 20 Volume | 6% | Lifts 1–2 levels; permanent deposit | Grey coverage or moderate colour changes |
| 30 Volume | 9% | Lifts 2–3 levels; faster oxidation | Lightening darker extensions (use cautiously) |
| 40 Volume | 12% | Lifts 4–8 levels; maximum lightening | Avoid - too damaging for extensions |
"Higher volume doesn't just mean more power. It means faster oxidation and less control. And fast isn't always better".
For extensions, 10 Volume is the safest option to deposit colour without risking damage. Use 20 Volume only when absolutely necessary. Avoid 30 and 40 Volume developers entirely, as they can compromise the integrity of the extensions. Always mix the dye and developer in plastic bowls and with plastic whisks, as metal tools can react with the chemicals and alter the colour unexpectedly. Stick to the manufacturer's recommended mixing ratio (typically 1:1), and keep in mind that the mixture remains active for only 60 minutes.
How to Dye Hair Extensions Step-by-Step
Step 1: Choosing the Right Shade
Start by comparing the current colour of your extensions to your natural hair under natural daylight. Keep in mind that extensions often appear a bit lighter once they dry. Picking the right shade at this stage is crucial to achieving the look you want.
Step 2: Preparing the Dye Mixture
After selecting your shade, mix the dye right before application to ensure it stays consistent. Use a plastic bowl and a non-metallic tool to combine the dye and developer, sticking to the 1:1 ratio recommended by the manufacturer. For bold, fashion-forward colours, you can try the watercolour method. This involves mixing the dye with a small amount of conditioner, which helps deposit colour without altering the hair's natural shade - perfect for pre-lightened extensions.
Step 3: Applying the Dye
Before applying the dye, detangle the extensions and wash them with a sulphate-free shampoo. Divide the hair into smaller sections to ensure even coverage. Using a tint brush, apply the dye from the roots to the tips, following the direction of the hair to avoid frizz. Massage the dye into the strands with gloved fingers for complete saturation. If you're working with tape-ins or clip-ins, protect the adhesive strips or metal clips by covering them with blue painter's tape or plastic wrap. Wrap the dyed extensions in tin foil or plastic wrap to retain moisture during the processing time, which typically ranges from 20 to 40 minutes. Check the colour every 5–10 minutes by blotting a small section with a paper towel. If needed, reapply the dye to even out the shade.
Step 4: Rinsing and Drying
Rinse the extensions under lukewarm water using low pressure for 15–20 minutes, or until the water runs clear. Follow up with a protein-rich conditioner or a hydrating mask, leaving it on for 5–10 minutes. Rinse again with cool water to seal the cuticles. Gently press out excess water with a towel, avoiding any twisting or wringing that could damage the hair. Lay the extensions flat on a clean towel to air-dry, spreading them out to prevent tangling. Hold off on heat styling until the extensions are fully dry.
Advanced Colouring Techniques
Watercolour Method for Bright Colours
The watercolour method, also known as a colour bath, is a creative way to achieve bold, vibrant colours on hair extensions without relying on harsh chemicals. This technique involves immersing extensions in hot water mixed with semi-permanent dye, ensuring even absorption. It's particularly effective on high-quality human hair extensions that can lift to a Level 10 or 613 shade, creating the ideal base for bold, fashion-forward hues.
"Colouring hair extensions, with this water colouring technique, is so much easier than any other method you ever tried." - DanYel Williams
To get started, remove any rubber bands, plastic ties, or labels from the extensions, as these can block the dye from adhering evenly. Use a large, non-metallic bowl filled with hot tap water (not boiling) and mix in semi-permanent dye with a plastic whisk, ensuring there are no clumps that could lead to uneven colouring. For intense shades, you might need two bottles of dye. Submerge the extensions completely, leaving them in the solution until the water turns clear - this signals the dye has been fully absorbed. The process is budget-friendly, costing as little as $6, and is a fantastic way to experiment with bold colours. To finish, apply a deep conditioner and allow the extensions to air-dry to maintain their quality.
From here, you can explore how balayage and ombre techniques can bring unique, eye-catching shades to your extensions.
Balayage vs Ombre on Extensions
Balayage and ombre are two popular techniques for adding dimension to hair extensions, each offering a distinct effect. Balayage involves freehand painting with sweeping motions, creating a soft, sun-kissed look without harsh lines. Ombre, on the other hand, features a more defined gradient, transitioning from darker roots to lighter ends for a striking contrast.
"Balayage is a freehand painting technique (the word literally means 'to sweep'). Colour is hand-painted onto the hair, creating a diffused, natural blend with no harsh lines." - Monique McMahon, Que Colour
| Feature | Balayage Extensions | Ombre Extensions |
|---|---|---|
| Application | Freehand painting in sweeping motions | Structured, horizontal gradient |
| Transition | Soft, diffused, and blended | Defined shift from dark to light |
| Appearance | Natural, sun-kissed dimension | Bold, dramatic, two-toned contrast |
| Regrowth | Subtle with no harsh lines | Noticeable where gradient begins |
| Maintenance | Minimal upkeep | Low to moderate upkeep |
Both techniques work beautifully with premium human hair extensions, offering versatile options to suit different styles. Balayage is perfect for a subtle, natural look with lighter pieces framing the face, while ombre makes a bold, modern statement with its clear colour contrast. Extensions like Silkara wavy halo extensions, made from high-quality human hair, are ideal for these techniques, as they can handle the colouring process with ease.
Dyeing Different Extension Styles
Each type of hair extension requires specific care to achieve consistent and flawless colour. For clip-in extensions, dye each weft individually to ensure the colour penetrates evenly, including the hair near the lace or clips. With halo extensions, protect the transparent wire or band by wrapping it in plastic - if you're using the watercolour method, only submerge the hair portion. Ponytail extensions need extra attention around the wrap-around base to make sure the colour matches the main hair piece. For fringe and U-part extensions, carefully section the hair to ensure the top portion (the part closest to your face or parting) matches perfectly. Always use clips to section the hair before applying dye to avoid patchy results. Once dyed, allow all extension styles to air-dry to maintain vibrancy and prevent heat damage.
Common Mistakes and Maintenance
Ensuring your extensions look their best means avoiding common missteps and committing to proper upkeep. Here's how to sidestep potential issues and maintain your extensions for lasting results.
Preventing Damage from Over-Processing
Even with careful preparation, certain mistakes can compromise your extensions.
- Steer clear of box dyes and high-volume developers (30–40), as they strip moisture and weaken hair. Stick with a 10-volume developer to minimise the risk of over-processing.
- Protect attachment points - like tape adhesives, clips, or keratin bonds - from dye. These can dissolve, oxidise, or slip if exposed. Wrapping these areas in tin foil or blue painter's tape can prevent any accidents.
- Avoid bleaching or lightening extensions that have already been coloured. This often leads to significant damage. If you're after a lighter shade, opt for virgin hair or choose a darker tone instead. Always perform a strand test beforehand, and apply dye from roots to tips to ensure even coverage and avoid frizz or patchiness.
Fixing Uneven Colour or Fading
Uneven colouring often stems from inconsistent application or differences in hair porosity. Here are some ways to address and prevent such issues:
- Avoid spot-treating uneven areas, as this can make the contrast worse. Instead, use waves or curls to disguise uneven tones.
- If the extensions appear too dark, a sulphate-free clarifying shampoo can help lift excess pigment with one or two washes.
- For brassiness, purple or blue toning shampoos can neutralise unwanted tones. Use sparingly, as overuse can dull the extensions or even give them a greenish tint.
- When colour fades, professional toners or colour-depositing conditioners can revive vibrancy without the damage of permanent dyes. If extensions fade differently from your natural hair, root concealers or colour sprays can help blend the transition. Allow 7–10 days for the colour to settle before attempting any corrective measures.
These steps not only correct issues but also set the stage for effective post-dye care.
Caring for Dyed Extensions
Proper care after dyeing is crucial to maintaining both colour and quality.
- Rinse dyed extensions thoroughly with lukewarm water for 15–20 minutes to remove any residue.
- Use a sulphate-free, colour-safe shampoo and avoid rubbing the hair together to prevent tangling.
- Apply a sulphate-free leave-in conditioner from the mid-lengths to the ends. Once air-dried completely, store extensions in a cool, dark, and dry place to avoid heat damage and fading.
- When styling, use lower temperatures on your tools to slow colour loss. A UV-protectant hair mist can also help reduce fading caused by sun exposure.
Silkara Hair provides premium tools designed to care for extensions gently, helping you preserve their vibrancy and quality. If your extensions feel gummy or show signs of breakage after dyeing, stop any at-home treatments and consult a professional for advice.
Conclusion
This guide covers everything you need to know to achieve a seamless colour match for your hair extensions. The key to success lies in three main factors: selecting the right type of hair, applying the dye correctly, and taking care of your extensions afterward. Always opt for 100% virgin Remy human hair extensions - they're the only type that will reliably hold colour. Synthetic hair, no matter the effort, won’t absorb dye.
When it comes to the dyeing process, precision is critical. Work through small sections of hair, applying the dye evenly from root to tip to avoid uneven patches or frizz. Use a professional-grade dye paired with a 10- or 20-volume developer, and allow the colour to process for 20–40 minutes. Once done, rinse thoroughly for 15–20 minutes until the water runs clear.
It's also safer to dye your extensions darker rather than lighter. If you're aiming for a lighter shade, starting with virgin hair is your best bet. Following these steps will help you achieve consistent, polished results.
After dyeing, proper aftercare is essential. Use sulphate-free, colour-safe products, limit heat styling, and store your extensions in a cool, dark place to maintain their vibrancy. By following these tips, you'll enjoy stunning, salon-quality extensions right from the comfort of your home.
FAQs
Can I dye hair extensions lighter without bleach?
If you're looking to lighten hair extensions without using bleach, natural methods can be a gentle option. One popular choice is lemon juice, which, when combined with sunlight, can subtly brighten the colour over time. These approaches are ideal for gradual lightening or creating soft highlights, but they typically result in only small changes.
For those seeking more precise or noticeable results without risking damage, it’s worth consulting a professional stylist. They can use advanced colour-matching techniques to ensure your extensions blend seamlessly while maintaining a natural appearance.
How do I match my extensions to my natural hair in daylight?
To find extensions that blend perfectly with your natural hair, daylight is your best friend. Use natural, indirect light to get a true sense of your hair's colour and undertones. Snap a few clear photos of your hair from different angles in daylight - this will help you compare your shade accurately with colour charts.
Start by identifying your base colour, like blonde or brunette, and figure out your undertones - are they warm, cool, or neutral? Opting for multi-tonal shades that mimic natural highlights and lowlights can make the extensions blend effortlessly for a seamless finish.
Will dye ruin tape, clip, or bond attachments?
Dyeing hair extensions can affect the strength of tape, clip, or bond attachments. While it’s technically possible to dye extensions while they’re attached, doing so can weaken their hold if not handled correctly. To reduce the risk of damage, use appropriate techniques and ensure the dyeing method suits the type of extensions you have. Be gentle with the attachments throughout the process and afterwards to help preserve their durability.