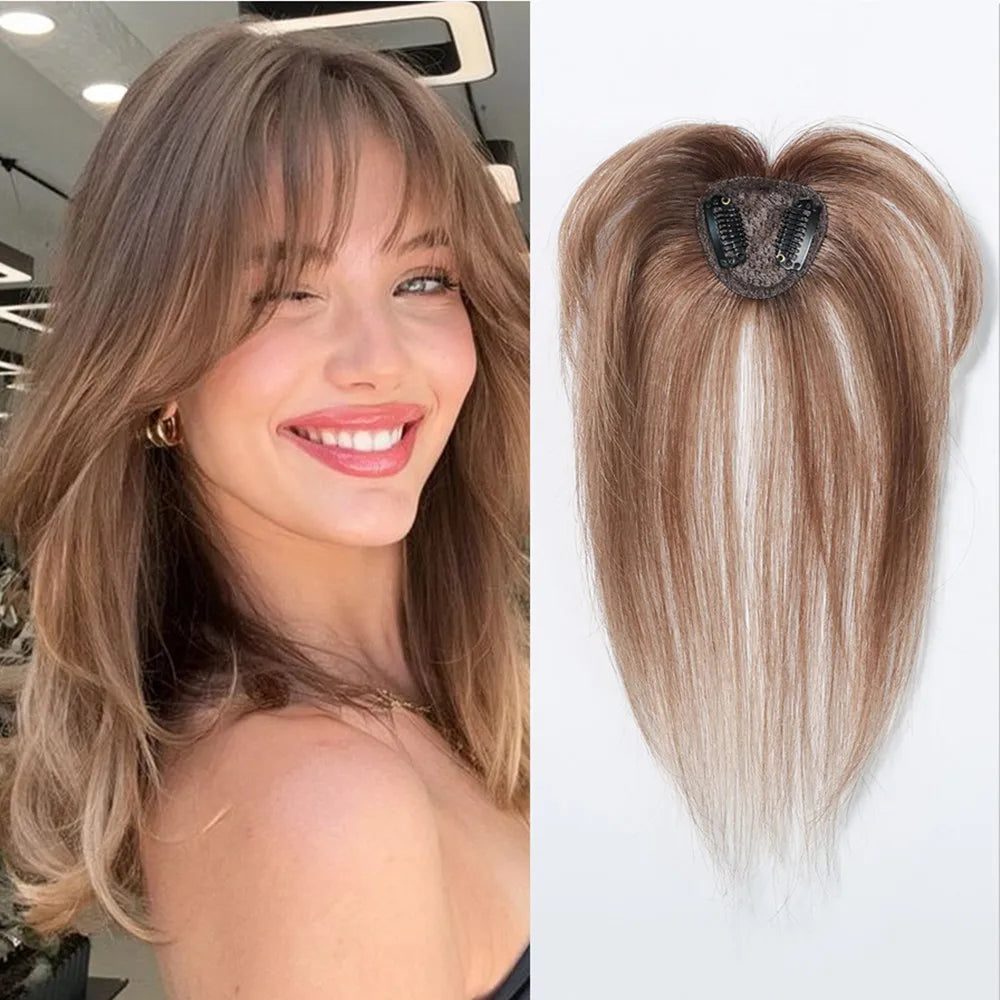

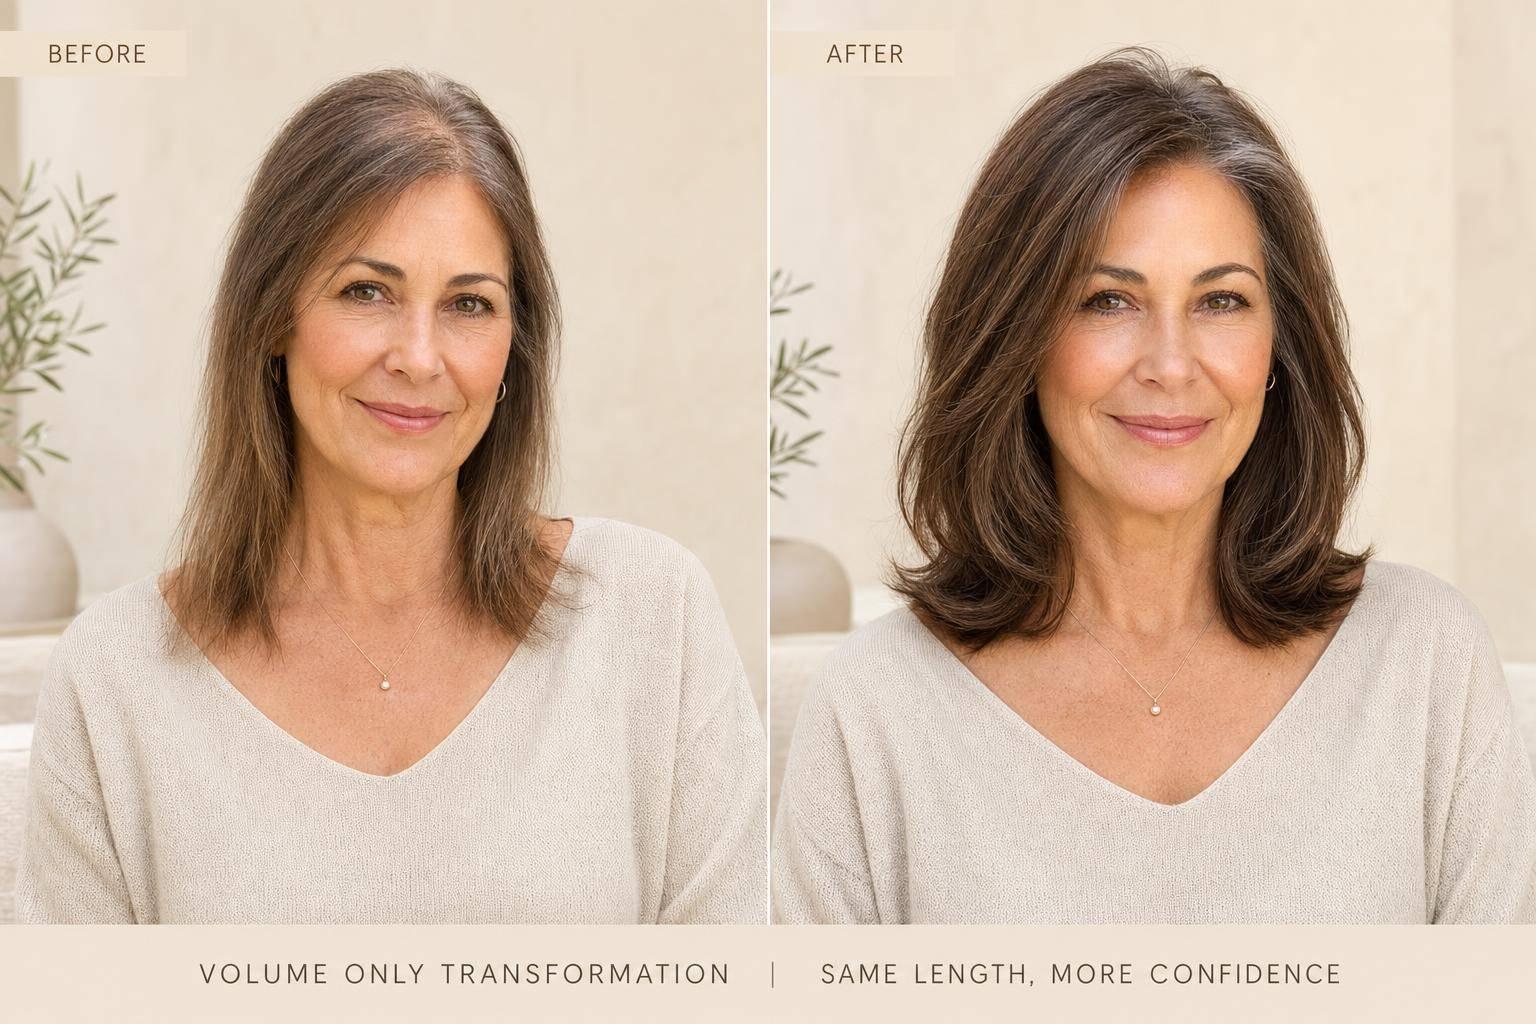
If you want thicker-looking hair without making it longer, the fix is simple: match the extension length to your own hair, keep most of the hair through the mid-lengths and ends, and avoid heavy sets.
I’d keep to three rules:
- Choose extensions that match your hair length or sit only 2–5 cm longer
- Pick halos for all-over thickness and clip-ins for thin spots
- Place wefts low and through the middle, not near the crown
If the extension hair drops too far past your own ends, the result stops looking like extra thickness and starts looking like added length. That’s why measuring your hair in cm, checking placement, and softening the ends matter more than buying a long or heavy set.
Quick comparison
| Option | Best for | Time to apply | Main watch-out |
|---|---|---|---|
| Halo | Even thickness through the back and sides | 1–3 mins | Less control for one thin area |
| Clip-ins | Patchy or local thinning | 5–15 mins | Too many wefts can feel heavy |
A few numbers make the difference: keep extra length to 2–5 cm, place clip-ins in 1.5–3 cm sections, keep clips 2 cm away from the ears and temples, and if you use heat, stay around 150–180 °C.
Put simply, I’d treat volume-only extensions like a blending job, not a length job. The aim is hair that looks thicker, softer at the ends, and the same shape you already have.
how to install & cut tape in extensions for VOLUME (not length)
sbb-itb-08feb2f
How to Choose the Right Extension Length for a Natural Blend
Now that you know the aim is length matching, you can use your own measurement to pick the right set.
Measure your hair in cm before buying
Take a soft tape measure and stand in front of a mirror with dry hair sitting as it normally does. Measure from the point where the extensions will sit down to the ends of your hair, following the hair’s natural fall in a straight line. Then write that number down in centimetres.
If your hair is wavy or curly, measure it as it looks on a normal day, not stretched out.
Choose a length that is only slightly longer
If you want a volume-only result, choose extensions that match your measured length or are no more than 2–5 cm longer.[1][2][3][6] That small difference usually blends well without making your hair look longer.
Once you go 10 cm or more past your natural length, things can get tricky.[4][5] You may end up with a clear length line where your own hair stops and the extension hair keeps going. It can also put extra weight on the ends, which may pull fine hair down and flatten the roots.
If the set is only 2–3 cm longer, a light trim after fitting can help the ends follow your haircut and sit more naturally.
Use the table below to match your measurement to a safer extension length.
Length comparison table
| Length Choice | Blend Difficulty | Visible Length Change | Volume-Only Suitability |
|---|---|---|---|
| Matching length | Very easy | Fuller ends, no visible length change | ✅ Ideal |
| +2–4 cm longer | Easy to moderate | Subtle softness at the ends, barely noticeable | ✅ Great balance |
| +5 cm or more | Hard, often needs cutting | Clear length change, blunt line | ❌ Not recommended |
Once the length is right, placement is what helps the hair look fuller instead of longer.
Halo or Clip-In Extensions: Which One Adds Thickness Better
Once you’ve matched the length, the next step is picking the method that adds fullness without changing your outline.
Both halos and clip-ins can make hair look thicker without making it look much longer. But they do the job in different ways, so each one suits a different need.
When a halo works best for all-over fullness
A halo is a single weft attached to a clear wire that sits under your hair. It adds even fullness through the back and sides. Once you get used to it, application usually takes 1–3 minutes, which makes it handy for day-to-day wear.
Halos tend to work best for women with one-length cuts or soft, long layers who feel their mid-lengths and ends look flat or see-through. Because the wire spreads the weight more evenly, it can suit fine or fragile hair well. The trade-off is that a halo isn’t the best tool for one specific thin spot. It works best when you want fullness right through the lengths, not a pinpoint fix.
When clip-ins work best for targeted volume
Clip-in extensions come in different weft sizes, so you can place them exactly where volume is missing. That extra control makes them a better pick when thinning is patchy or localised.
If your goal is thickness rather than length, a lighter set is usually enough. In many cases, a few small wefts will do the job better than a full heavy set. That keeps things more comfortable on fine hair and helps you avoid putting too much weight on delicate sections. Lightweight, seamless clip-ins with thin bases usually sit flatter and stay more discreet.
Clip-ins are a good fit for patchy or localised thinning because you can add fullness only where it’s needed.
Halo vs clip-in comparison table
| Feature | Halo Extensions | Clip-In Extensions |
|---|---|---|
| Application time | 1–3 minutes (single piece) | 5–15 minutes (multiple wefts) |
| Placement control | All-over fullness; less precise | High; place exactly where needed |
| Pressure on hair | Very comfortable; weight spread evenly along the wire | Comfortable with lighter sets; heavier sets may create pressure points at clip locations |
| Blend at your current length | Easy when matched to natural length; light trim may help ends blend | Easy to customise by using fewer wefts or trimming ends |
| Best for fine or fragile hair | Excellent; minimal tension on strands | Good when using lightweight or seamless sets |
Next, placement decides whether the result reads as thickness only or extra length.
Step-by-Step: How to Apply Extensions for Thickness, Not Length
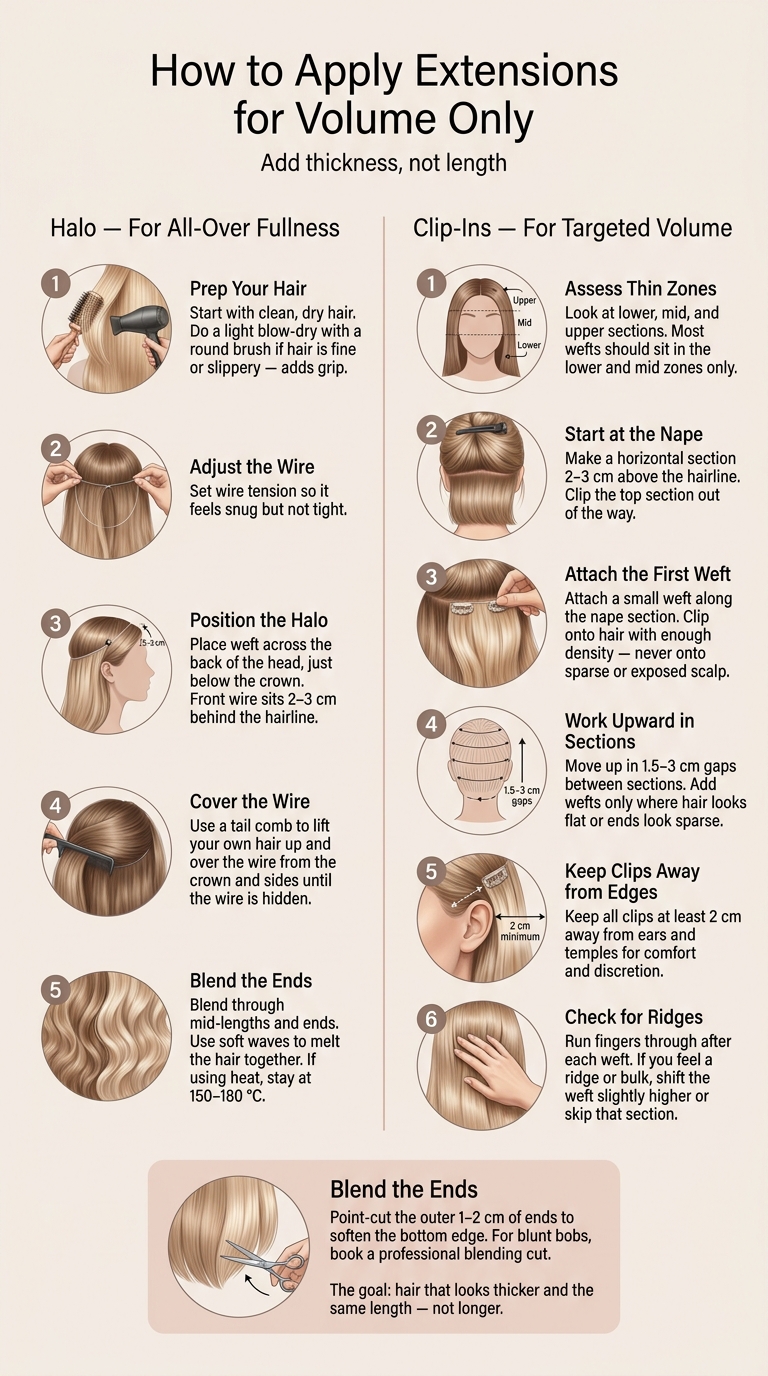
How to Apply Clip-In Extensions for Volume Only (Step-by-Step)
Placement and blending decide whether the result looks thicker or just longer. That’s the whole game here.
How to apply a halo for even volume through the mid-lengths and ends
Start with clean, dry hair styled the way you usually wear it. That makes it much easier to spot the areas that look flat before you add anything. If your hair is very fine or slippery, do a light blow-dry with a round brush first. It gives the hair a bit more grip.
Adjust the wire so it feels snug but not tight. Then place the weft across the back of your head, just below the crown. The front of the wire should sit about 2–3 cm behind your hairline, following the natural curve around your temples. Once it’s sitting where it should, use the pointed end of a tail comb to lift your own hair up and over the wire from the crown and sides until the wire disappears.
After that, blend the halo through the mid-lengths and ends. Soft waves usually work best here because they help your natural hair and the extension hair melt together. If you’re styling human hair extensions with heat, stay around 150–180 °C so the hair is protected while you set the blend.
Where to place clip-ins when fullness is missing
The same idea applies with clip-ins: keep the bulk low and through the middle of the head, not up near the crown.
Before you clip anything in, look at your hair in the lower, middle and upper sections of the head. If your goal is volume only, most of your wefts should sit in the lower and mid zones. Putting them too close to the crown can make the clips easier to spot, and the extra bulk ends up in the wrong place.
Start at the nape. Make a horizontal section about 2–3 cm above the hairline, clip the top section out of the way, and attach a small weft along that line. The clips need hair with enough density to hold onto, so don’t place them straight onto thin, see-through patches. Then work upward in 1.5–3 cm gaps between sections, adding wefts only where the hair looks flat or the ends look sparse. If the front perimeter looks thin, shorter side wefts placed just above ear level can help. Keep clips at least 2 cm away from the ears and temples so they stay comfortable and out of sight.
After each weft, run your fingers through the hair. If you feel a ridge or a bulky spot, shift the weft a bit higher or skip that section. Sometimes less does the job better.
How to blend the ends so hair looks full, not blunt at the bottom
With one-length cuts and blunt bobs, the ends can make or break the result. If the extension hair drops even a little below your natural outline, it will look like added length instead of added thickness. Check the shape around your shoulders, jawline or collarbone - wherever your haircut sits - and make sure the extension ends blend into that line instead of falling past it.
A simple fix is point-cutting: small vertical snips into the outer 1–2 cm of the ends only. That softens the bottom edge without changing the overall length of your haircut. You can also twist a small section and trim only the strands that hang below your natural perimeter.
For blunt bobs or any cut with a sharp outline, a professional blending cut is often worth booking. A stylist can use slide cutting or tailored perimeter shaping to tidy the join so the added hair follows your haircut’s shape and keeps the focus on thickness rather than length.
How to Keep a Volume-Only Result Looking Natural Over Time
How to care for extensions and protect fine or thinning hair
Once your extensions are in, the next job is simple: keep the blend soft and keep stress off fine or thinning hair.
A gentle routine goes a long way. Brush from the ends up with a soft-bristle or loop brush, and hold the hair with your free hand as you work closer to the roots. That small step helps cut down tugging at the attachment points and puts less strain on fragile strands.
Wash clip-ins only when they need it. As a rough guide, that’s every 10–20 wears. Halos can usually be washed around every three months, depending on buildup.[8][9][10] Use a sulphate-free shampoo, apply conditioner through the mid-lengths and ends, then let them air-dry flat on a towel.
A few habits matter here:
- Don’t sleep in your extensions.
- Give your hair regular rest days.
- Keep the routine gentle, especially around the attachment points.
Aftercare is only part of it. Fit matters too. For fine hair, keep clip-in sets to about 100–120 g in total.[7] Attach wefts to broader, more secure sections of hair instead of sparse areas, and never clip straight onto exposed scalp.
Check colour, fit and density as your hair changes
Hair doesn’t stay the same all year, so your extensions shouldn’t be a set-and-forget choice either.
Check the blend now and then, not just how the extensions feel to wear. Colour can shift more than people expect. Sun exposure, seasonal change, greying, and toning treatments can all alter your natural shade, and that mismatch often shows up fast in daylight. That’s why it helps to review colour, fit, and density together.
If you’re not sure your shade still matches, Silkara Hair offers free colour matching support. Send a photo and their team can guide you. Silkara Hair’s AI virtual try-on on selected products can also help you preview the blend before you buy.
Density matters just as much as colour. If your natural hair has changed in thickness or condition, the number of wefts you used before may no longer look right. What once felt perfect can start to feel too heavy or too thin. Tweaking density, not only shade, is often what keeps the result looking like your own hair instead of something sitting on top of it.
Conclusion: The key rules for adding thickness without extra length
Match the length, place extensions where they add fullness, and blend the ends so they look soft rather than blunt.
Measure your own hair before you buy anything. Choose a halo or clip-in length that matches your natural hair or sits only slightly longer. Use extensions to fill out thin mid-lengths and sparse ends, not to drag the shape lower. Then blend the ends with care so the finish stays soft.
The best volume-only result should look like your hair on a very good day: fuller, healthier, and the same length.
FAQs
Will volume-only extensions suit fine hair?
Yes, volume-only extensions can work well for fine hair if you choose the right type and apply them with care. The main thing is to go for lightweight pieces so they feel comfortable and don't put extra tension on the hair.
A halo extension is often one of the gentlest options because it sits on an invisible wire instead of relying on clips at the roots. If you're dealing with crown thinning, a lightweight hair topper paired with halo or clip-in extensions can add both coverage and volume while still looking natural.
Can I use extensions with a blunt bob?
Yes. Silkara Hair extensions can work well with a blunt bob, including options made for shorter hair.
Clip-ins can add body through the mid-lengths and ends, which helps your bob look fuller without making the added hair stand out. For the most natural finish, pick extensions close to your current length and make sure your top layers cover the attachment points.
How do I stop extensions looking longer than my hair?
Choose extensions that match your current hair length as closely as you can. That’s what helps them blend in, instead of sitting there with a clear line between your own hair and the extra length.
A simple way to check the right length is to measure from the top of your ear to the point where you want the extensions to sit. If you’re using clip-ins, place them below eyebrow level and leave enough of your own top layers out to cover the clips.
Related Blog Posts
- Halo Hair Extension Length Guide: 14, 16, 18, 20 & 22 Inches Explained
- Do Hair Toppers Come in 24 Inches? Understanding Topper Length vs Extension Length
- Want Long Hair and Crown Coverage? How to Choose Between a Topper, Halo and Extensions
- Best Halo Hair Extensions for Short Hair: How to Get a Seamless Blend