
Want salon-quality hair extensions at home? The secret isn’t just in the extensions - it’s in the tools. From heatless curlers to precision pliers, using the right tools can help you style, maintain, and extend the life of your extensions while protecting your natural hair. Here’s a quick overview of the must-have tools for Australians looking to achieve flawless results at home:
- Silkara Hair Heatless Curlers: Create stunning curls overnight without heat damage (AUD 24.95).
- Loop Brush for Extensions: Detangle extensions without snagging or frizz (AUD 20–30).
- Nano and Micro Extension Pliers: Handle tiny rings with precision (AUD 28–37).
- Extension Machine Tool Set: All-in-one kit for professional-level application (AUD 85–150).
- Hair Sectioning Clips: Keep sections neat for even placement (AUD 6–10).
- Laifen Swift Hair Dryer: Ionic technology for frizz-free, shiny extensions (AUD 139.99).
- Extension Cutting Shears: Japanese/German steel for clean, precise cuts.
- Bead Opening Tools: Safely remove beads without damage (AUD 40).
- Hair Weaving Needles: Essential for secure installations (AUD 5–7).
Quick Comparison Table
| Tool | Key Feature | Price (AUD) | Best For |
|---|---|---|---|
| Silkara Curlers | Heatless overnight curls | 24.95 | All extension types |
| Loop Brush | Nylon loops, anti-frizz | 20–30 | Detangling extensions |
| Nano/Micro Pliers | Precision ring handling | 28–37 | Nano/micro ring applications |
| Extension Machine Set | Complete application kit | 85–150 | DIY professional application |
| Sectioning Clips | Durable, rust-resistant | 6–10 | Neat sectioning for placement |
| Laifen Hair Dryer | Ionic tech, smart heat control | 139.99 | Frizz-free drying |
| Cutting Shears | Japanese/German steel blades | 50–100 | Precise extension cuts |
| Bead Opening Tools | Fine tips, ergonomic grip | 40 | Safe bead removal |
| Weaving Needles | Stainless steel, curved design | 5–7 | Securing wefts/extensions |
| Styling Iron | Adjustable heat, ceramic/titanium | 55–200 | Smooth, frizz-free styling |
Pro Tip: Start with basic tools and upgrade as you gain confidence. Quality tools not only protect your extensions but save you time and money in the long run. Ready to style like a pro? Let’s dive into the details!
What's Inside My Hair Extension Tool Kit: Must-Have Tools for Perfect Extensions
1. Silkara Hair Heatless Curlers
Silkara Hair Heatless Curlers are the perfect solution for achieving stunning curls without exposing your hair to damaging heat. Crafted from silk, these curlers help reduce friction and minimise breakage, ensuring your hair extensions remain smooth, tangle-free, and in top condition. Here's a closer look at their standout features and how to use them effectively.
These curlers are incredibly versatile, allowing you to create everything from soft, loose waves to defined, bouncy curls. Plus, with a temperature-safe range of 71–85°C, they help protect your hair from heat damage - an especially important feature in Australia's warm climate.
How to Use Silkara Hair Heatless Curlers
- Start with damp, nearly dry hair and apply a light styling product for hold.
- Place the curler horizontally across the top of your head.
- Wrap sections of your extensions around the curler.
- Secure the hair in place using the provided silk scrunchies.
- Leave the curlers in overnight to let your curls set naturally.
These curlers are compatible with all types of extensions, such as tape-ins, nano rings, and weaves, making them a versatile choice for anyone looking to style their hair effortlessly at home. With a price tag of AUD 24.95 and glowing reviews from over 9,500 users, they bring salon-quality results right to your doorstep.
| Feature | Benefit |
|---|---|
| Silk Material | Reduces friction and prevents tangling |
| Overnight Styling | Allows you to style your hair as you sleep |
| Universal Design | Works with all types of extensions |
| Temperature Safe | Protects hair by maintaining a safe temperature |
If you're after gorgeous curls without the heat damage, Silkara Hair Heatless Curlers are a game-changer!
2. Loop Brush for Extensions
A loop brush with 123 nylon loops and hollow, ionic powder-tipped bristles is a must-have for keeping extensions tangle-free. It’s especially handy for those humid Australian days when static and frizz can be a challenge. The nylon-looped bristles glide smoothly, protecting the bonds of your extensions while detangling with ease.
Design Features
This brush is designed with hollow, drop-shaped bristles coated in ionic powder. These features help reduce static and frizz, making it effective for various extension types, including tape-ins and microlinks. The flexible bristles gently work through your extensions, from roots to ends, ensuring they stay intact and looking their best.
| Feature | Benefit |
|---|---|
| Nylon Loops | Prevent snagging on extension bonds and natural hair |
| Ionic Powder Coating | Minimises static and frizz |
| Hollow Drop Shape | Reduces tangling and protects extension connections |
| Flexible Design | Works on both wet and dry hair |
Once you’ve got the brush, using it the right way will make all the difference.
Proper Brushing Technique
To get the most out of your loop brush, stick to these steps:
- Hold Extensions Securely: Use one hand to hold the base of your extensions steady while brushing.
- Start at the Ends: Begin brushing at the tips and work upwards in small sections.
- Brush Twice a Day: For semi-permanent extensions, brushing in the morning and before bed helps prevent tangles.
One satisfied user shared:
"One hundred and twenty three nylon loops enable this brush to easily glide through your hair and remove tangles without the worry of snagging on your bonds, bases or natural hair strands." - RemySoft
Maintenance Tips
Keeping your brush in good shape is just as important as using it correctly. Regularly clean it to remove hair and product build-up. Avoid brushes with ball-tipped bristles, as they can catch on adhesives and microlinks.
Gentle, consistent brushing not only prolongs the life of your semi-permanent extensions but also keeps them looking as good as they did when you left the salon. Plus, the brush's cellulose acetate material is an eco-friendly choice, offering anti-static benefits while being kind to the planet.
3. Nano and Micro Extension Pliers
Nano and micro pliers are essential tools for managing rings and bonds with precision. Crafted from surgical-grade stainless steel, these tools are designed to handle even the tiniest nano rings with ease and accuracy.
Professional-Grade Features
The standout features of nano and micro pliers make them indispensable for extension work. Here's what sets them apart:
| Feature | Benefit |
|---|---|
| Surgical Steel Construction | Offers long-lasting durability and resists rusting |
| Dual Spring Handles | Enhances control and ensures a secure grip |
| Ergonomic Design | Minimises hand fatigue during extended use |
| Precision Ring Notches | Perfectly reshapes and restores rings |
| Multi-Use Capability | Suitable for both nano and micro rings |
These features, combined with proper technique, ensure precision and efficiency in every use.
Proper Usage Tips
When using nano and micro pliers, maintain a steady but gentle grip to avoid damaging the rings. Their fine-tipped ends are designed for precise handling, making it easier to work with even the smallest nano rings. As Hair Made Easi points out, a firm yet delicate touch is key to achieving the best results.
Maintenance Requirements
To keep your pliers in top condition and extend their lifespan, follow these simple maintenance steps:
- Clean them thoroughly after each use to remove any product build-up.
- Store them in a protective pouch to prevent damage.
- Apply anti-rust oil occasionally to maintain their stainless steel finish.
- Regularly check the alignment of the tips to ensure consistent performance.
Price Range and Value
The price of quality pliers varies depending on the brand and features. For instance, the Cross Edge Corporation Hair Extension Micro Beads & Tape in Remover Plier is available for AUD 28.00, while the premium Beauty Works Nano Pliers are priced at AUD 37.00.
Professional Results at Home
Achieving salon-quality results at home is possible with the right tools. Look for pliers with precision tips, ergonomic handles, and durable stainless steel construction. Models that can handle multiple ring sizes offer added versatility. Pairing quality tools with proper technique ensures professional-level results, while regular maintenance keeps your pliers performing at their best.
4. Extension Machine Tool Set
A complete extension machine tool set provides everything needed for professional-quality results at home. Below, we break down the key components and what makes them indispensable.
Components and Features
| Component | Purpose | Key Features |
|---|---|---|
| Extension Machine | Application | Fast-curing lamp technology |
| Pulling Hook | Hair Sectioning | Precise placement control |
| Professional Pliers | Bead Closure | Silicone-padded jaws |
| Sectioning Tools | Hair Management | Ergonomic design |
| Adhesives | Secure Attachment | Hypoallergenic formulas |
Professional-Grade Options
For those looking to elevate their home application experience, premium sets are available. The Extension Master Kit is a standout option, equipped to handle multiple extension types. It includes specialised tools like the Pro Fusion Tool and Pro Tape-In Press, ensuring consistent, high-quality results across various methods.
Time-Saving Technology
Modern systems are designed for efficiency, with some kits allowing you to install a full head of extensions in as little as 30 minutes.
Application Materials
These kits come packed with all the essentials: hypoallergenic adhesives, micro silicone link ring beads, professional-grade removal solutions, and protective heat shields to ensure a safe and smooth application process.
Investment Value
Pricing for a complete set typically falls between AUD 85 and AUD 150, making it a cost-effective choice for home users. A popular pick is the SCIAZA 6D Hair Extension Machine Kit, priced at AUD 85.86, which offers a great balance of quality and affordability.
Maintenance Requirements
To keep your tool set in top condition:
- Clean all tools thoroughly after each use.
- Store them in the protective case provided.
- Replace adhesives and beads as needed.
- Regularly check tool alignment to ensure optimal performance.
5. Hair Sectioning Clips
Hair sectioning clips are essential for dividing hair into manageable sections, ensuring even and precise extension placement.
Types of Sectioning Clips
Different types of sectioning clips cater to specific hair needs. Here's a quick guide:
| Clip Type | Ideal For |
|---|---|
| Alligator Clips | Thick, coarse hair |
| Plastic Duckbill | Dry styling and delicate hair |
| Metal Duckbill | Wet styling |
| Butterfly Clips | Very thick hair |
Built to Last
High-quality sectioning clips are designed to endure demanding use. For instance, some alligator clips can handle temperatures as high as 160°C and are tested to withstand up to 75kg of pressure. The stainless steel springs in these clips have undergone over 100,000 pressure test cycles, ensuring durability.
Tips for Effective Use
Sectioning Technique
- Use a tail comb to create clean, horizontal partings.
- Secure the upper sections firmly to keep them out of the way.
- Distribute sections evenly for a balanced and natural result.
Choosing the Right Material
- Opt for plastic clips when working with chemical treatments or heat styling.
- Use rust-resistant metal clips for wet styling tasks.
"Using the proper hair products to achieve the style of your dreams is only half the battle. The tools used behind the chair, or in front of your mirror at home, are equally important." – Ashley Mishler
Cost and Value
Investing in durable sectioning clips can save money in the long run. For example, AIMIKE offers a 4-piece set for about AUD 5.99, while larger sets, such as a 30-piece option, are available for approximately AUD 9.99.
Keeping Your Clips in Top Shape
To maximise the lifespan and performance of your sectioning clips:
- Clean them after each use to remove product buildup.
- Store them in a dry place to prevent rust.
- Replace clips that show signs of wear or reduced grip.
- Regularly check the tension of the springs.
6. Laifen Swift Hair Dryer
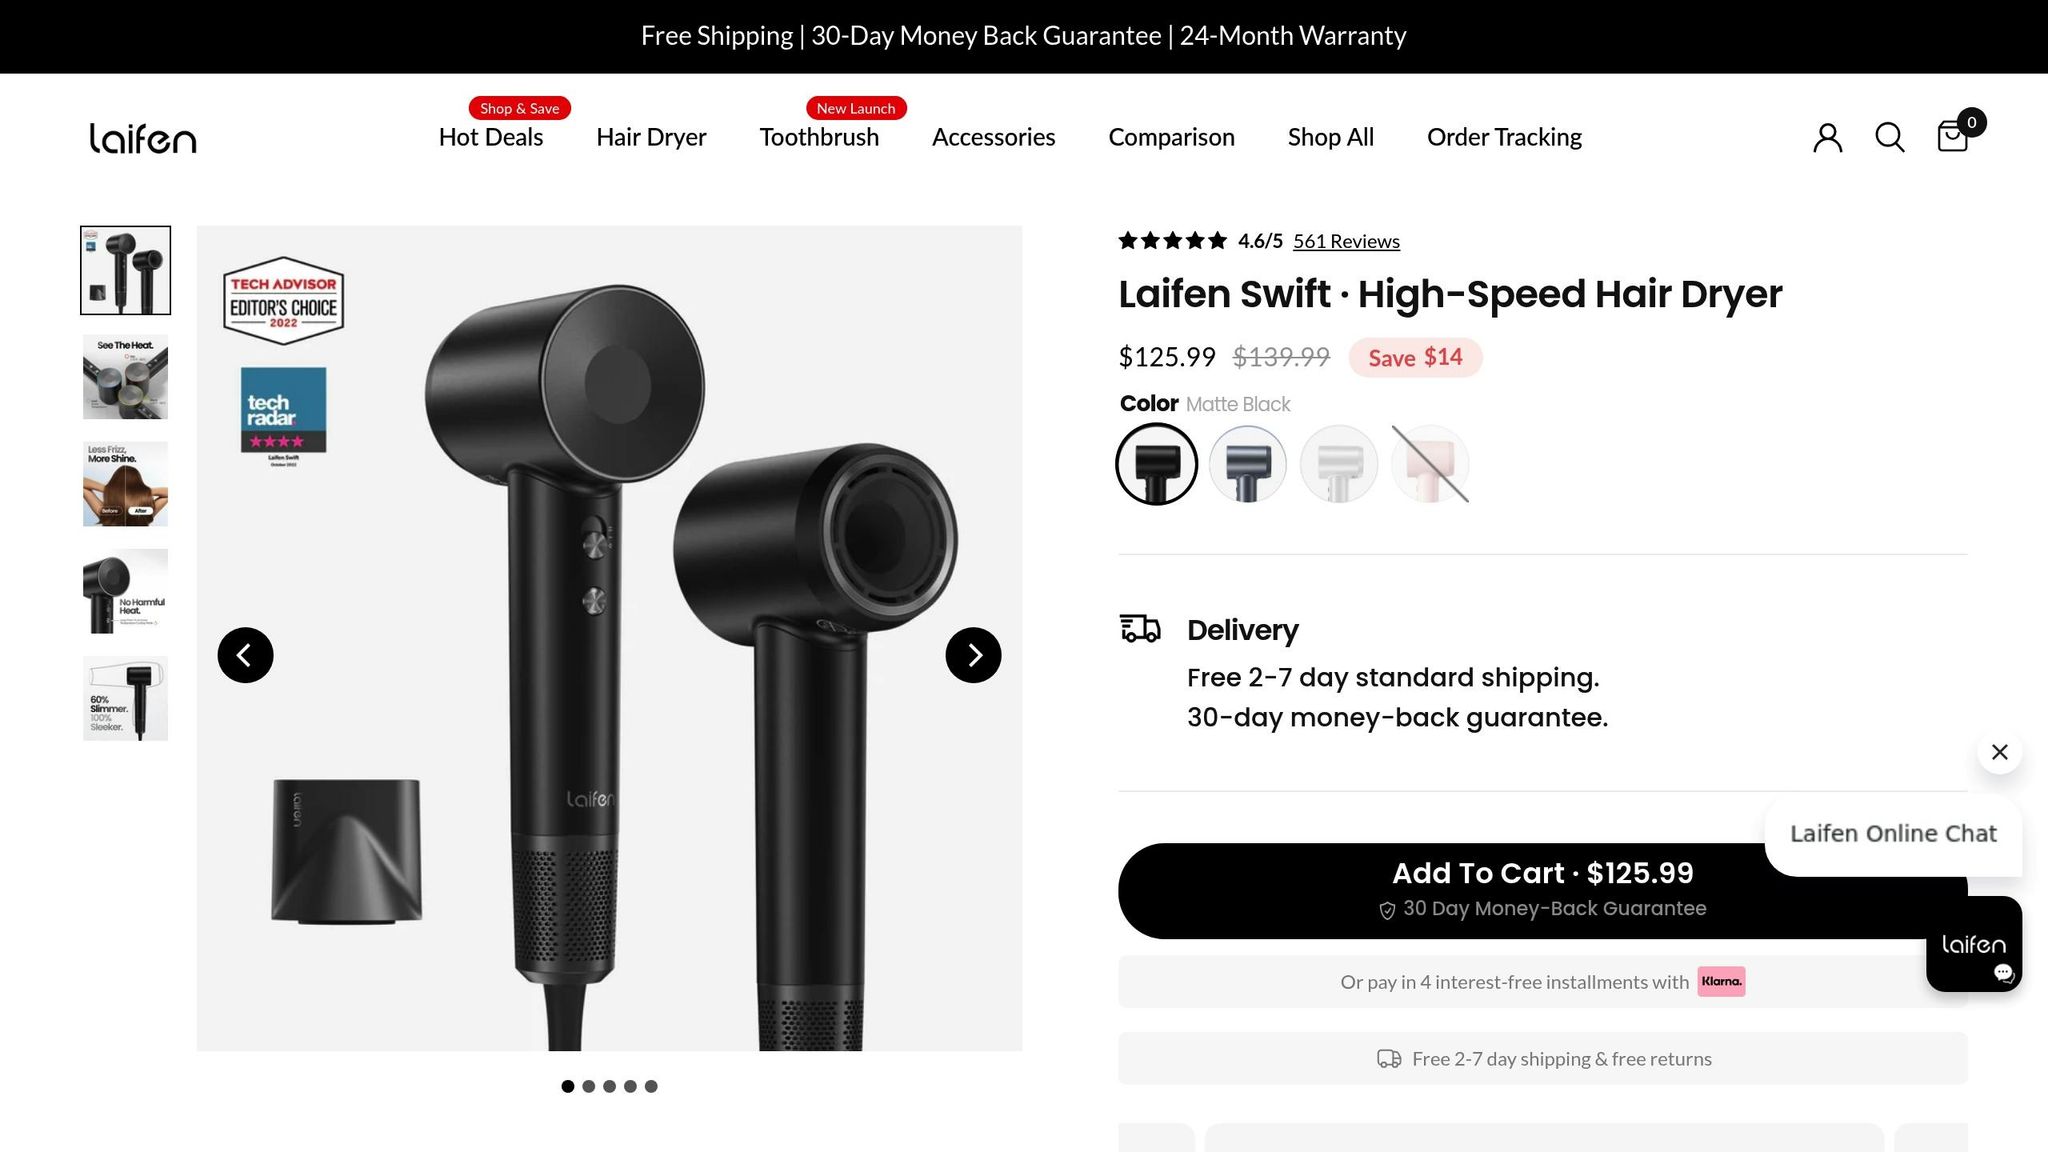
The Laifen Swift Hair Dryer is designed with advanced features to care for and style your hair extensions at home. It pairs perfectly with other essential tools for maintaining extensions, ensuring both protection and style.
Advanced Technology for Extension Care
This dryer is powered by a 110,000 RPM brushless motor, delivering an impressive 22m/s airflow. Its ionic technology releases a staggering 200 million negative ions to minimise frizz, boost shine, and maintain the integrity of your extensions. The smart temperature control system monitors heat 100 times per second, ensuring the temperature stays below a safe maximum of 80°C. These features make it a standout choice for extension care.
Features Designed for Extensions
| Feature | How It Benefits Extensions |
|---|---|
| Temperature Cycling | Alternates between hot and cold air to prevent heat damage |
| Smart Heat Control | Keeps the temperature safely below 80°C |
| Multiple Attachments | Customises styling for various extension types |
| Lightweight Design | Comfortable for extended styling sessions |
Tips for Using the Laifen Swift with Extensions
To get the best results while protecting your extensions, follow these tips:
- Keep the dryer at least 15 centimetres away from your extensions.
- Use medium heat settings to avoid excessive heat exposure.
- Apply a leave-in conditioner before drying for added protection.
- Select the correct attachment based on your extension type.
Choosing the right model for your needs can also enhance your styling experience.
Model Options
- Laifen SE Lite: A budget-friendly option priced under AUD 100.
- Laifen Swift: A mid-range model available for AUD 139.99.
- Laifen Swift Special: A premium model priced at AUD 239.99.
Maintenance and Durability
With just 10 minutes of daily use and proper care, the Laifen Swift can protect both your extensions and natural hair for up to 16 years. Operating at a quiet 59dB, it’s ideal for styling at any time of day. To keep your dryer in top condition:
- Clean the filter regularly to maintain airflow.
- Store it in a dry, safe place.
- Use the appropriate attachments for your styling needs.
- Maintain a 15-centimetre distance from your hair during use.
sbb-itb-08feb2f
7. Extension Cutting Shears
Using professional-grade cutting shears ensures precise cuts and helps maintain the integrity of hair extensions.
Choosing the Right Shears
Investing in high-quality shears made from premium steel is key to achieving clean, smooth cuts. Experts often recommend Japanese or German steel for its durability and sharp edges, which lead to better results. For a more budget-friendly option, American stainless steel is a reliable alternative that still delivers excellent performance.
| Feature | Professional Recommendation | Benefit |
|---|---|---|
| Blade Length | 4–5 inches (10–12.5 cm) – great for beginners | Offers better control and precision |
| Blade Type | Convex edge | Prevents fraying and splitting |
| Handle Design | Offset finger rest | Minimises hand fatigue |
| Material | Japanese/German steel | Ensures long-lasting sharpness |
Essential Cutting Techniques
The right techniques are just as important as the tools when it comes to cutting extensions. Here are three key methods to master:
-
Point Cutting
This involves cutting upwards at a steady angle to blend the ends seamlessly and soften any harsh lines. The result? A more natural, feathered finish. -
Slicing Technique
To create face-framing layers or achieve a smooth blend, hold the extensions at an angle and cut from top to bottom while gently opening and closing the shears. -
Bulk Removal
When you need to reduce weight without affecting the length, try the slithering technique. Glide the open shears from the midshaft to the ends with consistent pressure for a lighter, softer look.
Professional Insights
Celebrity hairstylist Clayton Hawkins shares this tip:
"You don't have to break the bank to find a quality pair of hair cutting scissors."
Extension expert Noelle Spinosa adds:
"Hair extensions should not be cut with conventional cutting shears unless using them to cut in the very bottom (weight-line) of the extensions or using a 'glide' technique."
Maintenance Tips
Proper care can keep your shears in top condition for up to 15 years. Here’s how to keep them performing like new:
- Wipe the blades clean after every use
- Store them in a protective case to avoid damage
- Regularly check and adjust the tension
- Get them professionally sharpened when needed
8. Bead Opening Tools
Bead opening tools are specifically designed to safely open the beads used to secure hair extensions. They allow for easy removal without causing damage to either the extensions or your natural hair.
Key Features to Look For
When choosing a bead opening tool, keep these essential features in mind:
| Feature | Preferred Material | Why It Matters |
|---|---|---|
| Material | Aluminium or stainless steel | Durable enough for repeated use |
| Tip Design | Fine, precision tips | Offers better control near the scalp |
| Grip Style | Ergonomic handle | Minimises hand fatigue during long use |
| Surface | Smooth closing surface | Prevents beads from being scratched or damaged |
| Special Features | Cross-hatch base | Helps with removing beads that are mangled |
These features ensure you can achieve salon-level results at home while protecting your hair and extensions.
Types and Uses
Bead openers generally come in two main types:
- Standard Bead Openers: Great for routine maintenance and for opening beads that are properly placed.
- Crush Bead Openers: Specifically designed for handling beads that have been crushed or compressed, which can be tricky for standard tools to manage.
Each type serves its purpose, so it's worth selecting the right one based on your needs.
Tips for Professional Results
To use bead opening tools effectively, follow these tips:
- Carefully position the tool around the bead.
- Apply steady and even pressure when squeezing.
- Avoid pulling or tugging to prevent unnecessary strain on the hair.
- Work methodically across the scalp, focusing on one bead at a time.
- Take your time to ensure clean and safe removal.
Worth the Investment
High-quality bead opening tools are a worthwhile investment for their durability and consistent performance. For example, the IBE® Bead Remover, priced at AU$40.00, is a popular choice among professionals for its reliability and ease of use.
Safety First
Always handle bead opening tools gently to protect your natural hair. With practice, you’ll achieve flawless results that rival a professional salon experience.
9. Hair Weaving Needles
Hair weaving needles play a key role in securing extensions effectively. Just like other tools from Silkara Hair, using the right technique and precise tools can make at-home extension styling look professional.
Types of Needles
Different needle designs cater to specific tasks:
| Needle Type | Best For | Key Features |
|---|---|---|
| C-Curved | Weave installations, wig creation | Curved shape for better control |
| J-Shaped | General weaving | Straight needle with a hooked end |
| I-Shaped | Detail work | Straight with a blunt tip |
| L-Shaped | Versatile use | Combines the benefits of curved and straight needles |
| Latch Hook | Micro beads, crochet weaving | Includes a closing latch mechanism |
Key Features to Look For
When choosing hair weaving needles, consider these important features:
- Material: Stainless steel ensures durability and prevents rust.
- Length: Standard sizes (2–2.5 inches) offer better control.
- Threading: A large eye size accommodates thicker threads.
- Tip Design: A slightly dull tip helps avoid scalp injuries.
Professional Tips for Home Use
To achieve great results with weaving needles at home, follow these tips:
- Hold C-curved needles with the curve facing upwards.
- Cut thread to 3–5 times the section length for flexibility.
- Use a double knot to secure stitches.
- Start with a triple knot when attaching the thread to the weft for extra stability.
Safety Precautions
Using sharp tools requires care. Keep these safety practices in mind:
- Store needles in a pincushion or magnetic holder to avoid accidents.
- Work in a well-lit area to see clearly.
- Take regular breaks to prevent hand fatigue.
Recommended Needle Sets
For beginners, the Lusecarl Needle and Thread for Hair Extensions set is a budget-friendly option at just AU$6.99. It includes 10 needles and 3 rolls of thread, earning a 4.7/5 star rating from 401 customers.
If you're looking for a professional-grade choice, the Ari C-Curved Sewing Needle set offers 12 needles for AU$4.99. However, some users have mentioned these needles might feel too sharp for those new to weaving.
10. Extension Styling Iron
A high-quality styling iron is a must-have for achieving salon-worthy results while keeping your hair extensions in top condition at home.
Plate Materials and Their Benefits
The type of material used for the plates can significantly impact your styling experience. Here's a quick breakdown of the most common options:
| Plate Material | Ideal For | Benefits |
|---|---|---|
| Ceramic | Fine, straight extensions | Provides even heat and gentle styling |
| Tourmaline | Wavy or curly extensions | Boosts shine and reduces frizz |
| Titanium | Thick, coarse extensions | Heats up quickly and offers excellent durability |
Choosing the right material ensures your extensions get the care they need while achieving your desired look.
Temperature Settings
Proper temperature control is essential for maintaining the longevity of your extensions. Look for a styling iron with adjustable heat settings. Use lower temperatures for fine or straight extensions and slightly higher settings for thicker or wavy textures. Always start with a lower heat level and gradually increase as needed - this cautious approach helps prevent damage.
Features to Look For
Modern styling irons often come with advanced features that make the process easier and safer:
- Ionic Technology: Reduces static and frizz for a smoother finish.
- Steam Function: Adds moisture while styling, which is especially helpful for extensions.
- Even Heat Distribution: Prevents hot spots that can damage hair.
- Quick Heat-up: Ready for use in just 15–20 seconds, saving time.
When shopping, weigh these features against your budget to find a styling iron that meets your needs.
Price Ranges and Recommendations
Styling irons are available across various price points:
- Budget options: Starting at around AU$55, these are great for basic needs.
- Mid-range options: Priced between AU$100 and AU$200, offering a balance of quality and features.
- Premium models: Exceeding AU$200, these often include advanced technologies and superior materials.
For instance, the Beachwaver Co. Coast Pro Titanium Styling Iron, priced at AU$189, features titanium plates and adjustable temperature controls, making it a solid mid-range choice.
Protecting Your Extensions
Heat protection is non-negotiable when styling extensions. Always apply a heat protectant evenly across sections before using a styling iron. This creates a barrier between the heat and your extensions, which lack the natural oils that protect real hair. Stick to low temperatures and limit heat styling sessions to preserve their quality and lifespan.
Tool Features and Prices
Choosing the right tools for at-home hair extension care doesn’t have to be overwhelming. The right equipment can make your maintenance routine efficient and cost-effective. Let’s break down the key features and prices of some top tools to help you decide.
Basic Tools and Accessories
Every extension maintenance kit should include these essentials:
| Tool | Price (AU$) | Key Features |
|---|---|---|
| Cotton Thread | AU$9.95 | Provides a secure hold with safe, durable material. |
| Mini Scissors | AU$14.95 | Designed for precision cutting, featuring gold-plated blades. |
| Basic Tools* | Various | Includes loop brushes, sectioning clips, and more (details covered earlier). |
*These tools are foundational for everyday extension care.
Professional Application Tools
For those looking to take their extension game to the next level, these tools are ideal for advanced techniques:
| Tool | Price (AU$) | Key Features |
|---|---|---|
| Bead Clamping Pliers | AU$39.95 | Ergonomic design for easy micro-ring application. |
| Nano Ring Looping Tool | AU$17.00 | Lightweight aluminium construction for durability. |
| Pre-Loaded Micro Beads | AU$44.00 | Silicone-lined for a secure and gentle hold. |
| Extension Machine Tool Set | AU$99.95 | A comprehensive kit for seamless application. |
Maintenance and Styling Essentials
Maintaining your extensions is just as important as applying them. For this, consider these must-haves:
- Deluxe Hair Extension Tool Kit (AU$99.95): Combines essential tools for professional-level care and styling.
- X-TEN Dissolve Tape Hair Extension Remover Spray (AU$14.95): A reliable solution for safely removing tape extensions.
Investment Considerations
Whether you’re a beginner or a pro, there’s an option to suit your needs and budget. Here’s a quick look at what you can expect:
- Starter Kit (AU$50-100): Perfect for beginners, this tier includes basic maintenance tools, styling essentials, and core application items.
- Professional Kit (AU$94.00): A step up with premium tools like high-quality pliers and advanced application equipment, all neatly stored in a durable case.
- Specialty Tools: For specific needs, consider options like the Hair Extension Trolley (AU$179.95), Professional Colour Ring (AU$99.95), or Silicone-Lined Micro Beads (1000 pieces for AU$35.95).
Investing in quality tools not only ensures better results but also protects the health of your hair. Whether you’re maintaining extensions at home or working with clients, professional-grade equipment is worth every dollar.
Summary
Using professional-grade hair extension tools can help you achieve salon-quality results right at home. These tools not only extend the life of your extensions but also protect your natural hair during application, maintenance, and removal. Plus, they’re built to last, reducing the need for frequent replacements.
"Having a rhythm and system(s) in place help to keep 5 star service and quality, and a speed that is cost-efficient and clients appreciate." - Kayla Laumann
When choosing tools, keep these key factors in mind:
- Quality and Durability: Tools made with professional-grade materials ensure consistent performance over time.
- Functionality: Each tool is designed with a specific task in mind to simplify your extension care routine.
- Safety Features: Thoughtful designs help prevent damage to both your extensions and natural hair.
Starting with a basic kit is a great way to cover the essentials. As you gain confidence and skill, upgrading to more advanced tools can offer greater precision and control. By combining the right tools with proper techniques, you can maintain your extensions like a pro and protect your investment in high-quality hair extensions.
FAQs
How can I choose the best tools for my type of hair extensions?
Choosing the right tools for your hair extensions is all about matching them to the type of extensions you have. For clip-in extensions, a good-quality extension brush and durable clips are all you need for styling and maintenance. These tools help keep your extensions tangle-free and secure while styling.
If you’re using tape-in extensions, you’ll need specialised items like tape removers and extension pliers. These are crucial for safely applying and removing the extensions without causing harm to your natural hair.
For fusion extensions, a fusion iron and keratin glue are must-haves. These tools help create a strong, long-lasting bond for your extensions. Always tailor your tools to the specific type of extensions you’re using to ensure they stay in great condition and give you that polished, salon-worthy look.
How can I make my hair extensions last longer using the right tools?
To keep your hair extensions looking their best for longer, using the right tools and following a few simple tips can make all the difference. Start by brushing gently with a soft-bristle brush or a wide-tooth comb. This helps prevent tangles and reduces strain on the extensions. Brush twice a day - once in the morning and again before bed - and always work from the ends upward to avoid pulling or damaging the bonds.
When it comes to washing, aim for 2–3 times a week with a gentle, sulphate-free shampoo. After washing, ensure your extensions are completely dry within 30 minutes to avoid moisture-related damage. For styling, don’t skip the heat protectant spray before using hot tools. This simple step helps reduce heat damage and keeps your extensions looking sleek and vibrant.
Proper storage is just as important. When you’re not wearing your extensions, store them carefully to preserve their shape and quality. A little extra effort in caring for your extensions ensures they’ll stay looking salon-fresh and fabulous for longer!
Can I use the same tools for applying and removing hair extensions, and what techniques should I follow to avoid damage?
Yes, many hair extension tools serve a dual purpose, making them handy for both applying and removing extensions, depending on how they’re designed. Take extension pliers, for instance - they’re not only used to secure extensions during application but can also help release them when it’s time for removal. Similarly, tools like tape-in removers or loop tools are crafted to simplify the removal process while keeping your hair safe.
When it comes to protecting your natural hair, technique matters. Always work in small, manageable sections, use products specifically designed to gently break down adhesives, and take your time. Rushing the process can lead to unnecessary damage, so a patient and careful approach is essential for keeping your hair healthy during both application and removal.